Your File History Drive Was Disconnected for Too Long, How to Reconnect File History Drive
Windows 10 File History is a utility that allows users to back up specific folders, such as Documents, Photos, Videos, or Downloads, to an external hard drive, USB flash drive, or network drive.
However, when using File History, some users have encountered these errors that say: "The File History service is not running, or the service is not enabled. Please check the service status in the Services console.
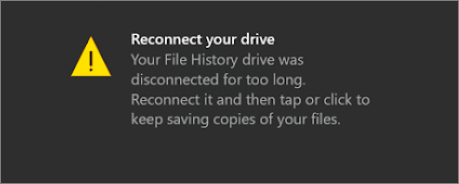
- "Reconnect your File History drive, which has been disconnected for too long, and then tap or click to continue saving copies of your files."
- Your File History drive is not connected to your computer, so it's unable to back up your files. Please reconnect the drive and try the backup process again.
- "Your files will be temporarily copied to your hard drive until you reconnect your File History drive and run a backup."
The contributing factors of this problem might be:
- The USB flash drive or external hard drive is indeed disconnected.
- The File History has been turned off.
- The file system in the File History drive may have been corrupted.
- The Files History backup has failed.
If you are also facing a File History drive disconnecting issue, read through this tutorial and try the effective solutions to figure it out.
First Thing to Do: Recover Deleted Data When File History Backup Failed
If you've lost data and only found the File History drive was disconnected when you want to restore files from backup, you can try using a data recovery software to scan the disconnected File History drive and recover your lost files. This software can help you recover your files even if the drive was disconnected.
You can use Deep Data Recovery, a world-famous file recovery and repair tool, to easily restore deleted, lost, or formatted data.
Deep Data Recovery
- You can recover files from an emptied recycle bin, formatted hard drive, corrupted, or inaccessible USB flash drive, and more.
- Recover deleted or permanently deleted photos, videos, documents, emails, etc. effectively
- You can restore files on various operating systems, including Windows 10/8/7/Vista/XP, Windows Server, and macOS 11.2 ~ 10.9, using various methods such as using the built-in file recovery features, third-party software, or cloud storage services.
To recover your important files without a backup, you can download Qiling data recovery software for free.
Step 1. Run Deep Data Recovery on your computer. Select the file types you want to recover and click "Next" to proceed with the recovery process.

Step 2. To proceed, select the specific file location you want to scan and then click the "Scan" button to initiate the scanning process.

Step 3. After the recovery process, navigate to the left panel and select the "Deleted Files" and "Other Lost Files" folders. You can then use the "Filter" feature or click the "Search files or folders" button to locate the recovered files.

Step 4. To recover the files, click the "Recover" button and save the restored files in a location different from the original one.
After recovering your data, you can resolve the "Your File History drive was disconnected for too long" issue by taking the following steps. We'll explain each method in detail, so you can easily follow along. To start, you can try reconnecting the File History drive and see if it resolves the issue.
Method 1. Reconnect the File History Drive
To back up Windows 10 files, ensure your external hard drive or USB flash drive is properly connected to your PC.
If you've connected your File History drive to your computer but still get the error "File History drive is disconnected for too long," you'll need to manually reconnect the drive and set it as the target disk.
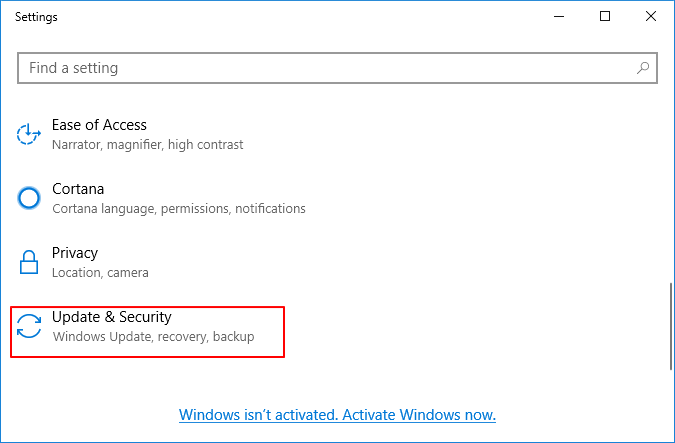
Step 1. Navigate to "Settings and choose "Update & Security".
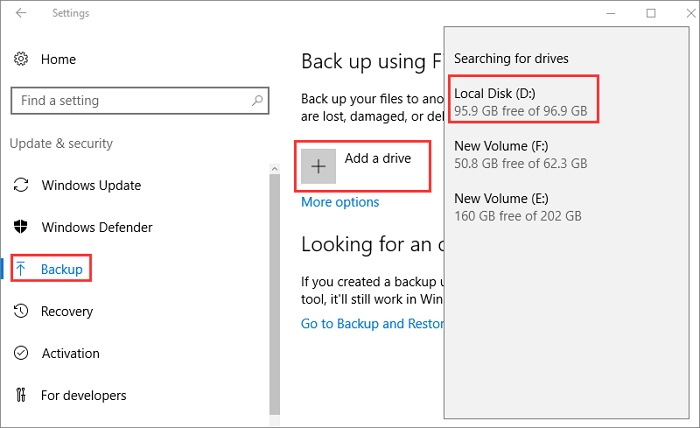
Step 2. To backup your data, click the "Backup" button on the left panel, then select "Add a drive" under "Back up using File History" and choose a hard drive to store your backups.
Method 2. Make Sure the File History Is Enabled
If you turn off the File History feature without properly disconnecting the File History drive, you may encounter the error message "Your File History drive is disconnected. Reconnect it and try again." To resolve this, simply re-enable File History to troubleshoot the issue.
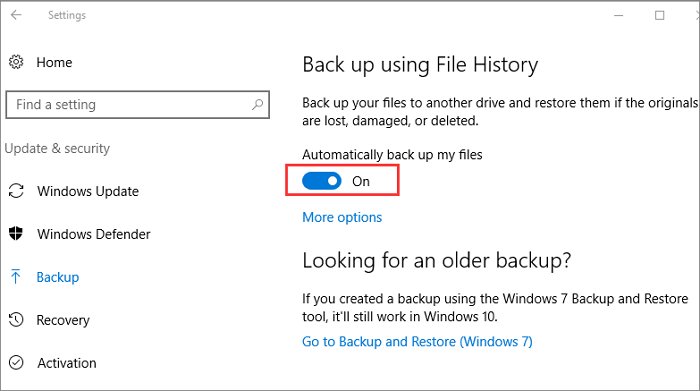
Step 1. Open "Settings" and go to "Update & Security" > "Backup".
Step 2. If you've already enabled File History, simply toggle the slider on/off under "Automatically back up my files" to reactivate it.
Method 3. Repair Corrupted USB Drive or External Hard drive
If your external hard drive or USB drive has been corrupted, using it as the File History drive will display the "Reconnect your drive" message.
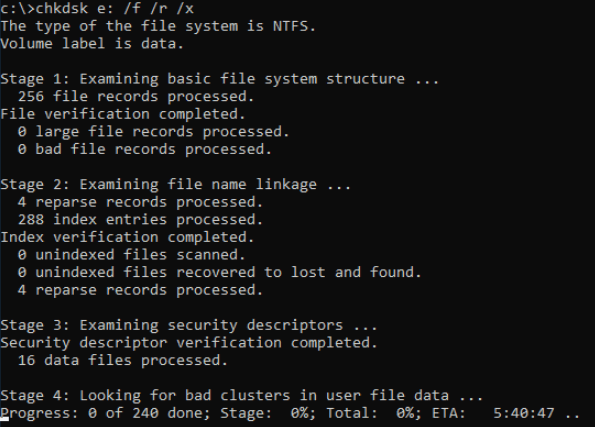
To fix the broken hard drive, run the Check Disk (CHKDSK) command to repair the file system. This can be done by booting from a Windows installation media, selecting the Troubleshoot option, and then choosing the "Command Prompt" option. Once in the Command Prompt, type "chkdsk C:" (where "C:" is the drive letter of the broken hard drive) and press Enter.
Step 1. Click the Search button, type, and search cmd.
Step 2. Right-click "Command Prompt" and choose "Run as administrator".
Step 3. Run the built-in Windows command `chkdsk` on the File History drive to repair it, specifying the drive letter, and the options `/f`, `/r`, and `/x` to fix errors, scan for bad sectors, and force the check without restarting the computer, respectively.
Method 5. Back Up Files with an Automatic File Backup Software
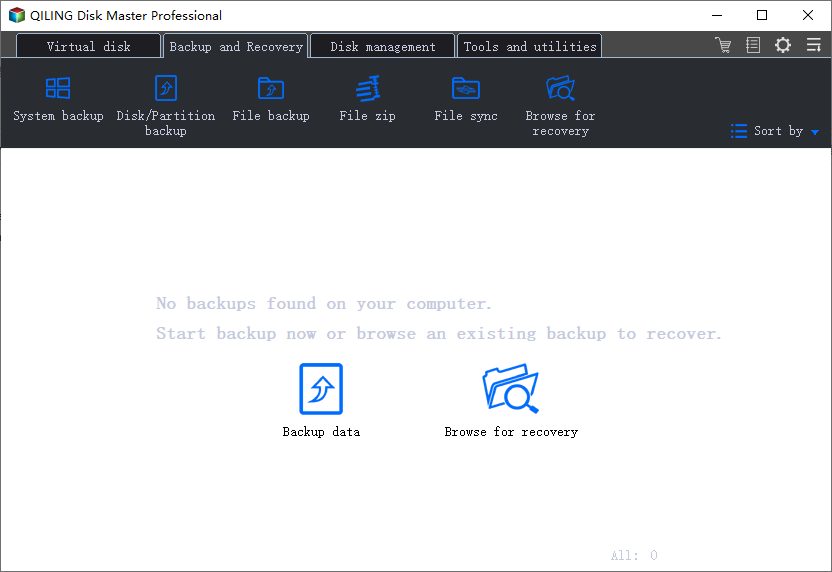
If none of the above methods work, you can back up your files with a File History alternative, such as Qiling Backup, which is a reliable PC data backup tool for both beginners and professionals.
This Windows automatic backup software offers advanced solutions for file backup, system backup, and disk/partition backup, and also supports system cloning to help migrate OS to an SSD without reinstalling.
Follow the steps below to use Qiling Backup to back up your files in the schedule.
Step 1. To initiate a backup, click the Select File backup option in the Backup and recovery page.
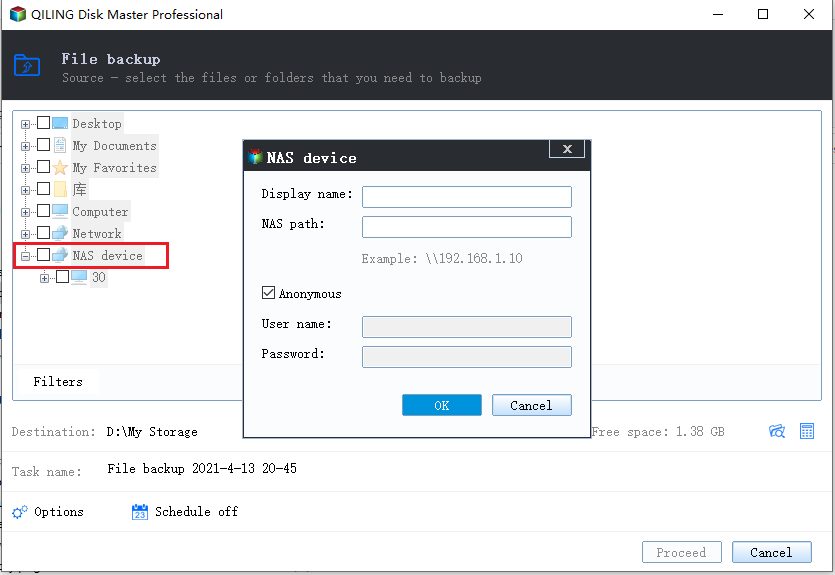
Step 2. On the left, both local and network files will be shown, allowing you to browse and select the desired backup files from a directory that can be expanded for further exploration.
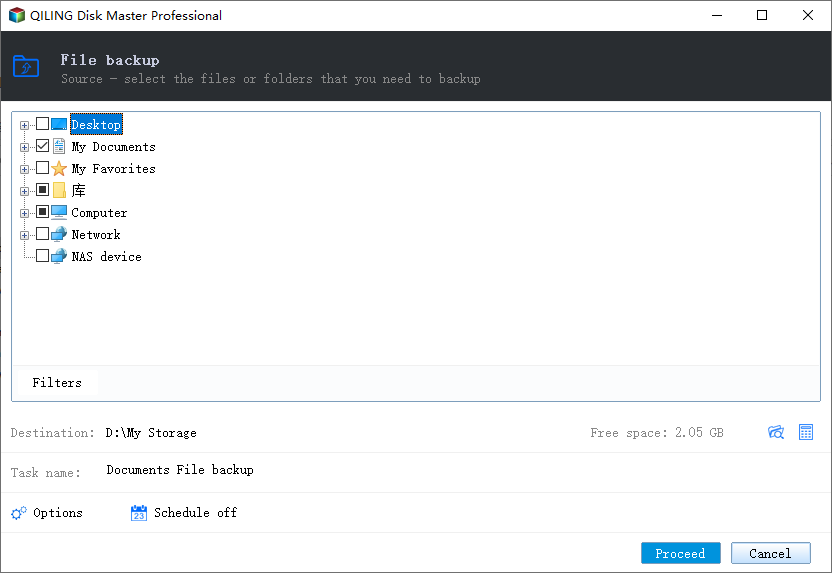
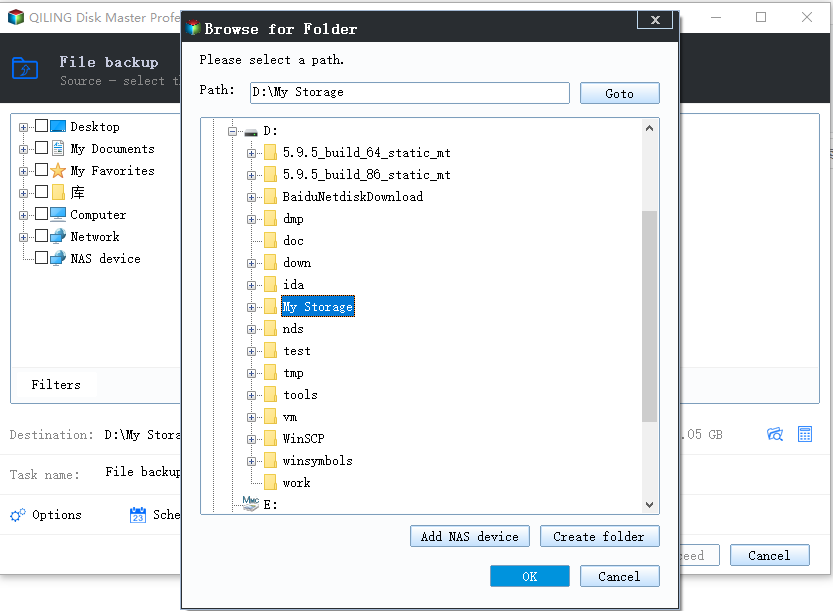
Step 3. Follow the on-screen instructions to choose a location to store the backup.
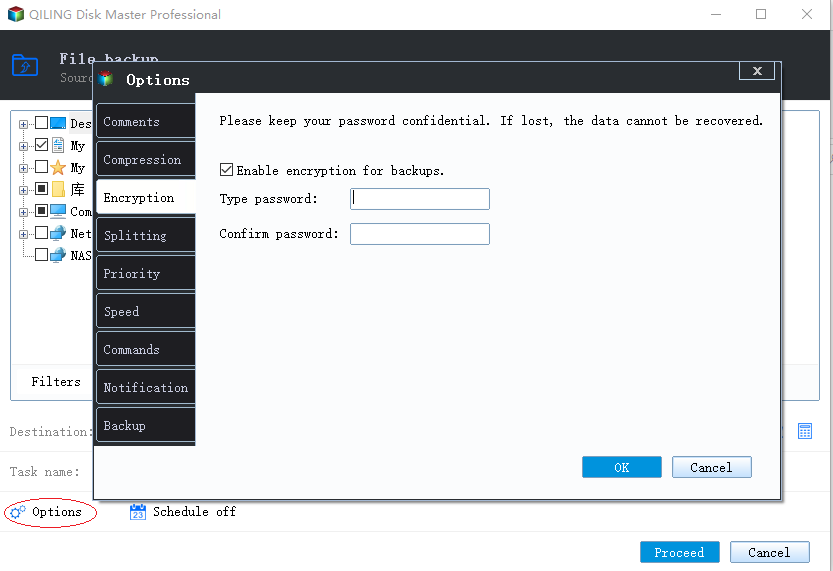
To encrypt the backup with a password, click on the "Options" button, which will take you to the "Backup Options" page, where you can set up a password to secure your backup.
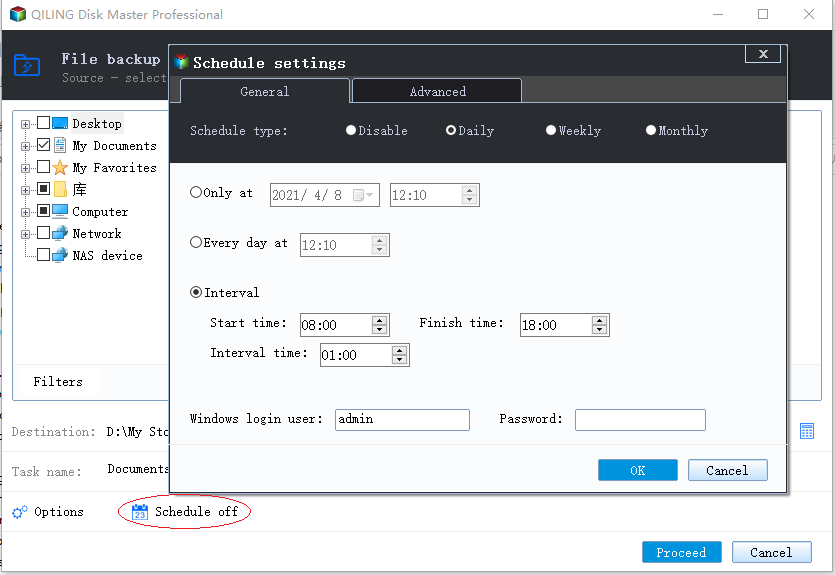
To specify a backup schedule, click on the "Backup Scheme" button. This allows you to set the timing and trigger for the backup process, ensuring that it aligns with your specific needs and preferences. Additionally, there are other customizable options available to further tailor the backup process to your requirements.
Step 4. The backup may be stored on a local disk, Qiling's online service, or a Network-Attached Storage (NAS).
Step 5. Click Proceed to start the backup process. The backup job will be displayed on the left side of the panel after completion. You can manage the backup job further by right-clicking on it.
To Sum Up
If you're experiencing issues with your File History drive disconnecting in Windows 10, there are quick solutions to resolve the problem. You can try re-enabling File History or simply reconnecting the hard drive to get it working again.
If you lose data without a backup, use Qiling data recovery software to retrieve your files in a timely manner.
Related Articles
- Excel Found A Problem with One Or More Formula References in This Worksheet [Solved]
- Reliable Ways to Fix i saved a word document and can't find it Issue
- Recover Video File When Power Off Before Stopping Recording
- How to Recover PowerPoint Files Not Saved | Free PowerPoint Files Recovery Methods
- HP Pen Drive Online Recovery – Recover Data from HP Pen Drive
This article provides a comprehensive guide to HP pen drive data recovery online, covering everything you need to know about HP pen drive online recovery and the best online recovery tool available for HP pen drives. - How to Recover Data from HP Simplesave External Hard Drive
Are you struggling to recover data from your HP Simplesave external hard drive? Don't panic, with Deep Data Recovery Software, you can easily recover your data on Mac or Windows, even if the drive is damaged, deleted files have been lost, or the drive has been formatted.