We Couldn't Install Windows 11 - Error Code 0x800f0830
Microsoft has released Windows 11, but many users are facing the issue of being unable to install it, specifically error code 0x800f0830 - 0x20003.
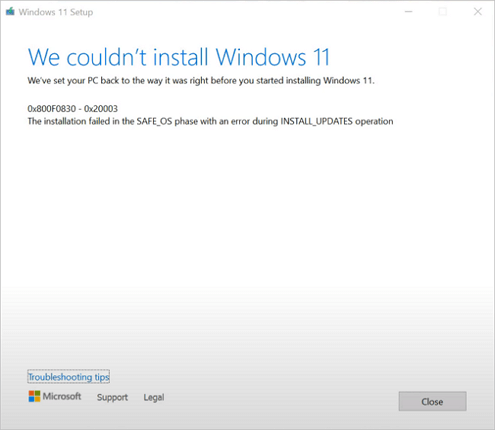
Error - We Couldn't Install Windows 11
The error code '0x800F0830 - 0x20003' typically indicates an issue with the installation of updates during the upgrade process to Windows 11. This could be due to various reasons such as corrupted system files, outdated drivers, or conflicts with installed software. To troubleshoot, you could try running the Windows Update Troubleshooter, checking for any pending updates, or updating drivers for your hardware. Additionally, ensuring the system is free from malware and running a system file check (SFC) might also resolve the issue.
| Workable Solutions | Step-by-step Troubleshooting |
|---|---|
| 1. Use Built-in Tips | Try every USB port available; Determine you\'re using USB 2.0 or 3.0...Full steps |
| 2. Enable TPM 2.0 | Restart PC and press F2/F10/Del key to enter BIOS. Use the left key...Full steps |
| 3. Enable UEFI Secure Boot | Restart and press Del/F2 to enter the BIOS system. Keys are different depending...Full steps |
| 4. Create Installation Media | Download Qiling Win11builder on your computer. It's a free Windows 11 iso downloader...Full steps |
Windows 11 Update/Installation Requirements
Windows 11 installation failure can be caused by various reasons, with the most common one being that the computer does not meet the minimum system requirements for installing Windows 11. To avoid this, ensure that your PC meets the minimum requirements before attempting to install Windows 11.
Processor: 1 gigahertz (GHz) or faster with 2 or more cores on a compatible 64-bit processor or System on a Chip (SoC) is the system requirement.
RAM: 4GB
Storage: 64GB or larger storage device
System firmware: UEFI, Secure Boot capable
TPM: Trusted Platform Module (TPM) version 2.0
Graphics card: Compatible with DirectX 12 or WDDM 2.0 driver
Display: H>9" with HD Resolution (720p)
Windows 11 Home edition requires internet connectivity and a Microsoft account to complete device setup for first use.
If your computer can't fulfill the requirements, you may experience errors such as the system being unable to boot, programs crashing, or the system freezing, among others.
- This PC can't run Windows 11
- PC must support Secure Boot
- The processor isn't supported for Windows 11
- The system disk needs to be 64GB or larger
How to Check If Your Computer Is Windows 11 Compatible
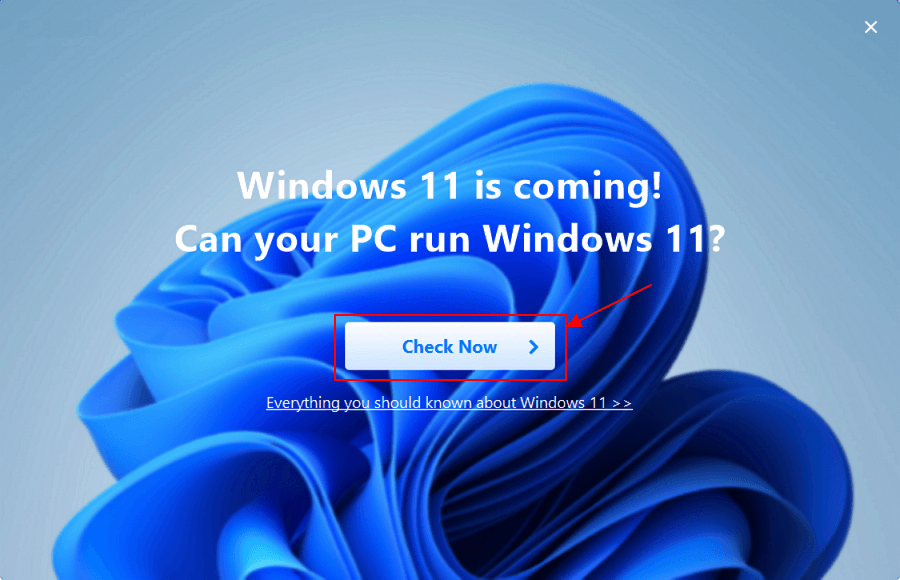
To check if your computer is Windows 11 compatible, you can use the Qiling Windows 11 Upgrade Checker, which allows you to easily and quickly verify compatibility.
Step 1. Download Qiling Windows 11 Upgrade Checker.
Step 2. Click the Check Now button to start.
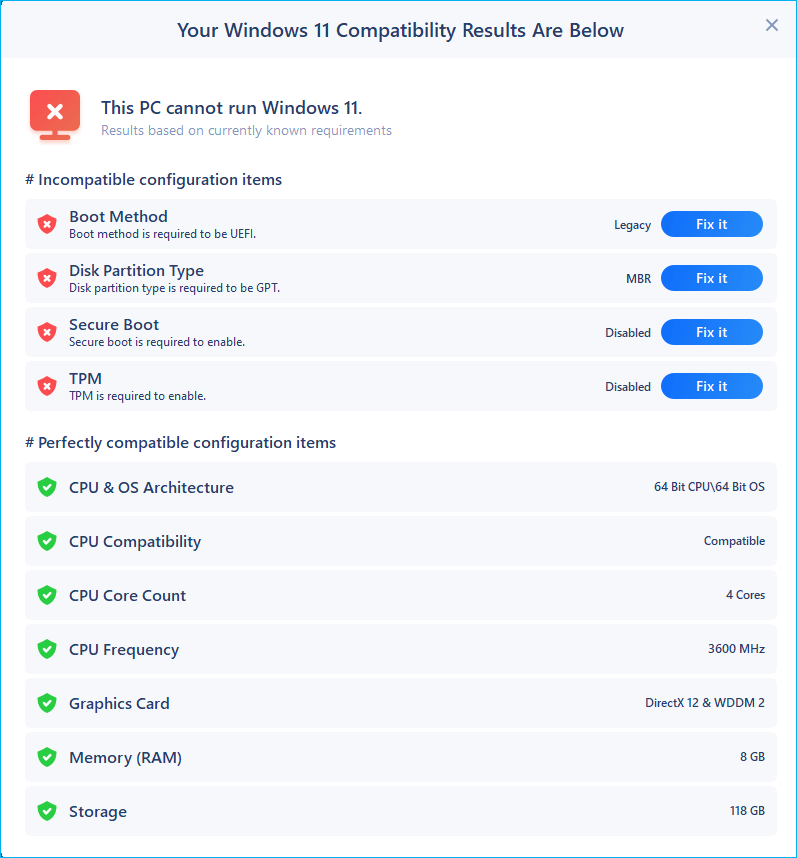
Step 3.The Windows 11 compatibility result window will soon appear, listing all incompatible and compatible configuration items.
Troubleshoot We Couldn't Install Windows 11
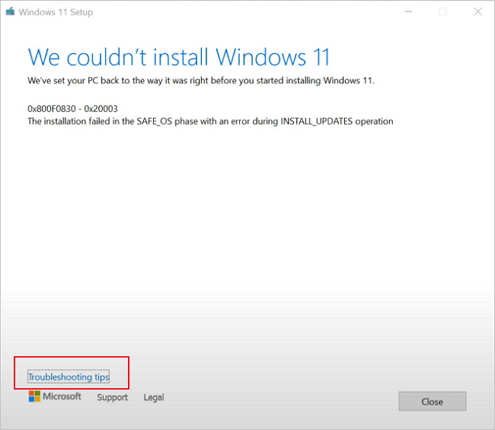
After checking your Windows 11 compatibility, you may receive reports that can be fixed accordingly. Error code 0x800f0830 is often accompanied by "Troubleshooting tips" to help you resolve the issue.
Method 1. Use Built-in Troubleshoot Tips
Follow the steps below to fix we couldn't install Windows 11.
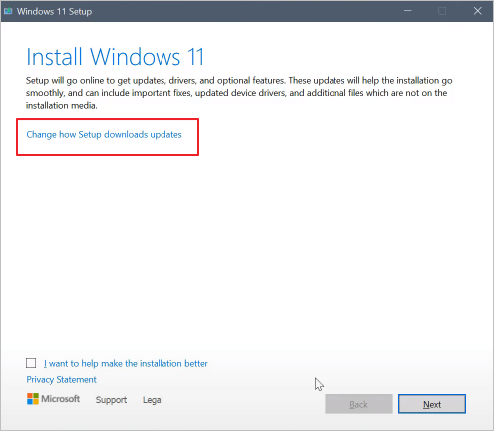
Step 1. If you're having trouble installing Windows 11, click the "Troubleshooting tips" button for assistance.
Step 2. Select "Change how Setup downloads updates".
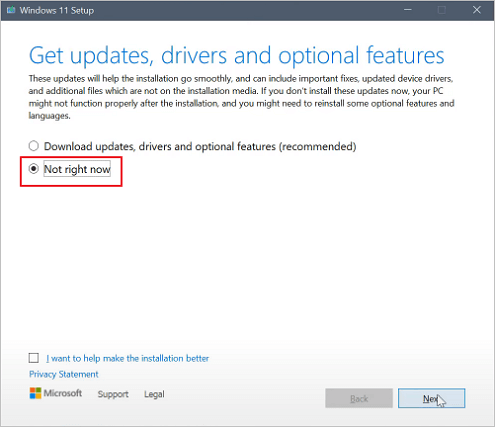
Step 3. When you see the "Get updates, drives, and optional features" screen, select "Not right now" and click "Next".
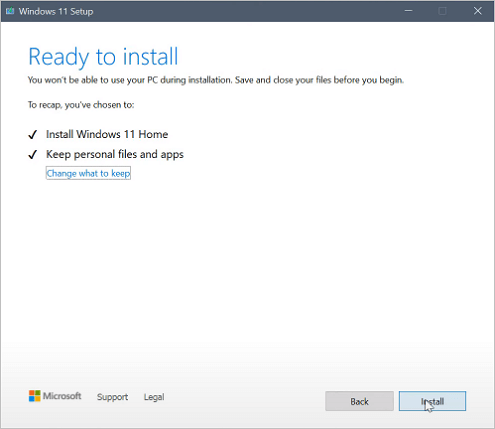
Step 4. After the automatic check, follow the on-screen instructions to proceed. When you reach the installation interface, click "install" to successfully get Windows 11 on your computer.
Method 2. Enable TPM 2.0 on Your Computer
If you forget to enable TPM 2.0 during the Windows 11 installation process, your installation may get stuck. To resolve this issue, you can enable TPM 2.0 to fix the installation error.
Step 1. Restart PC and press F2/F10/Del key to enter BIOS.
Step 2. Use the left key and go to the Security section.
Step 3. To resolve the issue, check the TPM (Trusted Platform Module) state and if it's currently disabled, enable it. This can typically be done through the BIOS settings or a UEFI firmware setup.
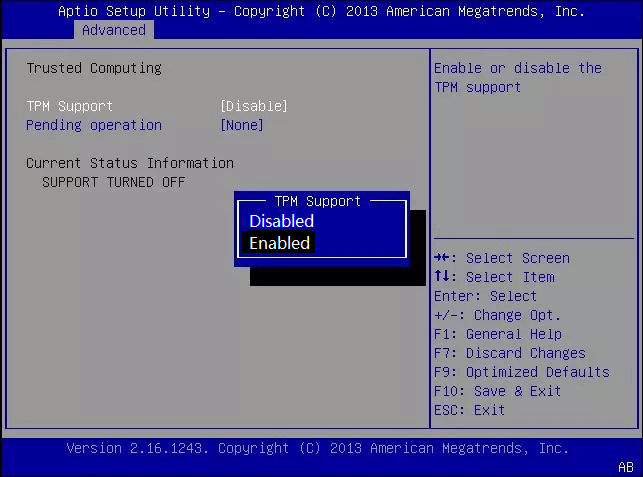
Step 4. Save the changes and exit BIOS.
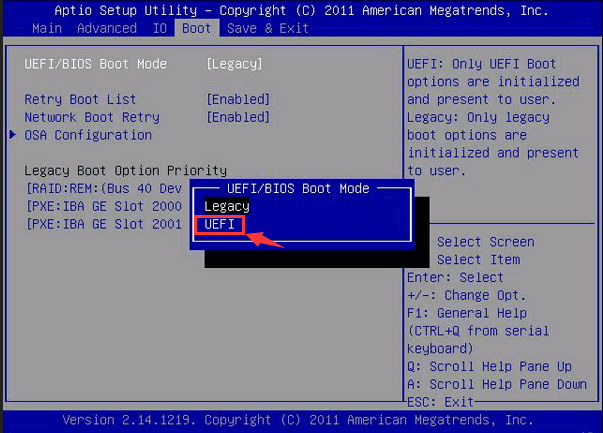
Method 3. Enable UEFI Secure Boot on a Supported Computer
Windows 11 requires Secure Boot to be enabled on the system to run the latest version. If your PC supports it but it isn't enabled, you'll encounter the error "we couldn't install Windows 11". To resolve this, you can enable Secure Boot, which will allow the installation to proceed.
Step 1. To enter the BIOS system, restart your computer and press the key that corresponds to your computer's BIOS settings entry method, which is typically Del or F2, but may vary depending on your specific computer host.
Step 2. In the Boot tab, select the UEFI/BIOS Boot Mode using the up or down arrow key, then press Enter to choose UEFI mode.
Step 3. The Secure Boot feature has been enabled.
Method 4. Create Windows 11 Installation Media to Install Windows 11
You can install Windows 11 by creating a portable USB drive using Qiling Win11builder, a tool that simplifies the process by downloading Windows 11 and creating a portable USB. This method can make the installation process easier. For detailed information, follow the steps provided.
Step 1. The Win11 builder is integrated with the Qiling OS2Go software, allowing users to download and launch the program after installation.
Step 2.The name of the software was changed from WinToGo Creator to Windows Install Drive Creator. It provides system information on its home screen, which updates in real-time. Additionally, the software supports the creation of installation drives for Windows 11, 10, and 8.1.
Step 3. To create a Windows 11 installation media, connect your USB flash drive to the computer. The Win11 builder will automatically detect the USB device, and all you need to do is click the "Create" button.
Step 4. The software will erase the data on your used USB drive. Once you start the download, wait until it's complete or do something else while you wait.
Step 5. After downloading the Windows 11 iso image file to a USB drive, you can proceed to install Windows 11 on your computer by following the installation wizard step by step from the bootable USB drive.
If you're experiencing data loss, you can turn to Qiling's hard drive recovery software for assistance. This software can aid in recovering data from various devices, including SD cards, files, USB flash drives, and partitions, among others.
Step 1. Select file types
Launch Deep Data Recovery. Select the desired file types and click "Next" to initiate the recovery process.

Step 2. Select a location and start scanning
Choose the partition where you lost data. Then, click "Scan".

Step 3. Filter and preview files
To find the files you need, use the file format filter on the left or upper right corner. Once you've selected the correct files, you can either click the "Preview" button or double-click a file to preview its content.

Step 4. Recover lost data or files
Click the checkbox next to the file and click "Recover" to restore the lost data to a secure place.
Conclusion
If you're experiencing error 0x800f0830 when trying to update Windows, try resetting the Windows Update components, running the Windows Update Troubleshooter, and checking for corrupted system files. If these resolutions don't work, you can contact Microsoft support or Qiling's experts for further help.
Related Articles
- Rollback from Windows 11 to Windows 10 - 2 Methods
- How to Map a Network Drive in Windows 11? Your Complete Guide Is Here
- Go Back to Previous Version of Windows in Windows 11 Even After 10 Days
- Windows 11 Games Crash or Freeze? Don't Miss Quick Fixes Here!
- How Often Should PC Be Cleaned?
Most PC users know that cleaning their PC is important, but only a few of them know how often should PC be cleaned. So in this post, we will provide you the answer and 2 easy ways to clean your PC. - How to Delete System Junk Files in Windows 10 (Available for Windows 11)
To delete system junk files in Windows 10, you can use the built-in Disk Cleanup tool, which can be accessed by searching for “Disk Cleanup” in the Start menu. You can also use the Storage Sense feature, which automatically deletes temporary files and system junk. Additionally, you can use third-party tools like CCleaner or Glary Utilities to scan and remove unnecessary files.