Windows Update KB4023057: How to Get and Restore Data After Windows Update
Check the full guides for Windows update KB4023057:
| Workable Solutions | Step-by-step Troubleshooting |
|---|---|
| Get and Install KB4023057 | Go to the Microsoft Update Catalog website. Search for KB4023057, and select the Windows version...Full steps |
| Fix KB4023057 Not Installing | Take a few ways to troubleshoot: Fix 1: Troubleshooting Windows Update; Fix 2: Run the DISM and SFC Scans; Fix 3: Disable Unnecessary Programs...Full steps |
|
Restore Lost Data After Windows Update |
Try professional data recovery software to restore lost or deleted files in Windows 10/11 update...Full steps |
| Windows KB4023057 FAQs | Check out more tutorials on KB4023057 such as how to get KB4023057 for Windows version 21H2...Full steps |
Microsoft has made the update KB4023057 available for download on Windows 11 and nearly all versions of Windows 10.
This is a security update to improve performance, but it's not a typical monthly update. Instead, it's a patch from Microsoft that addresses issues preventing Windows Update from downloading and installing updates on your machine.
KB4023057 is a Windows update that includes components to fix issues with the operating system's update process.
KB4023057 Overview
Microsoft releases a repetitive update, KB4023057, with minor variations, initially intended to address issues preventing critical Windows updates from being installed.
Microsoft has released an update, KB4023057, which affects all Windows 10 versions from 1511 to 21H1. The update includes a detailed description on its website, discussing the changes it can bring about.
- The network settings should be reset if there are any difficulties with the network.
- Remove any registry keys that can be preventing updates from being correctly installed from being installed.
- Windows operating system components that are disabled or corrupted can be repaired using the built-in System File Checker (SFC) tool or by running a System Restore point to a previous date when the system was working properly. The SFC tool scans and replaces corrupted system files, while System Restore can roll back changes made to the system since the restore point was created.
- To free up disk space and allow for critical upgrades on your computer, you can compress files in your user profile directory.
- The Windows Update database should be reset to correct any issues that may have prevented updates from installing properly.
How to Get and Install KB4023057 on Windows 10/11
Now that you know some insights regarding the KB4023057 update, it's time to install the version on your system. To do this, follow these steps:
Step 1. Head over to the Microsoft Update Catalog website.

Step 2. Type KB4023057 in the search bar.

Step 3. Select the Windows version from the given list below.
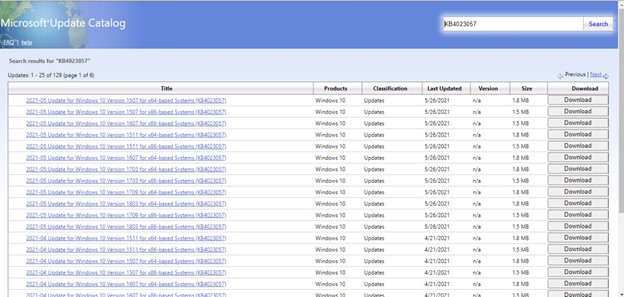
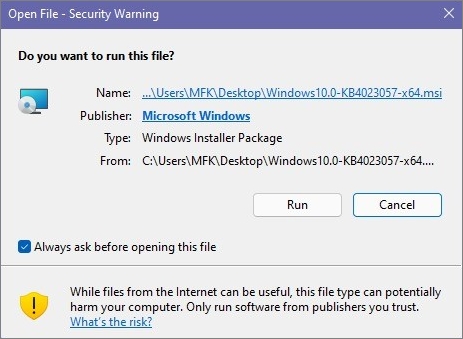
Step 4. Start the installation process by pressing the Run option.
KB4023057 Not Installing in Windows 10/11? How to Fix
Many Windows users have reported issues installing the KB4023057 update, citing various reasons such as corrupted downloads, incompatible system files, or conflicts with existing updates. As a result, the update fails to install, leaving users frustrated and unable to resolve the issue.
- Difficulties with the internet connection
- Damaged system files
- Problems with the Windows Update service
- Many users experience compatibility and update issues with their security software and VPN, leading to frustration and potential security vulnerabilities.
- Version problems can often be caused by a prior update that was flawed and contained viruses.
- Missing that was necessary for the installation operation
Windows update issues are often caused by underlying problems that need to be addressed first, such as installing updates on the system, to resolve performance difficulties. This is why these issues prevent Windows updates from downloading and installing.
Fix 1. Troubleshooting Windows Update
Troubleshooting Windows Update is a crucial step in addressing common issues, as most updates come with security patches that can be exploited by viruses or hackers, posing a significant security risk to a company. To resolve Windows Update issues, follow these steps.
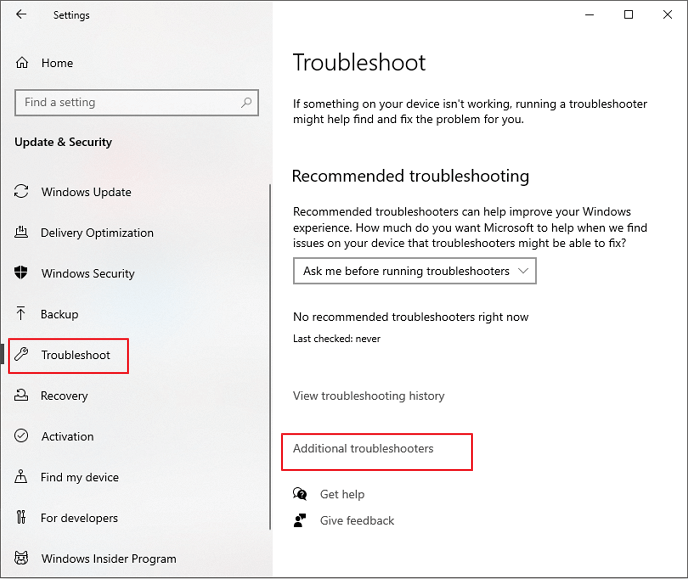
Step 1. To access the Windows Settings, press the Windows key and the letter I at the same time.
Step 2. Choose "Troubleshoot" from the "Update & troubleshooting" drop-down menu.
Step 3. To see all the available troubleshooter lists, click on the "Additional troubleshooters" link from the drop-down menu.
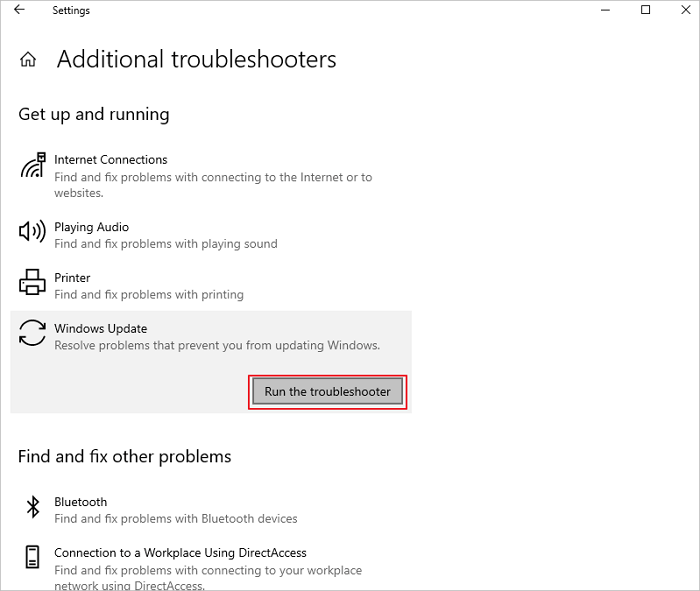
Step 4. Windows updates can be found in this menu.
Step 5. To start the troubleshooter, choose "Run the troubleshooter".
Fix 2. Run the DISM and SFC Scans
To run the DISM and SFC scans, you need to identify and correct faulty files in the Windows system image, which is crucial for SFC to function correctly. This can be done by following the steps below:
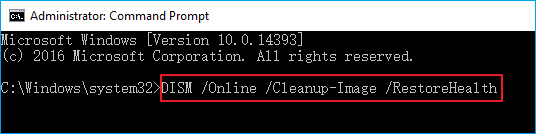
Step 1. Start the program using the command prompt as an administrator.
Step 2. The following command should be entered: DISM /Online /Cleanup-Image /restorehealth.
Step 3. After finishing the procedure, use the following command: sfc /scannow.
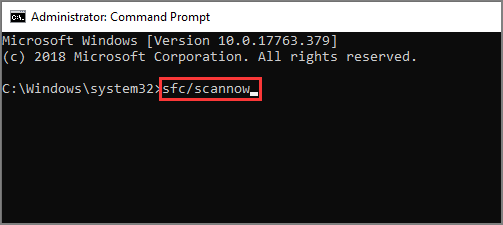
Step 4. The system file checker application can discover and restore any missing system files on your computer, ensuring that your system is running smoothly and efficiently.
Step 5. Restart the computer if necessary.
Fix 3. Disable Unnecessary Programs in the Startup
If you're unable to resolve your issue after running DISM and SFC scans, try disabling unnecessary programs in startups, as background programs can slow down your installation. Some starting items may not have a shortcut in the Startup folder, which can be a problem.
To deactivate unwanted startup programs, users can utilize the Startup apps/tasks tool in Settings or the Task Manager, which can handle the necessary actions without requiring registry modification. These tools are recommended for those who are new or uncomfortable with registry editing.
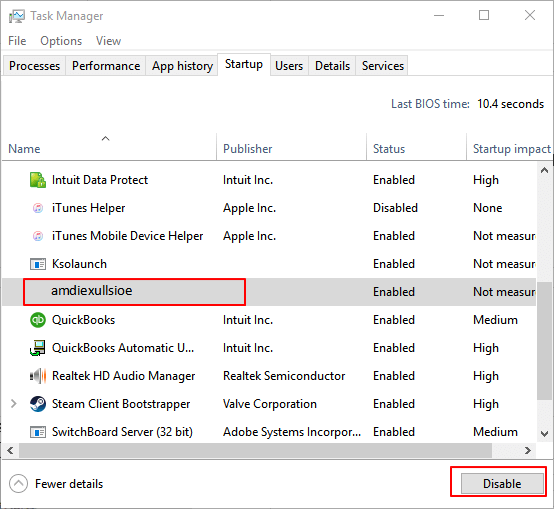
Step 1. To access the Task Manager, right-click on a blank area of the taskbar and select "Task Manager" from the context menu.
Step 2. To disable startup programs, open Task Manager, go to the "Startup" tab, and select the program you want to disable, then click "Disable".
Step 3. To prevent them from running, choose the program and click the "Disable" button, or right-click on one and select "Disabled" from the context menu.
Fix 4. Reset Windows Update Components
The 'Reset Windows Update Components' fix is often necessary when the Windows Update agent-related services fail to work, which can be caused by a problem with the update cache or the specific components themselves. This issue is common among customers who experience difficulties with the Windows Update services.
If you're experiencing issues with Windows Update on Windows 10, restarting it is usually the solution. To do this, follow these steps:
Step 1. Open the CMD by searching for it.
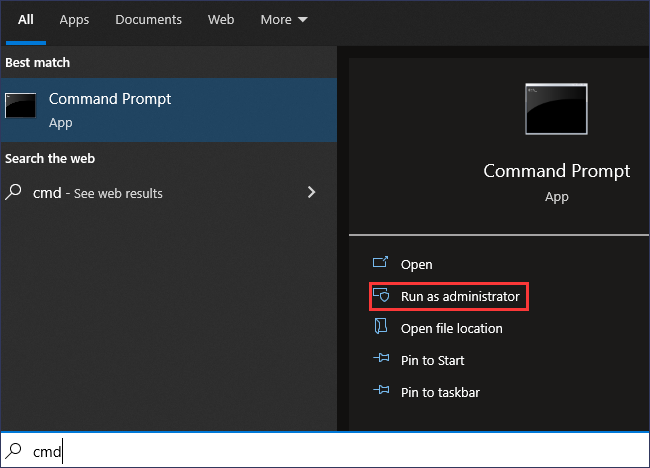
Step 2. Make sure you're signed in as an administrator before going any further.
Step 3. To stop the Windows update service, you can use the command `net stop wuauserv` in the Command Prompt. This will terminate the service.
Step 4. To stop the Background Intelligent Transfer Service, enter the command "net stop bits" in the command prompt.
Step 5. Go to the following site if possible: C:\\Windows\\SoftwareDistribution\\Download.
Step 6. Delete whatever is included inside the folder's contents.
Step 7. To select all of the files on your computer, press CTRL + A on your keyboard, accompanied by Delete to remove the documents.
Step 8. To re-start operations that have been interrupted, you need to run the commands `net start wuauserv` and `net start bits` in the Command Prompt. This will help resume the operations.
How to Restore Lost Data After Windows 11/10 Update
To recover lost or deleted data on Windows, a reliable software application, such as Deep Data Recovery, can be used. It can also be helpful for those who don't want to lose their precious data files, especially after a Windows upgrade, accidental deletion, hard drive formatting, virus attack, or OS crash.
Deep Data Recovery can recover lost files from any storage device, including restoring permanently deleted files from emptied Recycle Bin, as well as recovering lost data on HDD, SSD, SD cards, USB flash drives, and pen drives.
You can download a data recovery program for free to recover lost data and repair corrupted files after the recovery process.
Step 1. Run Deep Data Recovery on your computer. Select file types and click "Next" to start the recovery process.

Step 2. To recover lost files, select the drive where the files were lost and click "Scan" to initiate the scanning process. If the lost files were on an external storage device, ensure it is connected to the computer before proceeding.

Step 3. The software rapidly scans deleted files and performs a deep scan to locate lost files, allowing users to filter specific file types after the scan is completed.

Step 4. To preview and recover files, click the "Preview" button or double-click on a file to view it in full. Select the desired files, click "Recover", and choose a safe location to save them.
Windows KB4023057 FAQs
Check the following frequently asked questions about Windows KB4023057.
Q1. Do I need an update for Windows 10 KB4023057?
Your device is no longer receiving security updates from Microsoft, making it more vulnerable to security threats and infections. We strongly recommend upgrading to the latest version of Windows 10 to ensure your device remains secure.
Q2. How to get KB4023057 for Windows version 21H2
Follow these instructions to manually obtain or upgrade to Windows 10 version 21H2 from version 21H1, version 20H2, or version 2004.
Step 1. Open the Windows 10 Settings app.
Step 2. Select "Update & Security" from the drop-down menu.
Step 3. Go to the "Windows Update" menu and choose the appropriate option.
Step 4. A window will appear asking if you want to check for new updates.
Step 5.To get the 21H2 upgrade option, your device must be compatible with Windows 11 and the upgrade message should appear on your screen.
Step 6.Click the "Download" and Install Now option in the "Feature update to Windows 10, version 21H2" section.
Pro Tip: If the Windows Update option is not accessible on your PC, it means the update is not ready for your device yet. This could be due to various reasons, such as the update not being available for your specific version of Windows or the update process being paused.
Step 7. Select the "Restart" now option from the menu that appears.
Note: Installing Windows 10 21H2 is similar to installing a standard monthly update, and does not require a fresh operating system installation.
Q3. Can I uninstall the update for Windows 10 for x64-based systems KB4023057?
To remove the KB4023057 update, navigate to the Start menu, select Computer Settings, and then go to Programs and Features. Right-click on KB4023057 and choose Uninstall. This will remove the update from your computer.
Concluding Words
The update KB4023057 for Windows 11 is a cumulative update that provides various improvements and fixes for the operating system. It can be installed through the Windows Update feature, and users can check for updates by going to Settings > Update & Security > Windows Update. The update includes fixes for known issues and provides a more stable and secure experience for users.
However, if you can't install the update due to some issues, you also fix them, as we have shown you above. And, if, after installation, you have some lost files, use Deep Data Recovery to recover your files!
Related Articles
- Download Windows 7 Disc Images (ISO Files) [Ultimate and Professional Edition]
- Fix 'Please Insert a Disk into Removable Disk' Without Losing Data
- Most Reliable Way to Store Data Long Term
- RAW Drive Fix: How to Fix RAW Hard Drive or External Hard Drive
- How to Format SD Card Without Losing Data
If your SD card becomes raw and inaccessible, Qiling file recovery software can help you recover or export all your files without losing any data. You can use it to format your SD card without any risk of losing your important files. - How to Format USB Drive without Losing Data
If your USB drive becomes corrupt, raw, or inaccessible, you can recover your data before formatting it. Formatting a USB drive without losing data is possible, and this page provides a guide on how to do it. By following these steps, you can recover your data from a damaged, unrecognized, or unreadable USB flash drive and then safely format it.