Low Disk Space Error on Windows 11, How Do I Fix? Your Guide Is Here
Disk Space, Storage capacity, also known as disk storage, refers to the logical space for storing data and applications on devices such as internal hard drives, external hard drives, and USB drives. When this space is depleted, a warning message is triggered, indicating low disk space.
To resolve the issue, try restarting your computer, checking for Windows updates, and running the System File Checker (SFC) and DISM tools to scan and replace any corrupted system files. If the problem persists, you can try resetting your computer to its default settings or seeking further assistance from Microsoft support. Additionally, ensure your graphics drivers are up-to-date, as outdated drivers can cause compatibility issues with the latest Windows 11 features. By following these steps, you should be able to resolve the issue and get back to using your computer smoothly.
If you're using Windows 10 or an older operating system, you can refer to the article "12 Ways to Fix Low Disk Space Error" for assistance.
How to Fix Low Disk Space on Windows 11 - 5 Ways
When your Windows 11 computer warns of a low disk space error, you can resolve the issue by freeing up space on your hard drive. Start by checking which drive is running low on space, usually the C: drive. Open File Explorer, right-click on the drive, and select "Properties" to see the available space.
- First, stop using your disk and don't save further new files into the disk. Next, back up your data to an external drive, cloud storage, or another internal drive. Then, safely disconnect the disk from your system.
- Second, turn to a reliable method that can get rid of this error from your PC.
Here are the 5 ways to fix Windows 11 low disk space error in one paragraph:
#1. Extend Disk Space, Adding More Storage Space
#2. Free Up Disk Space
#3. Clean Up Temporary Files
#4. Transfer Installed Apps to Other Drive
#5. Move Files to Cloud/External Disk
To resolve low disk space issues, consider the following additional tips:
- Clean up junk files, large files
- Empty recycle bin
- Delete duplicate files
- Run anti-virus software
You May Also Be Interested In:
How to Reallocated Disk Space without Losing Data
It's also important to make good use of your computer's hard disk space. For more detailed guidance, you can refer to this page.
Editors' Suggestion: To quickly and losslessly fix the error, we suggest using Method 1 among the 5 available methods.
Method 1. Extend Disk Space by Adding More Storage Space
Duration: 1-3 minutes.
Tool: Partition manager software - Qiling Partition Master
Qiling Partition Master allows you to easily add more storage space to extend the target disk space, offering two solutions to this issue.
#1. Adjust with 1-Click to Move Unallocated to Target Drive
The Adjust with 1-The Click feature in Qiling Partition Master enables users to easily move unallocated space on a disk and add it to a target drive. This can be done even if the unallocated space is not adjacent, allowing users to combine unused space from other drives into their target volume.
Here are the steps:
Step 1.Click "Move/resize" to extend C drive.
When your C drive is running low on space, you'll see a Low Disk Space alert in Qiling Partition Master. To free up space, click the "Move/resize" button to extend the C drive.
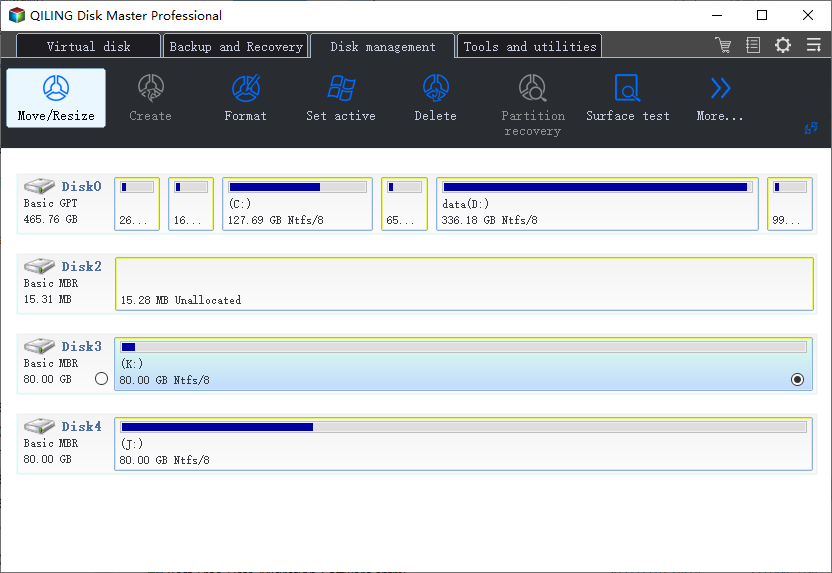
Step 2.Drag the system partition end into the unallocated space.
To resize the system partition, simply drag the system partition end into the unallocated space to add it to the C: drive, then click "Proceed" to start the resize process.

#2. Allocate Free Space to Target Drive
To allocate disk space in Qiling Partition Master, select the target partition, click on the "Allocate" button, and then choose the source partition from which to allocate free space, specifying the amount of space to be allocated. This process can be performed without affecting the original data on the source partition, allowing for efficient management of disk space.
Step 1. Locate the Target Partition
To extend a partition, first locate the target partition and select the option "Resize/Move" from the context menu.
Step 2. Extend the Target Partition
To add unallocated space to your current partition, drag the partition panel rightward or leftward, then click on "Proceed" to confirm the changes.
Method 2. Free Up Disk Space via Storage Sense
Duration: 3-5 minutes
Tool: Storage Sense - Windows built-in tool.
Storage Sense is a built-The tool you're referring to is likely the Storage Sense feature in Windows 10, which automatically frees up disk space by deleting unnecessary files, emptying the recycle bin, and other content on your disk. This feature continues to work seamlessly on Windows 11, providing a convenient way to maintain your device's storage capacity.
When the low disk space issue comes up, you can apply this tool for help:
Step 1. Click the start button, select Settings.
Step 2. Go to System > Storage > Enable Storage Sense.
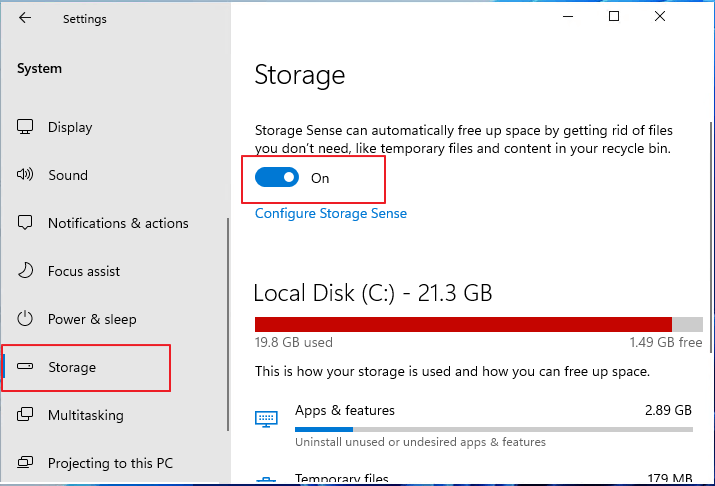
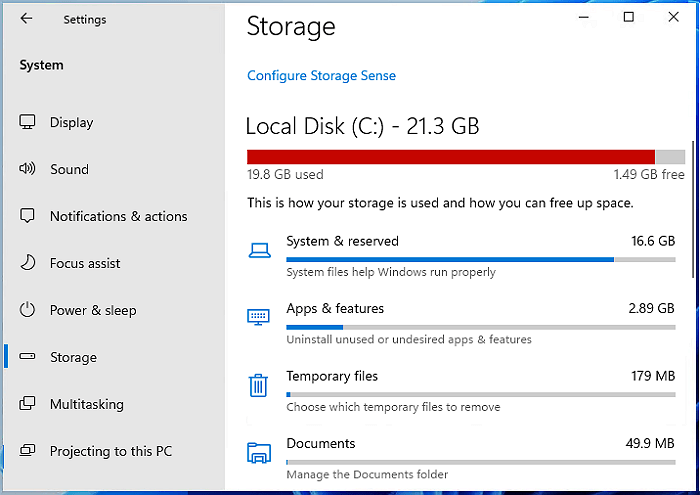
Step 3. Check what is taking up space on your disk.
The proposed changes to the current system include eliminating the requirement for a physical address, allowing users to access their accounts from anywhere, and implementing a more user-friendly interface. The new system will also include additional security features, such as two-factor authentication and encryption, to protect user data.
Or, you can enable the automatic cleanup feature in Storage Sense with the next step.
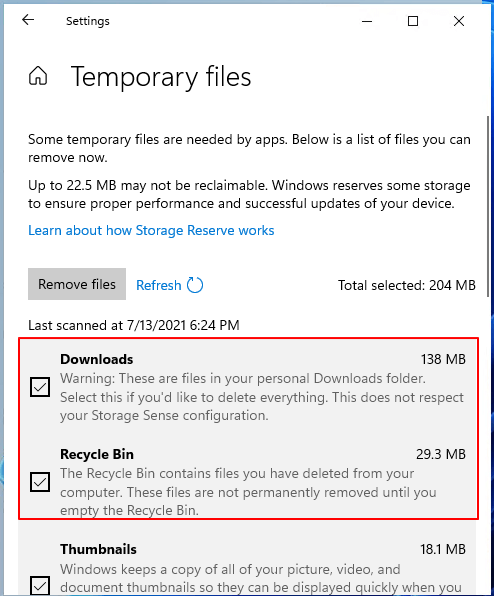
Step 4. To enable automatic deletion of files from your target disk drive, click the right arrow next to the Storage Sense switch, and select the files you want to delete. This will automatically remove unwanted files from your target disk drive.
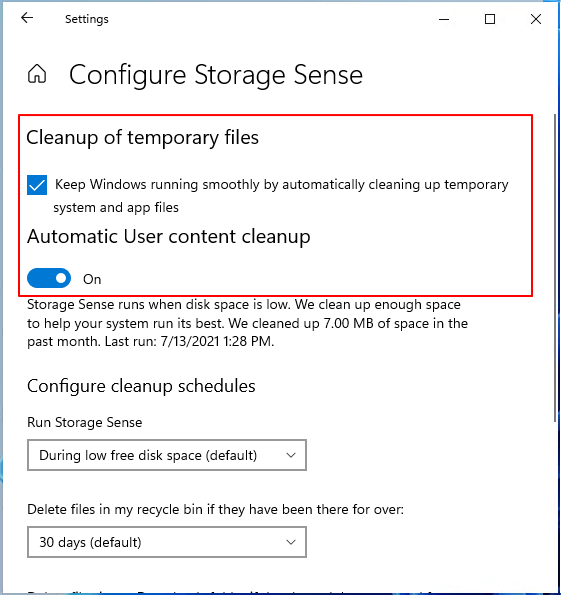
Step 5. To configure Storage Sense, select the option and check the box under "Cleanup of temporary files" to enable it, and also enable Automatic User content cleanup.
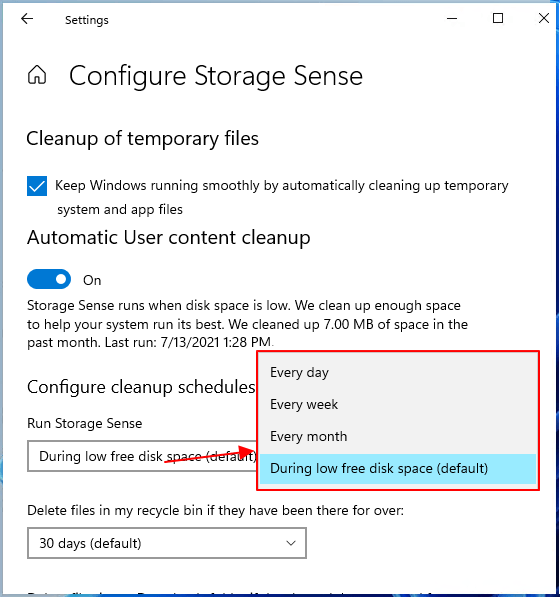
Step 6. You can set when to run Storage Sense and how often to delete files in Recycle Bin, etc. by going to Settings > System > Storage > Storage Sense.
Windows 11 will automatically start cleaning up files based on the configuration settings that prioritize the most frequently used and recently accessed files, while also considering the system's available storage space.
Method 3. Clean Up Temporary Files with Disk Cleanup Tool
Duration: 2-5 minutes
Tool: Disk Cleanup - Windows built-in tool
Disk Cleanup The Windows built-in tool "Disk Cleanup" helps free up disk space by deleting temporary files, system files, and some downloaded files online.
To fix low disk issues using Disk Cleanup, open the Disk Cleanup tool and select the drive you want to clean up. Then, click "Clean up system files" and select the types of files you want to delete, such as temporary files, system files, and other items you don't need.
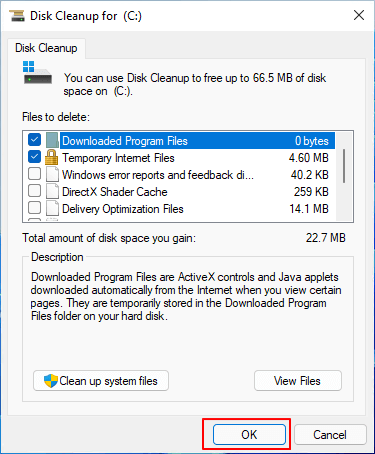
Step 1. To run Disk Cleanup, press the Windows key + S keys, type "disk cleanup", and select the "Disk Cleanup" option from the search results.

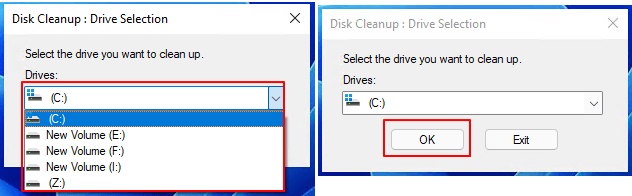
Step 2. Select the drive with low disk space to clean up, and click OK to proceed.
Step 3. To delete files, select the boxes next to the desired file types, and then click OK to confirm the deletion.
You can check various folders such as Downloaded Programs, Temporary Internet Files, Thumbnails, Recycle Bin, and others to see what can be removed from your target disk.
Method 4. Transfer (C Drive) Installed Apps to Other Drive
Duration: 2-5 minutes
Tool: Application transfer tool - Qiling Disk Master
On most Windows computers, the system disk (usually C drive) is taking up a significant amount of storage space due to installed applications, programs, and software. Having a tool that can transfer these installed software and programs to other drives would be highly beneficial, freeing up a substantial amount of space on the OS disk.
To fix low disk error on the C drive, professional application transfer tools like Qiling Disk Master can help. By using such tools, you can move installed apps to a different drive, thereby freeing up space on the C drive and resolving the low disk error.
Method 5. Move Files to Cloud/External Disk
Duration: 5-30 minutes
Tool: File backup tool or cloud backup app
To resolve the low disk space error on Windows 11, you can back up and move files to a Cloud or external hard drive. This can be done manually by copying and pasting files, or by uploading large files to a cloud drive.
Qiling file backup software can both compress and backup large files to a target location, utilizing very small storage space.
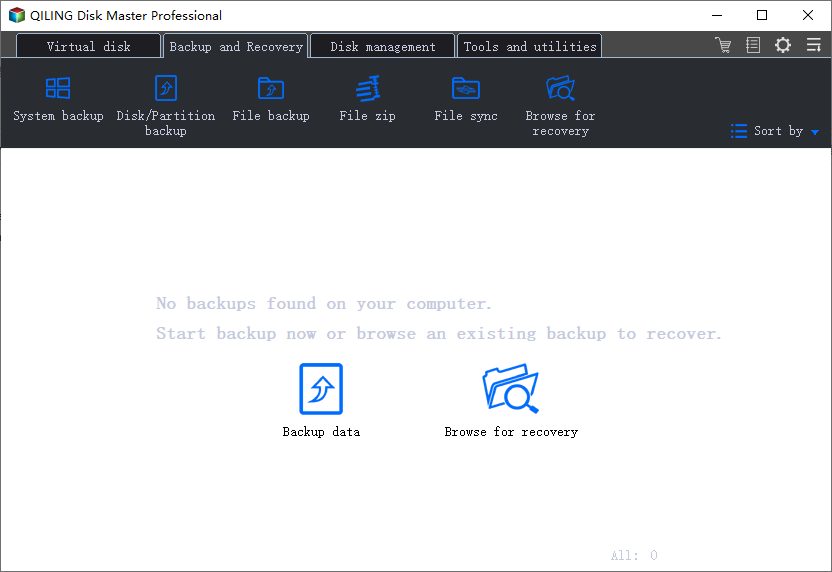
Step 1.To initiate a backup, click the Select backup contents option.
Step 2.There are four data backup categories, including File backup, Disk backup, System backup, and File zip, which can be accessed by clicking on File backup.
Step 3.On the left, both local and network files will be shown, allowing you to browse and select the desired backup files from the directory.
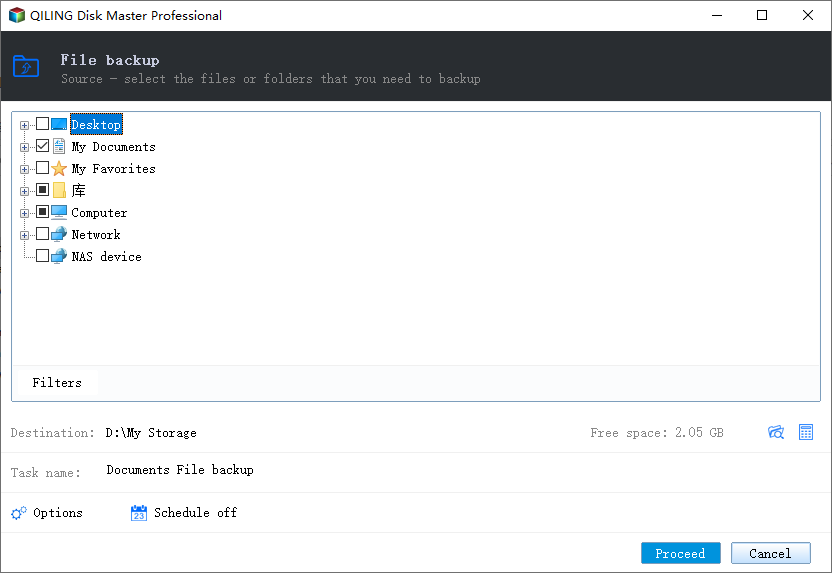
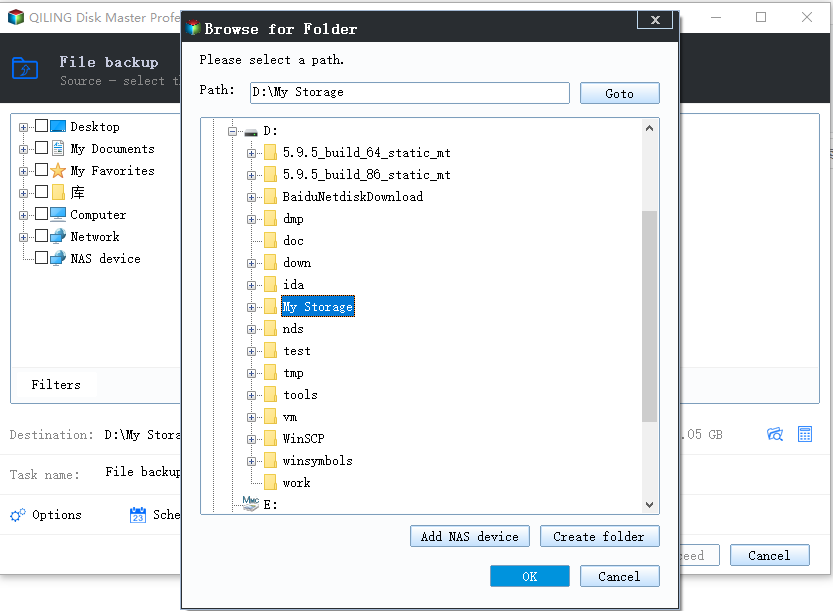
Step 4.Follow the on-screen instructions and choose a location to store the backup.
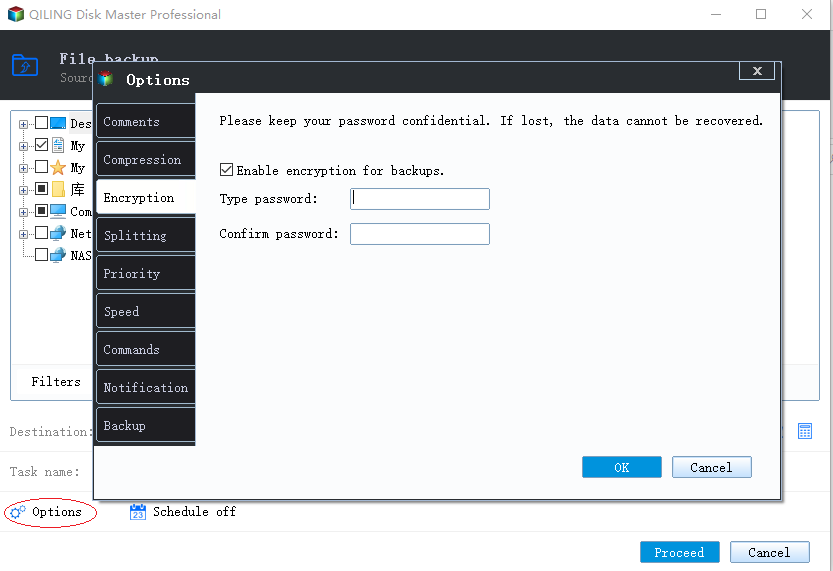
To encrypt the backup with a password, click Options in Backup Options, then select Backup Scheme to specify the backup schedule and start the backup at a certain event. Additional choices are also available to customize the backup process.
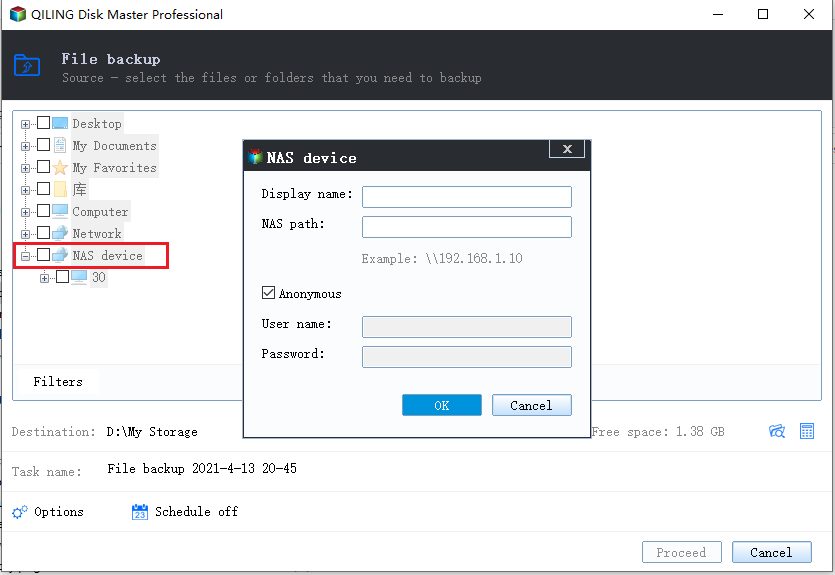
Step 5.The backup may be stored on a local disk, Qiling's online service, or NAS.
Step 6. Qiling Backup allows customers to back up data to both a third-party cloud drive and its own cloud drive.
If you want to back up data to a cloud drive provided by a third party, select Local Drive, scroll down to add Cloud Device, and add and log in to your account.
You can also choose the Qiling cloud drive. Sign up for a Qiling Account, then click Qiling Cloud and log in.
Step 7.To start the backup process, click Proceed. Once finished, the backup job will be displayed as a card on the left side of the panel, allowing you to manage it further by clicking on it.
Once the backup operation is complete, you can safely delete the large files from your drive, which should resolve the low disk space error.
Windows 11 Low Disk Space Issue Is Fixable, Follow to Remove It from Your PC Now
To resolve the low disk space error on Windows 11 computers, there are 5 effective ways to consider. Firstly, you can remove temporary files and system files to free up space. Secondly, uninstall unnecessary programs and apps to declutter your disk.
Here are some tips to prevent the issue from happening on your computer:
- 1. The command to add and leave enough storage space to the target disk drive is `dd if=/dev/zero bs=1M count=1 of=/dev/sdb1`. This command uses `dd` to create a 1MB file on the target disk drive `/dev/sdb1`.
- 2. Regularly clean up your computer by removing and deleting temporary files, emptying the recycle bin, and getting rid of large, unnecessary files on your disk. This helps keep your computer running smoothly and efficiently.
- 3. Transfer installed programs to a non-system drive.
- 4. Backup files to an external or cloud drive.
Allocating disk space properly is crucial to prevent errors like not enough disk space, insufficient disk space, or low disk space. Qiling Partition Master can easily assist in this process with just a few clicks.
Windows 11 low disk space error is not a complex issue, and you can easily fix it on your own. To resolve the problem, try checking for and removing temporary files, uninstalling unused applications, and freeing up space by deleting unnecessary files. Additionally, you can use the built-in Disk Cleanup tool to remove system files and other items you don't need.
Related Articles
- How to dual boot Windows 11/10 with Windows 8 or 7?
- [Simple & Easy] Wipe Your HDD/SSD Data Completely
- 10 Ways to Open File Explorer: Fix 'Where is File Explorer on My Computer'
- Clear/Reformat/Erase/Wipe SD Card & USB Flash Drive
- How to Fix Dell Laptop Won't Turn On | 2024 New💡
If your Dell laptop won't turn on, this guide is here to help. Learn about the common issue of a Dell laptop not powering on and discover the possible causes and solutions to get your laptop up and running again. - Should I Select Disk Cleanup Compress Your OS Drive? Your Answer Is Here [2024 Full Guide]
Choosing 'Disk Cleanup Compress Your OS Drive' can help free up space on your drive, but it's essential to understand what happens when you compress your OS drive under disk cleanup. This article provides specific instructions and guidance on this process, so keep reading to learn more.