How Do I Format External Hard Drive for Xbox One Successfully? Here Is the Guide
When your Xbox One runs out of space for new games, don't delete purchased games to free up space - instead, consider adding and formatting an external hard drive to expand your storage capacity.
With a new external hard drive, you can easily download and install new games on your Xbox One, without any issues. By following this guide, you can quickly learn how to select the right external hard drive and set it up for playing Xbox One games on your own.
- Notice:
- If you've already purchased an external hard drive, jump to #2 to start the Xbox One external hard drive setup process.
- If your external hard drive has files on it, back up those files to another secure location before wiping it.
#1. Tips to Select External Hard Drive for Xbox One
Adding an external hard drive is the most recommended solution for Xbox One users when their internal hard drive runs out of storage space.
To ensure a fast loading speed and smooth gaming experience, it's not recommended to add an old USB 2.0 external hard drive to your Xbox One.
To use an external hard drive with your Xbox One, you'll need a drive that meets specific requirements, including a minimum capacity of 256 GB, a USB 3.0 interface, and compatibility with the Xbox One's NTFS file system, with the drive also needing to be formatted in NTFS. Additionally, the drive should be able to provide a read speed of at least 120 MB/s and a write speed of at least 100 MB/s to ensure smooth performance.
Tips for Select Xbox One External Hard Drive:
- USB type: 3.0 or newer.
- Capacity: 256GB-16TB are all acceptable, but 1TB or 2TB will be the best.
- Speed: 5400P RM -7200 RPM is standard, but 10000 RPM or higher is recommended for better performance.
- Type: External SSD will be the best.
- Interface: SATA III will be better than SATA II.
List of Referral External Hard Drive for Xbox One:
- Toshiba 1TB Canvio Advance - Best budget Xbox One external hard drive
- The Seagate 2TB/4TB Xbox One Game Drive is an official external hard drive designed specifically for the Xbox One. It allows users to expand their console's storage capacity, making it ideal for gamers who have a large collection of games.
- WD Black P10 1-5TB Game Drive
- Silicon Power Armor A62
- WD 4TB My Passport Portable
- Samsung T7 Portable SSD
- Seagate Expansion 8TB
#2. Preparations Before Formatting External Hard Drive for Xbox One
Here are some tips to get your external hard drive ready for Xbox One:
First Move. Check If External Hard Drive Is Partitioned and Its File System
- 1. Connect the external hard drive to your computer.
- 2. Right-click This PC and select "Manage". Click "Disk Management" in Device Manager.
- 3. Check if the external hard drive displays as unallocated.
- If not, move to the next step.
- If yes, partition the external hard drive in the next move.
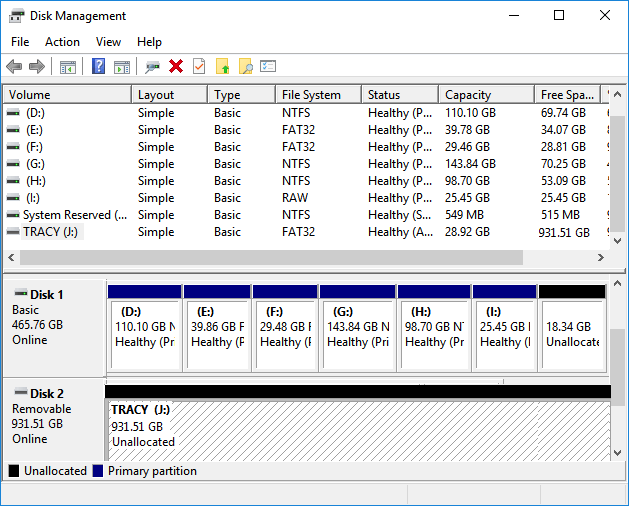
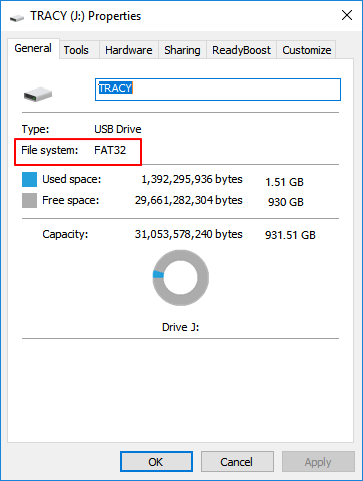
4. If the external hard drive contains a partition, check if its file system is NTFS.
If your external hard drive is formatted with FAT32 or exFAT, you'll need to convert it to NTFS before using it with your Xbox One in the next move. This is because NTFS is the recommended file system for Xbox One. To do this, you can use the built-in disk management tool in Windows or a third-party software like Qiling Partition Master.
Second Move. Partition External Hard Drive or Convert It to NTFS
The external hard drive must have a partition and a file system supported by Xbox One in order to be formatted for use with the console.
#Partition External Hard Drive
To save time and energy, we recommend using Qiling Partition Master to partition an external hard drive more efficiently.
Step 1. Check for free space
To divide a disk partition into multiple ones, ensure that there is adequate free space to be allotted. This is necessary to prevent data loss and ensure a smooth partitioning process.
Step 2. Shrink a disk partition to create unallocated space
To resize a partition, start by clicking on the "Resize/Move" feature, then select a partition that has a lot of free space.
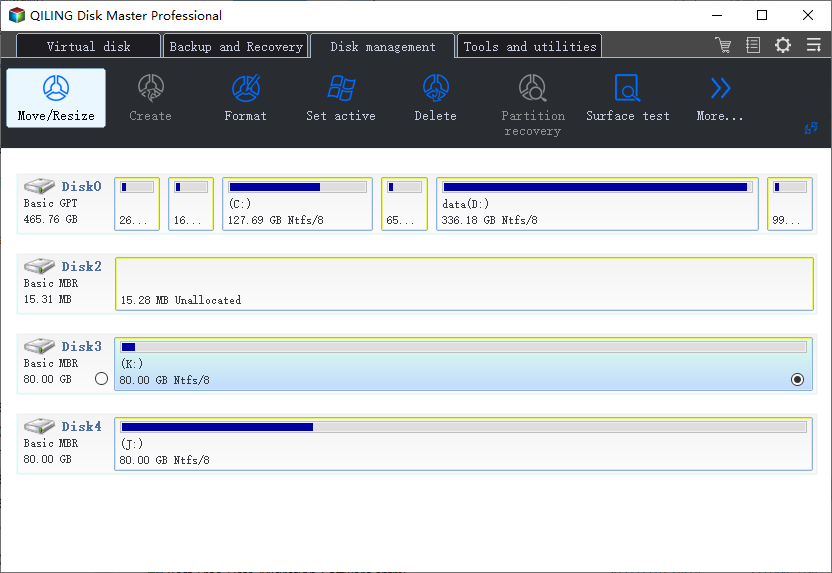
To make space, drag either end of the partition to the right or left, reducing its size as indicated by the red arrow, and freeing up unallocated space. This can be monitored in the "Partition size" area, showing the amount of space decreased.

To summarize, after resizing the disk, click "Proceed" to save the changes, and a new unallocated space should appear under the same disk.
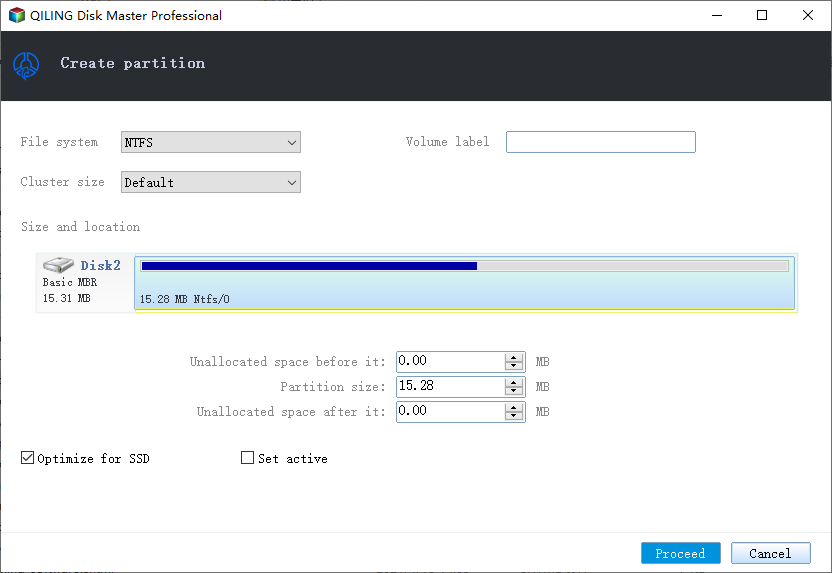
Step 3. Create a new partition on unallocated space
To turn unallocated space into a usable partition drive, click on the unallocated space and select the "Create" option. This will allow you to create a new partition drive with a recognized file system.
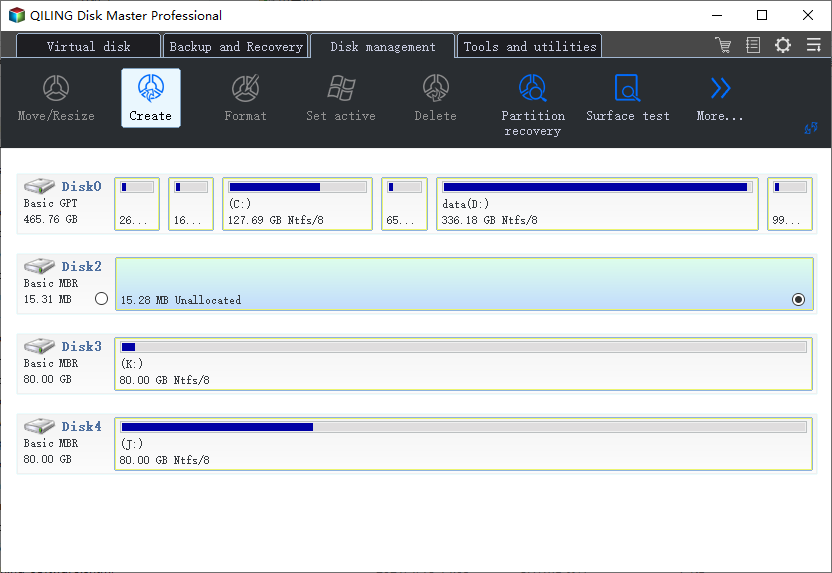
You can customize the partition information by selecting a drive letter, partition label, and file system (such as NTFS, FAT32, EXT2/3/4, or exFAT) among other settings in the Advanced Settings.
To partition a hard drive and create multiple partitions, first, open the Disk Management tool. Then, right-click on the unallocated space and select "New Simple Volume" to create a primary partition. Next, assign a drive letter and file system to the partition, and format it.
#Convert External Hard Drive to NTFS
If the external hard drive is formatted with FAT32, you can directly convert it to NTFS using Qiling Partition Master.
To format an exFAT external hard drive to NTFS, you can follow these steps:
#3. How to Format External Hard Drive for Xbox One
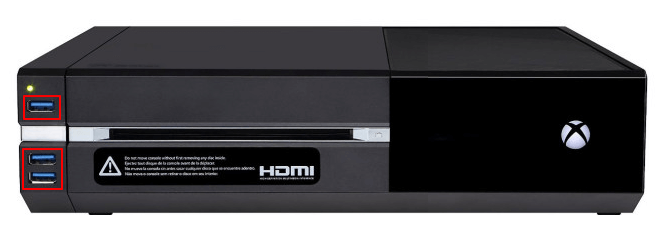
Step 1. Find the USB port on the Xbox One models.
The Xbox One's controller is usually placed at the front, sides, or back of the console.
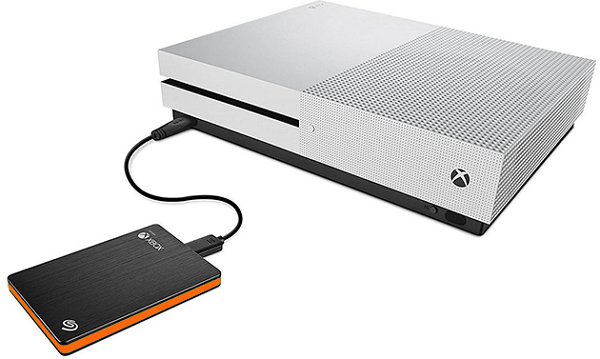
Step 2. To start or boot up your Xbox One, press its power button.
Step 3. Connect the external hard drive to your Xbox One via its USB 3.0 cable.
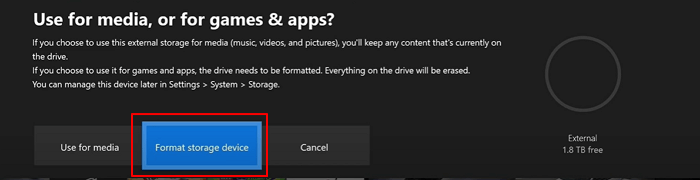
Step 4.The Xbox One will prompt you to choose whether to use the storage device for media or games and apps. Select "Format storage device" to continue.
Step 5. At the Give your device a name section, name the external hard drive within 12 characters. Once done, press "A" to continue.

Step 6. At the Install things on ** Ext by default section, select "Install new things here".
To free up space on the computer, you can install games on the external hard drive instead of the computer's internal hard drive. This will allow you to keep your computer's storage space clear and use the external hard drive to store your games.
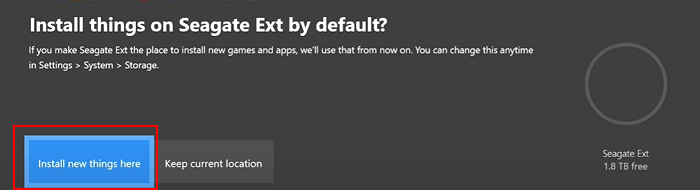
On Xbox One, you can change the default location for saving games and files at any time.
Step 7.At the Format * Ext section, select "Format storage device" to confirm the formatting operation.
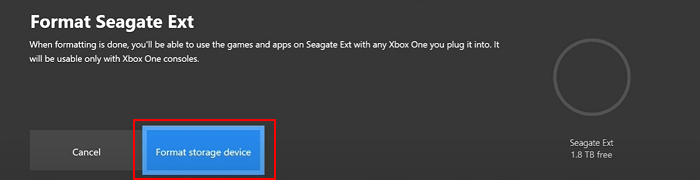
The system will format your external hard drive, and the Xbox One will notify you when it's ready.
Now, you're all set to run Xbox One and download your favorite new games. The system will automatically install your games on the newly formatted and added external hard drive.
You May Also Be Interested In: How Do I Format Xbox One External Hard Drive for PC
Sometimes, when you updated the internal Xbox One hard drive with bigger storage, the external hard drive may not be necessary anymore.
To make use of the external hard drive for normal file storage again, you'll need to format it for PC, but it currently shows up in Disk Management as "Disk Unknown Not Initialized".
To fix the issue of Qiling Partition Master not working on Windows PC, the best solution is to initialize the disk and re-partition it. This can be achieved with the help of Qiling Partition Master, which provides a user-friendly interface to manage disk partitions. By initializing and re-partitioning the disk, users can resolve the issue and get Qiling Partition Master working smoothly on their Windows PC.
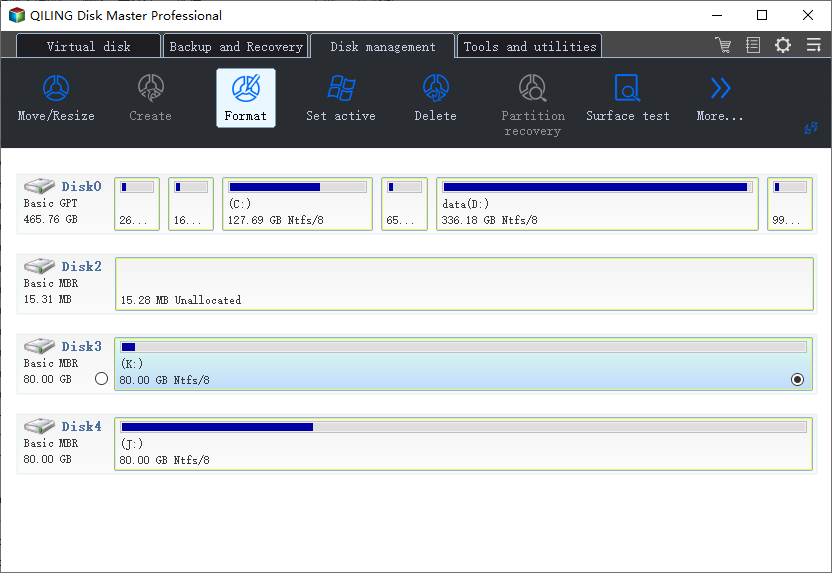
Step 1. Launch Qiling Partition Master, right-click the partition on your external hard drive/USB/SD card which you want to format and choose the "Format" option.
Step 2. Assign a new partition label, file system (NTFS/FAT32/EXT2/EXT3/EXT4/exFAT), and cluster size to the selected partition, then click "Proceed".
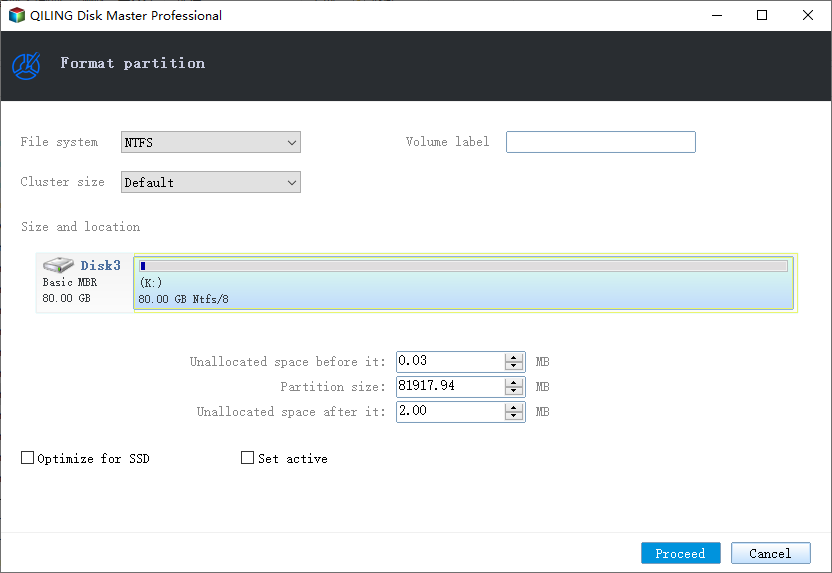
Step 3. You click "OK" in the Warning window to start formatting your external hard drive/USB/SD card.
If you're using a Mac, you can simply plug the external hard drive into the computer and follow the on-screen instructions to initialize and format it. If you're using a PC, you'll need to open the Disk Management tool, select the external hard drive, and choose to initialize and format it.
Formatting External Hard Drive for Xbox One Is Easy, Go to Improve Your Gaming Experience Now
To improve the Xbox One storage for a better gaming experience, start by deleting unused apps and games, and consider purchasing an external hard drive to expand your storage capacity. Next, move games and apps to the external drive by going to Settings > System > Storage > Manage Storage > Move Items.
- 1st, you should select a proper external hard drive.
- 2nd, you need to get the external hard drive ready.
- You can format an external hard drive in Xbox One as a new storage location.
After formatting the external hard drive, you can install games and enjoy a better gaming experience with your Xbox One, taking advantage of the additional storage space.
Upgrading the Xbox One storage is a relatively simple process. To do it, you just need to be careful and follow the steps outlined in the guide. By taking your time and following these instructions, you can enjoy a faster and better gaming experience on your Xbox One.
Related Articles
- [Samsung Data Migration Windows 10/11] Clone A Hard Drive with Samsung Disk Cloner
- (3 Free Methods) How to Remove or Delete Partition Windows 11/10
- All You Want to Know about exFAT, FAT32, and NTFS
- Solution: How to Securely Wipe Free Space on SSD
- Solutions to Windows Can't Be Installed to Disk 0 Partition 1
Windows can't be installed to disk 0 partition 1 is an error message you may meet when installing Windows. Here, I'll tell why & how to fix it in several ways. - How to Remove Drive from RAID?
Removing drive from Software RAID 0, 5 array shrinks volume to free up unallocated space and reconfigure dynamic disk structure to optimize PC performance.