Why is My Camera Not Working on Laptop | Fix Camera Not Working
| Workable Solutions | Step-by-step Troubleshooting |
|---|---|
| Fix 1. Allow Camera Permission | Allow camera permission in Windows Settings. To do this, click Windows Start, type "Settings", and click on it. Then, click on "Privacy" and select "Camera" from the left menu. Toggle the switch to the "On" position to allow camera permission.webcam...Full steps |
| Fix 2. Update Driver of Laptop Camera | Press Windows + X and click Device Manager. Move to Imaging Devices and click it. Right-click driver...Full steps |
| Fix 3. Apply Troubleshooting | Type Control Panel in the search box and click to start. Scroll down the page and select Troubleshooting...Full steps |
| Fix 4. Rollback Camera Driver | Type Device Manager in the search box, and click to open it. Click the Imaging device. Your webcam will show...Full steps |
| More Useful Solutions | Uninstall and reinstall the camera driver in Device Manager; turn Off camera protection...Full steps |
"My camera has stopped working, I cannot uninstall it and reinstall it. I cannot find it listed anywhere in my device manager settings. I would appreciate it if somebody could solve this problem for me without me having to buy a new laptop. please help."
Your laptop camera isn't working when you need it, and it's frustrating. Let's troubleshoot together to resolve the issue. We'll explore the possible reasons behind the camera not being detected or working properly on your laptop. Follow the steps below to learn how to fix your camera on your laptop.
Solution 1 - Allow Camera Permission (Windows Settings)
One common reason for a camera not working on a laptop is limited camera permission. To resolve this, go to Windows Settings and allow camera permission, which should resolve the issue.
Step 1. Click Windows Start > Settings.
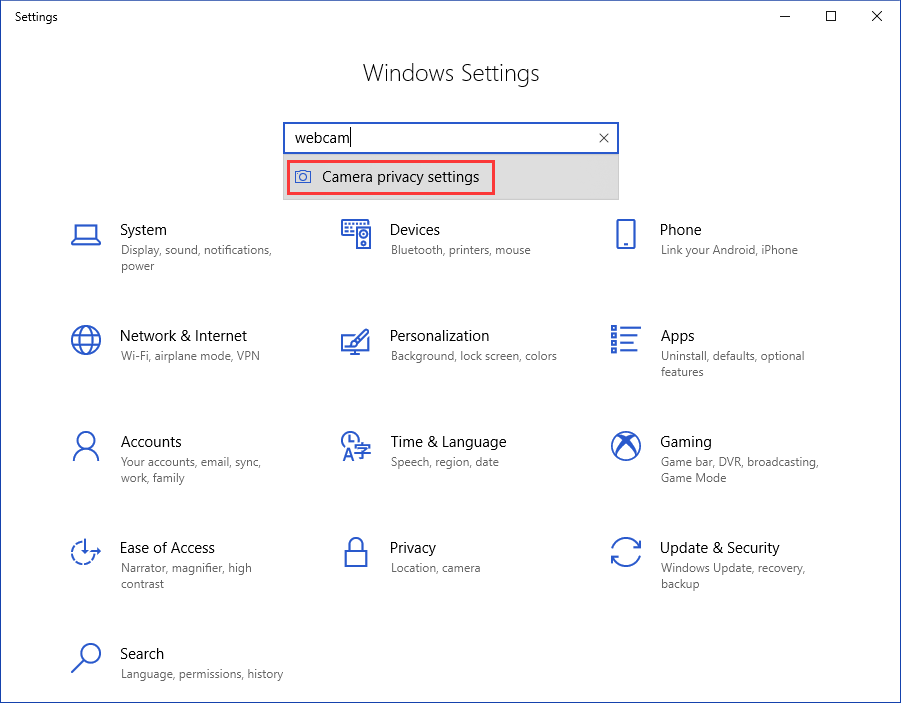
Step 2. Type webcam in the search box.
Step 3. Choose Camera privacy settings.
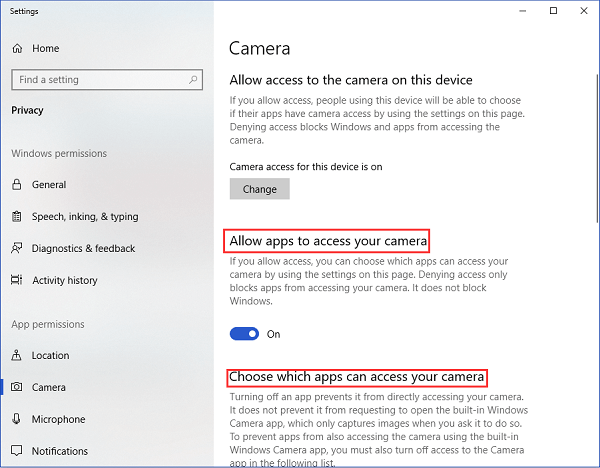
Step 4. Make sure "Allow apps to access your camera" is on or choose apps to access your camera.
Solution 2 - Update Driver of Laptop Camera (Device Manager)
Step 1. Press Windows + X and click Device Manager.
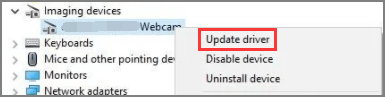
Step 2. Move to Imaging Devices and click it.
Step 3. Right-click the laptop camera driver.
Step 4. Choose Update Driver.
Step 5. To update the driver, go to the Device Manager, select the device with the yellow exclamation mark, click on the "Update driver" button, then choose "Search automatically for updated driver software". If this doesn't work, select "Let me pick from a list of device drivers on my computer" to manually search for the correct driver.
Step 6. Choose USB Video Device.
Step 7. Restart your PC.
Solution 3 - Apply Troubleshooting (Control Panel)
Step 1. Type Control Panel in the search box and click to start.
Step 2. Scroll down the page and select Troubleshooting.
Step 3. Click View all on the left pane.
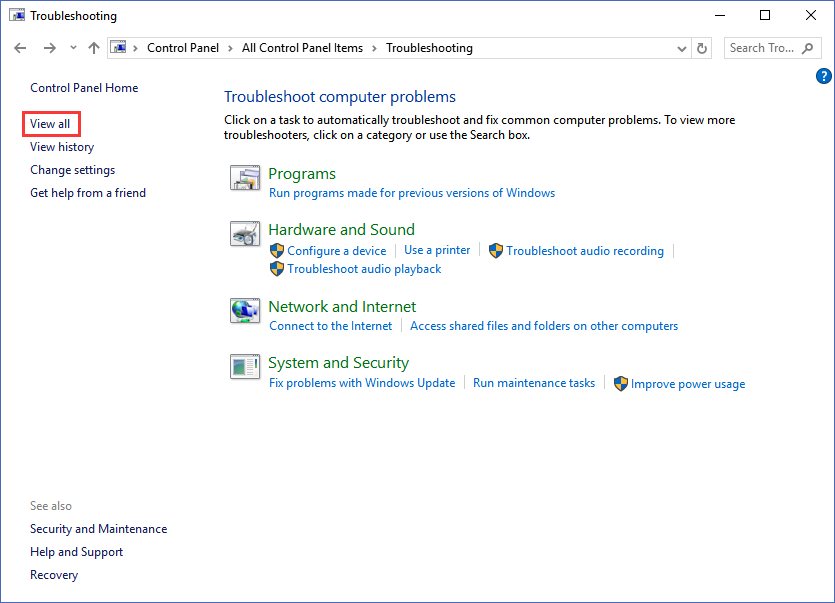
Step 4. Select Hardware and Devices.
Step 5. Click Next.
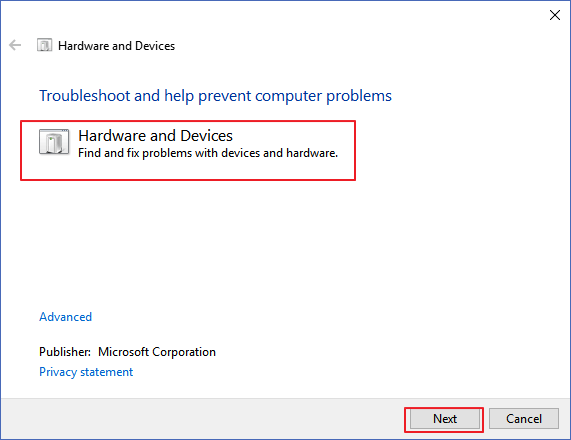
The troubleshooting will identify any common or serious problems with the hardware.
Solution 4 - Rollback Camera Driver (Device Manager)
Step 1. To access the Device Manager, type "Device Manager" in the search box on your computer, and click on the result to open it.
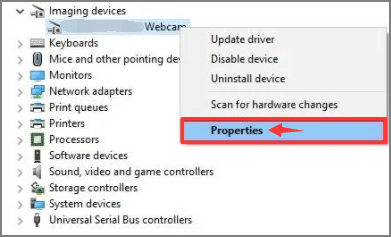
Step 2. Your webcam will show up under the Imaging device.
Step 3. Right-click it and choose Properties.
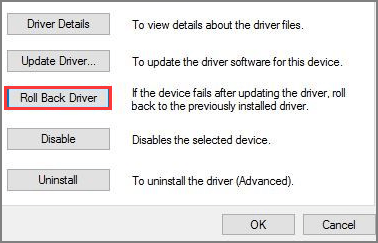
Step 4. To roll back the driver, go to the Driver tab, click Roll Back Driver, and click OK. If this doesn't work, you can try another method. If the option is available, proceed. If not, you can try another method. If it is available, go on.
Step 5. The Driver Package rollback will prompt a list of reasons for rolling back. Select the answer that best matches your situation.
Step 6. Click Yes and restart your computer.
Solution 5 - Uninstall and Reinstall the Camera Driver (Device Manager)
Step 1. Press Windows + X, select Device Manager.
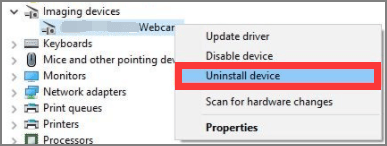
Step 2. To uninstall the webcam driver, scroll down to the "Imaging devices" section, right-click on the webcam driver, and select "Uninstall device" from the context menu.
Step 3. The "Uninstall Device" window will appear, select the option to "Delete the driver software for this device" and click the "Uninstall" button.
Step 4. Click the Action tab and choose Scan for hardware changes.
Step 5. The computer will reinstall your camera driver. You can check whether the camera is working properly.
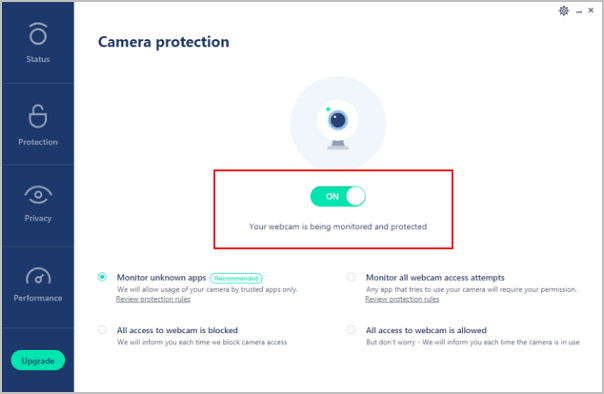
Solution 6 - Turn Off Camera Protection (Antivirus Software)
Generally, most antivirus software has privacy settings to limit some application's access to the camera, which can sometimes interfere with camera functionality, so checking and adjusting the camera protection setting in the antivirus software can help troubleshoot the issue.
Step 1. Open your antivirus software.
Step 2. Find your "Privacy Protection".
Step 3. Turn off the camera protection. As pictures shows:
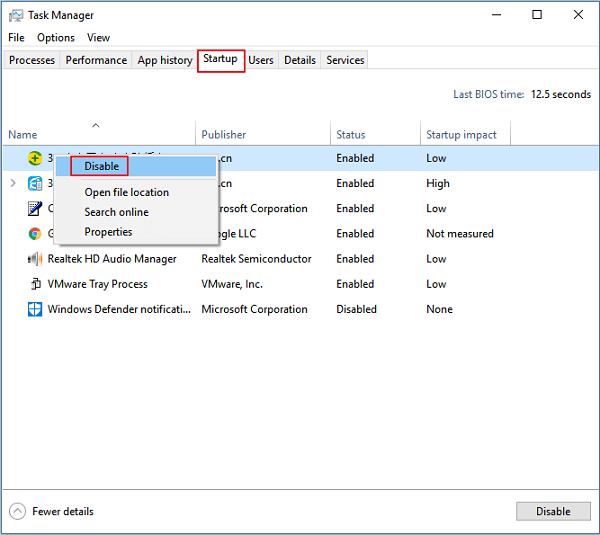
Solution 7 - Disable the App that is Using the Camera
Your camera not working may be caused by the webcam being used by another program.
Step 1. To open Task Manager, type "Task Manager" in the search box at the bottom left of your screen and click on it to open.
Step 2. To resolve the issue of your webcam not working, go to the Start menu and select the "Start-up" tab. From there, click on the process that is using the webcam and disable it to resolve the issue.
Step 3. Right-click process and choose disable.
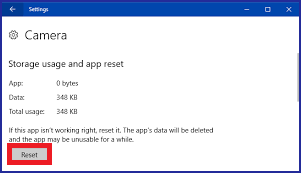
Solution 8 - Reset Your Camera Programs (Windows Settings)
If the previous methods fail to resolve the "Camera not working" issue, you can reset the camera app, which will reinstall it and revert to its default settings.
Step 1. Click Settings > Apps > Apps & Features > Camera
Step 2. To access the Camera app on your device, you can either scroll down to find it in the list of installed apps or search for "Camera" in the search box. This will bring up the Camera app, allowing you to take photos and videos.
Step 3. Click Camera and select Advanced options.
Step 4. Choose Reset.
Why Is My Camera Not Working on Laptop
- Your camera permission is not allowed to your running programs.
- Outdated webcam driver.
- Your antivirus software blocks the camera function for privacy protection.
- Your camera app is used by another unknown program.
- ......
Get Your Answer Here! Available on Top-rated Laptop Models!
Regardless of the laptop brand you're using, whether it's Lenovo, HP, ASUS, Dell, or any other, you can try the eight methods mentioned earlier to troubleshoot and potentially resolve the issue of the camera not working.
If you encounter any technical issue with our product, please send an email to support@idiskhome.com.
Related Articles
- Download USB Pen Drive Repair Software Full Version with Crack
- How to Fix Dell No Hard Drive Detected Error
- How to Activate Windows 10/11 with Product Key/Digital License/CMD
- Recycle Bin Empties Itself: How to Stop Recycle Bin Auto Deletion in Windows 7/8/10
- How to Extract and Restore Specific/Individual Files from Windows 11/10/8/7 Backups
If you're trying to extract and restore specific or individual files from a Windows backup, there are two methods you can use. Whether you're working with a Windows 10, 8, or 7 image backup, these methods can help you find and restore single files or folders. By following these steps, you can effectively retrieve the files you need from your backup. - Fallout 4 Accidentally Deleted Saves, How to Recover?
Have you accidentally deleted saves from Fallout 4? This article shows you how to recover your Fallout 4 accidentally deleted save with Qiling data recovery software. Download this free data recovery software to restore lost data as soon as possible.