Buffalo Nas Data Recovery Software | Recover NAS Data Quickly
PAGE CONTENT:
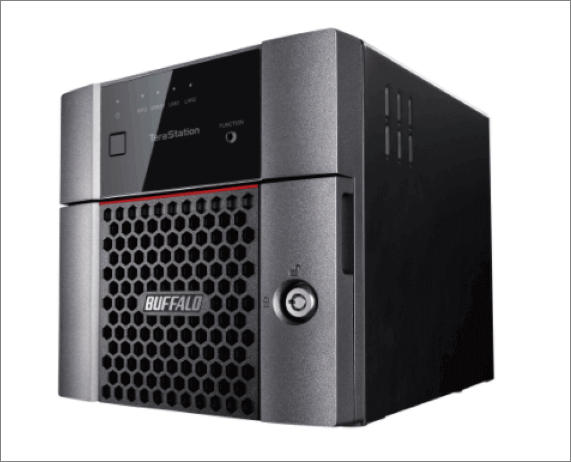
What Is Buffalo NAS Device
The Buffalo NAS device is a network-attached storage system that allows authorized users to access files remotely without a direct connection. It comes in two main series, LinkStation and TeraStation, offering a cloud-based data storage solution at an affordable cost, providing protection and backup for important data.
Benefits of Buffalo NAS File System:
- Offer a variety of options.
- Share files in a more efficient manner.
- Maximize production by reducing maintenance downtime.
- Support a variety of workstations while ensuring data availability.
- Ensure data integrity and availability by implementing robust backup and redundancy strategies, and provide secure access controls to safeguard sensitive information, even in the event of software or hardware failures.
Powerful Tool: Buffalo NAS Data Recovery Software
Trying to recover lost Buffalo NAS data can be a daunting task. It requires searching through a large database to identify the specific files and documents that need to be recovered, which can be a time-consuming and complicated process. Unfortunately, even after trying various methods, data recovery may still not be successful, making the situation even more frustrating.
Fortunately, the Buffalo NAS data recovery process can be very easy if you have downloaded Qiling NAS data recovery software on your PC, which allows you to recover lost files and documents stored on the Buffalo NAS device with minimal effort.
Qiling data recovery software supports nearly all versions of Buffalo NAS Linkstation and TeraStation servers.
| Buffalo Linkstation | Buffalo TeraStation |
|---|---|
|
|
Full Guidance to Restore Buffalo NAS Data
Deep Data Recovery has been praised for its effective data recovery performance since its launch. What sets it apart from other methods is its ability to quickly restore important NAS data without requiring users to remove disks. Additionally, users can preview lost data before recovery, making the process more efficient and user-friendly.
The device supports various NAS brands such as Synology, DLink, and Seagate, allowing for recovery of lost data from these systems without downtime. This means you can use it to recover data at any time, regardless of the situation.
To recover lost Buffalo NAS data, follow these steps. First, check if the Buffalo NAS is still accessible and if the data is still on the device.
Step 1. Select a NAS server and start recovering.
Download and install Deep Data Recovery on your Windows 11/10 64-bit computer. Open the software, select "NAS Recovery", and it will automatically list all connected NAS servers. Choose your target NAS device and click "Scan" to proceed.
Step 2. Enable SSH service on the NAS server.
To enable remote access, go to the "Control Panel" and select "Terminal & SNMP". Check the box to enable the SSH service, then note the port number for remote access. Next, open Deep Data Recovery and click "Next".

Step 3. Connect to the NAS server remotely.
This software automatically detects your IP and Port, requiring only your username and password. If the detected IP or Port is incorrect, you can manually correct it. After inputting the necessary information, click "Connect Now" to proceed.

Step 4. Recover lost/deleted NAS data
Qiling data recovery software will connect to your NAS, scan it, and display all deleted, lost, or existing files on your server.
To recover lost files on a hard drive, you can either use the "Filter" feature or click on the "Search files or folders" option to locate the missing files. Select the desired NAS files that were lost on the server and click "Recover" to save them to a different location.
To recover lost NAS files, click the "Recover" button after selecting the files you want to restore.

Additional Help - Buffalo Data Recovery Service
Qiling offers data recovery services for Buffalo NAS devices, regardless of their manufacturer, operating system, or configuration, with a focus on prioritizing customer data. Expert assistance is available to help restore data as quickly as possible.
Consult with Qiling data recovery experts for one-on-one manual recovery service, which includes repairing the damaged RAID structure and restoring data from all RAID levels, all offered after a free diagnosis.
- Data can be restored from all RAID levels, including RAID 0, RAID 1, RAID 5, RAID 6, RAID 10, and others, using specialized software and tools. These tools can reconstruct the original data from the RAID setup, even if one or more disks fail or are damaged.
- Recover data from enterprise RAIDs such as QNAP, Synology, WD, Buffalo, and more, with our expert assistance. Our team specializes in retrieving data from these complex storage systems, even when they've failed or are no longer accessible.
- Retrieve lost RAID data caused by any issues
- Fix disks that become GPT protected partitions
- Recover data from RAID remotely, no need to ship
FAQs About Buffalo NAS Data Recovery
To address lost or deleted NAS recovery issues more smoothly, it's essential to gather more information and develop more skills related to not only Buffalo NAS devices, but also NAS devices from other brands. This broader understanding will enable you to tackle a wider range of recovery scenarios and provide more effective solutions for users.
1. How do I access my Buffalo NAS?
Step 1. Connect the Buffalo NAS device to your router using an Ethernet cable and turn it on.
Step 2. Press the Power button or turn on the power switch.
Step 3. Wait for the power LED to stop blinking.
Step 4. Open a web browser and enter the IP address of the NAS device, using NAS Navigator if the IP address is unknown.
2. What file system does Buffalo LinkStation use?
The Buffalo LinkStation uses the XFS file system to store data.
3. How do I copy a file in Buffalo LinkStation?
Step 1. Connect to USB devices to the Buffalo LinkStation.
Step 2. Press the blue function button on the LinkStation to automatically copy data from a USB drive to the device.
Step 3. Remove the USB after it is dismounted.
4. How do I update Buffalo LinkStation firmware?
Step 1. Enter the model number on the Buffalo downloads page.
Step 2. Select the firmware update utility from the firmware section.
Step 3. Right-click the zip file and select "Extract All".
Step 4. Click file "TSUpdater.exe" and select the exact unit to update.
Step 5. Enter the admin password for the unit and click OK.
5. How do I recover files from a Synology NAS hard drive?
Step 1. To enable the Recycle Bin feature on a shared folder in File Station, you can follow these steps: Start File Station and navigate to the shared folder where you want to enable the Recycle Bin feature. Once you have located the shared folder, click on it to open its details.
Step 2. Find the Recycle subfolder and right-click on the folders or files within it.
Step 3. To recover deleted data, go to the "Copy to/Move to…" option and select "Move to…".
Conclusion
If you've accidentally deleted important data stored on your Buffalo NAS device, you can try Deep Data Recovery to quickly recover the lost data. This easy-to-use software not only works well in restoring Buffalo NAS data but also supports other NAS brands, including QNAP, Synology, Lacie, and Iodate.
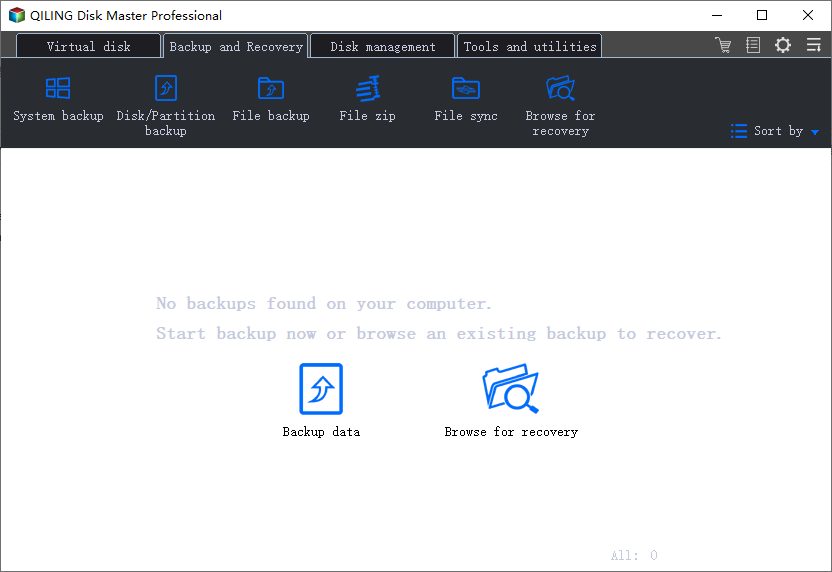
If you're experiencing frequent losses of stored files and documents, consider using Qiling Backup, which allows you to manually or automatically back up data on a daily, weekly, or monthly basis.
Below is the step-by-step tutorial for using this effective data backup software.
Step 1. To start a backup, click the "File backup" option on the "Backup and recovery" page.
Step 2. On the top list view, you'll see a list of local and network files, which can be expanded to select the files to be backed up.
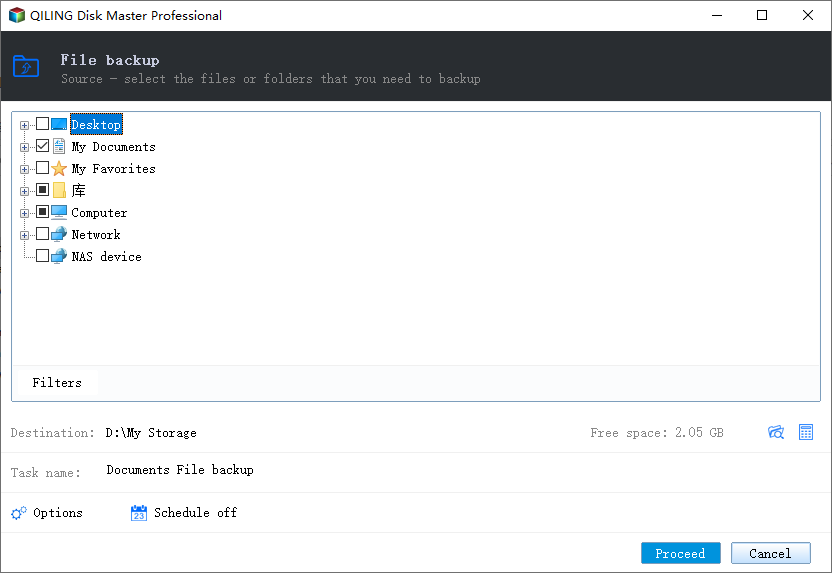
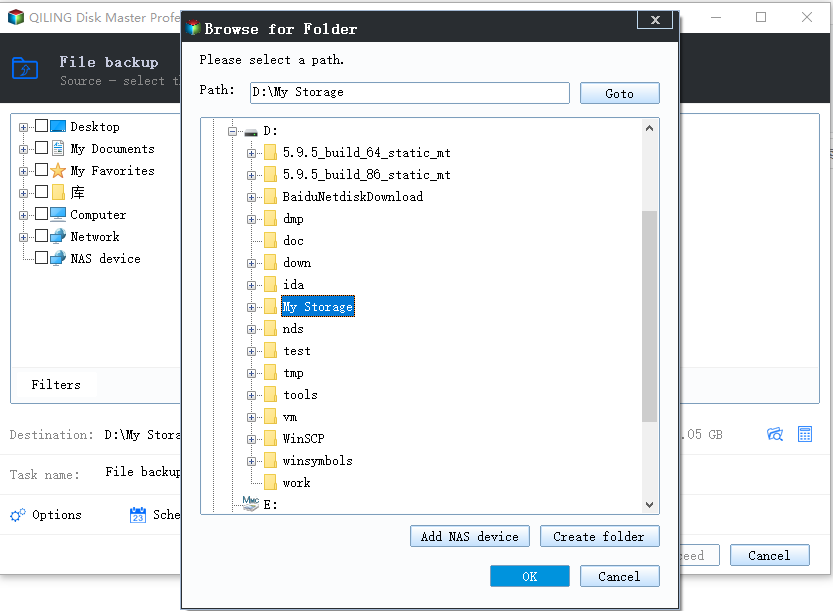
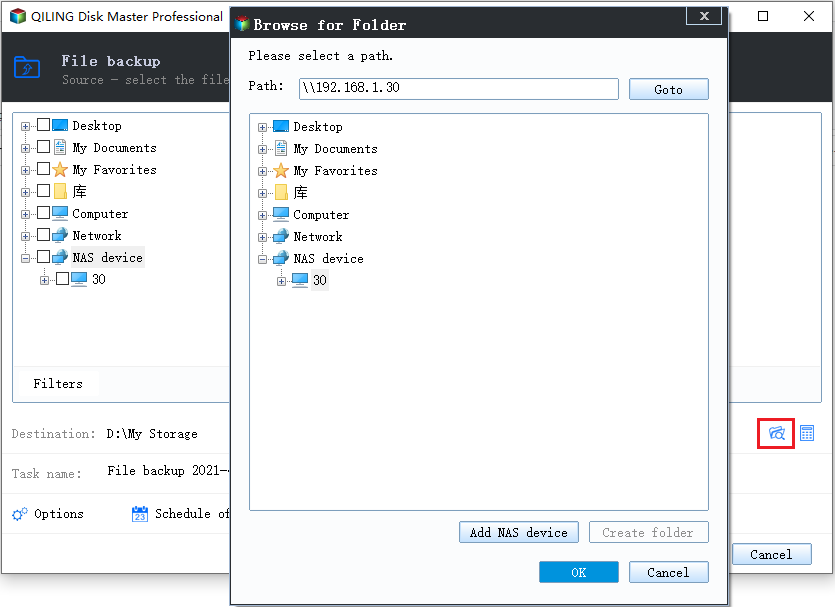
Step 3. Follow the instructions on the screen to select the desired location for storing the backup.
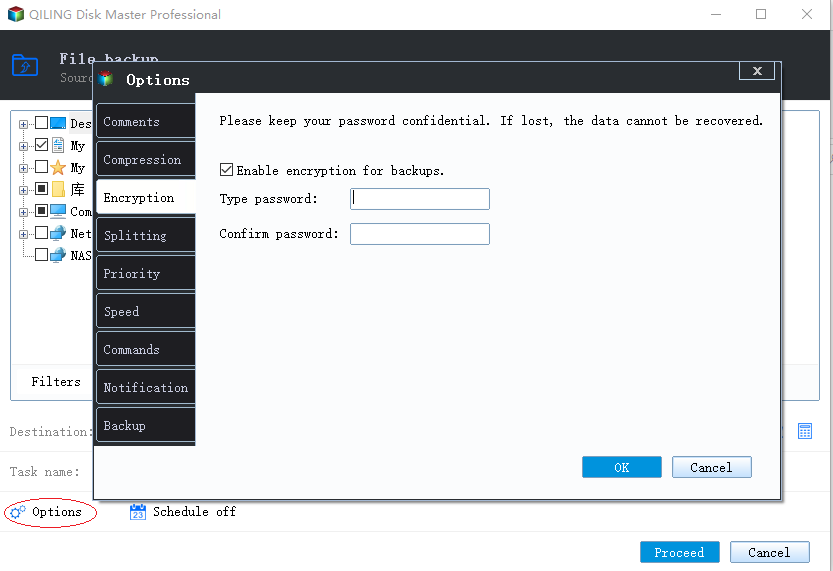
In Backup Options, click Options to encrypt the backup with a password.
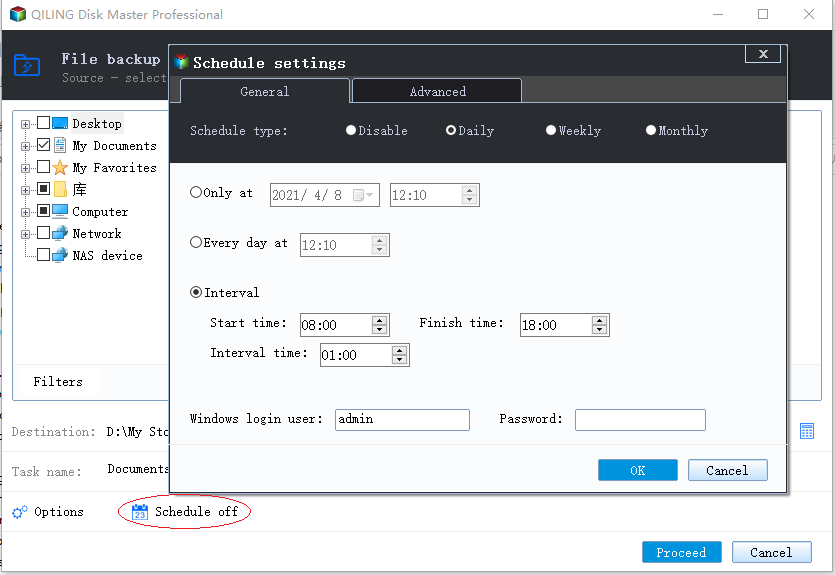
You can specify the backup schedule and choose when to start the backup based on a specific event in the Backup Schedule. This allows for customizable features to tailor the backup operation to your specific needs.
Step 4. Backups can be stored on a local disk, in Qiling's cloud service, or on a network attached storage device (NAS).
Step 5. To start a backup, click Proceed, which will then be displayed as a card on the left-hand panel once the backup process has been completed successfully. For more detailed backup job management, right-click on the backup job.
Related Articles
- Deep Data Recovery 14.2.0 Crack with License Code 2022
- How to Recover Deleted Files/Folders in Windows 11 [Ultimate Guide]
- How to Fix Corrupted Video on Windows 10/Android/SD Card - 3 Ways
- [Solved] Windows Cannot Access the Specified Device Path or File
- A Complete Guide to Recover Deleted Files
Are you looking for a way to recover deleted files on Windows 10? This full guide provides you with every way to recover deleted files on Windows 10, Windows 11, Mac, iPhone, Andriod, SD card, USB flash drive, Google Drive, and more. Read on and you can find lost data back in any data loss situations. - How to Recover Deleted Instagram Posts/Photos/Videos
If you've lost photos, videos, or stories on Instagram, you may have tried using the app to restore them, but it only supports posts deleted within 30 days. For permanently deleted or lost posts, Qiling data recovery software might be able to help.