RAID 0 vs RAID 1, Comparison and How-to Setup Guide [2022 New]
Applies to: All Windows Server from 2003 to 2022.
This page covers everything you need to know about RAID 0 and RAID 1, including details about both types of disks. If you need to set up and manage RAID 0 or RAID disks, continue reading to learn how to manage RAID disks on your Servers.
RAID 0 vs RAID 1, Overview
RAID stands for Redundant Array of Independent Disks. It's a storage technology that combines multiple physical disks into one logical unit to improve performance and reliability. There are several RAID levels, each with its own characteristics and benefits.
RAID,RAID (Redundant Array of Independent Disks) is a storage technology that combines multiple disks into a single drive, extending storage capacity in Windows Server computers.
RAID 0, Striped disks, also known as RAID (Redundant Array of Independent Disks), configure and join multiple disks together, enabling the system to read and write data simultaneously across disks at a fast speed. This storage technology, called stripping, divides and saves data into striped units onto the connected disks.

RAID 1, RAID 1, also known as mirroring disks, is a technology that duplicates data on two or more disks. This setup allows the computer to read and write content to both mirrored drives simultaneously, providing redundancy and ensuring data can be read quickly from both disks. While write operations may be slower due to the need to write data to two disks, RAID 1 offers a reliable solution for maintaining data integrity.

RAID 0 vs RAID 1, What Is the Difference
The main difference between RAID 0 and RAID 1 lies in their disk connection technology, as defined by their respective RAID levels. However, aside from this, RAID 0 and RAID 1 have distinct features, which can be summarized in a comparison table. For example, RAID 0 offers improved performance by striping data across multiple disks, while RAID 1 provides redundancy and data protection by mirroring data across two or more disks. These unique features make each type of disk suitable for different use cases and requirements.
| Comparison | RAID 0 | RAID 1 |
|---|---|---|
| Disk Feature | Disk Stripping | Disk Mirroring |
| Disk Requests | 2 or more disks | 2 or more disks |
| Storage Capacity Usage | 100% used | 50% used |
| Fault Tolerance | No | Yes |
| Data Recovery | No | Yes |
You might also be curious to learn about the write and read speeds of RAID 0 and RAID 1 configurations. If so, keep reading to discover more details about these storage setups.
RAID 0 vs RAID 1, Which Is Faster
The configuration and working mode of RAID 0 and RAID 1 differ significantly, resulting in distinct reading and writing speeds between the two types of disks.
# Reading Speed:
RAID 0 is faster than RAID 1 because it saves data separately into several disks, whereas RAID 1 writes data into two disks, which slows down reading speed due to the need to compare and read data on both disks.
# Writing Speed:
When writing content to RAID 0 and RAID 1 disks, the writing speed on RAID 0 is significantly faster due to its non-redundant configuration. In contrast, RAID 1 requires writing data twice onto two disks to ensure redundancy and fault tolerance, which slows down the writing process. This fundamental difference in design affects the overall performance and use cases for each type of RAID configuration.
Assumption: When using the same brand and capacity disks for RAID 0 and RAID 1, the reading speed of RAID 0 is faster than RAID 1, and the writing speed in RAID 0 is twice as fast as RAID 1.
When to Use RAID 0 and RAID 1
Some users may be unsure when to use RAID 1 versus RAID 0. For those familiar with Windows Server, the differences between the two are well-known. However, for others, it's worth noting that RAID 1 is typically used for mirroring data to ensure redundancy and protect against drive failure, while RAID 0 is used for striping data across multiple drives to increase storage capacity and improve performance.
RAID 0 and RAID 1 are two different types of disk arrays that serve distinct purposes. RAID 0, also known as striping, excels at reading and writing data to disks, making it ideal for applications that require high performance. On the other hand, RAID 1, also known as mirroring, prioritizes data security by duplicating all data across multiple disks, providing a high level of protection against data loss.
| Comparison | RAID 0 | RAID 1 |
|---|---|---|
| Pros |
|
|
| Cons |
|
|
| When to Use |
|
|
Based on the comparison table, it's evident that RAID 0 and RAID 1 are designed for distinct purposes. As such, Qiling Editors recommend using them accordingly, with RAID 0 being suitable for applications requiring high performance and RAID 1 for those needing high reliability.
- RAID 0 is a type of disk array that stripes data across multiple disks, providing faster read and write speeds compared to a single disk. This is achieved by distributing data evenly across multiple disks, allowing for simultaneous access and processing, resulting in improved performance and reduced latency.
- RAID 1 is a disk mirroring technique that duplicates all data on two or more disks, providing redundancy and protection against data loss in case of a disk failure. This makes it a reliable option for businesses that need to ensure the security of their content.
How to Setup RAID 0 or RAID in Windows Server
Before setting up RAID 0 or RAID 1 disks, it's essential to understand the difference between creating RAID disks in software and hardware ways. We'll provide a complete guide on setting up RAID disks in both soft and hard ways, but first, let's learn the basics of each method. Once you're familiar with the differences, you can proceed to the step-by-step guide to set up RAID 0 or RAID 1 disks in software or hardware.
To set up a RAID 0 or RAID 1 disk with multiple disks, start by connecting all the disks to the computer and installing the necessary drivers. Then, use a disk management tool to create a RAID set, selecting the disks you want to include and choosing the RAID type (0 or 1). Next, format the new RAID set as a single drive and install the operating system on it.
#1. Prepare Hard Disks
When preparing hard drives for RAID, it's essential to be aware of several key considerations. First, ensure that all drives are identical in terms of capacity, interface, and firmware version to prevent compatibility issues.
- Using the same brand of disks if possible.
- Select disks with the same storage capacity, for example, using two or more disks with the same storage capacity, such as 1TB.
- Install and connect the disks to Server computers correctly.
- Mechanical hard drives are still more widely preferred when creating RAID disks.
#2. Confirm How Would You Like to Setup RAID 0 or RAID 1
Here are the differences between the two ways to configure RAID 0 or RAID 1 environment across disks:
- Software RAID: Creating RAID disks no longer requires a BIOS setup operation. Instead, reliable software can be used to simply create RAID disks, making the process easy to follow.
- Hardware RAID: To set up the RAID disk type in BIOS using the RAID controller card for the Server, follow a somewhat complex process.
Setting up a RAID environment is typically done the hard way, but most server computers provide RAID controller cards to simplify the process. However, for those who want to set up a RAID 0 or RAID 1 disk, here are the detailed steps involved.
#3. Setup RAID 0 or RAID 1 in Windows Server (2022/2019/2016)
Create Hardware RAID 0/1:
Step 1. To access the RAID controller, shut down the Server computer, open the computer case, and remove the motherboard. This will allow you to locate the RAID controller, which is typically a dedicated card or chip on the motherboard.
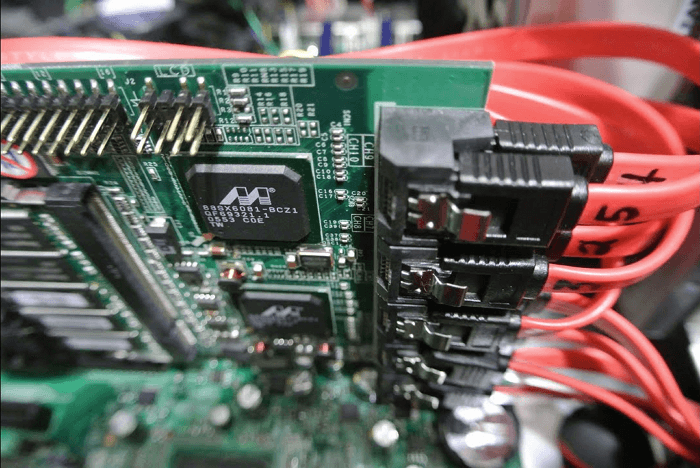
Step 2. Prepare the SATA cables.
Step 3. To ensure optimal performance and data redundancy, it's essential to properly configure the RAID (Redundant Array of Independent Disks) controller in your Server. This involves physically connecting the hard drives to the RAID controller, which can be done using a variety of methods depending on the specific hardware setup.
Step 4. Put the computer case back on, restart the Server computer, and press F2 to enter the BIOS settings.
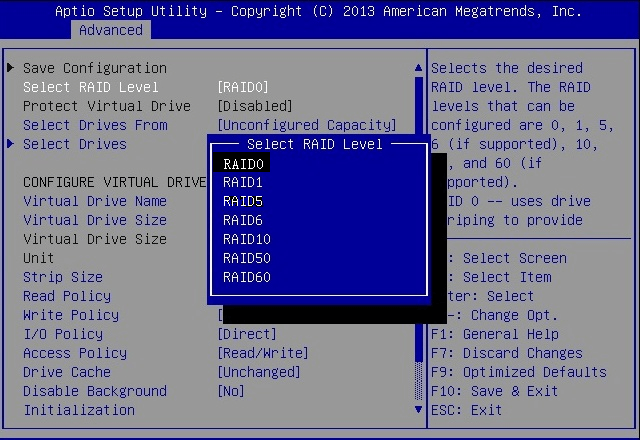
Step 5. Enable RAID in BIOS based on the motherboard model:
- To enable RAID mode on your SATA drives, go to Configuration > SATA Drives and set the chipset SATA Mode to RAID.
- To configure your computer's drive configuration for RAID, go to Advanced > Drive Configuration > Set Configure SATA to RAID.
- To configure the drive, go to Advanced, then Drive Configuration, and set the Drive Mode to Enhanced. Next, enable the RAID option.
You can set the disk mode to RAID 0 or RAID 1, depending on your needs. This allows you to configure your storage for optimal performance or redundancy.
Step 6. Press F10 to save the changes and exit.
To create a RAID 0 or RAID 1 disk mode, you need to wait for the process to complete after running the command, and then you'll have the disk mode created on your computer successfully.
Create Software RAID 0/1:
For small business users, using software to create RAID 0 or RAID 1 can be more efficient and cost-effective. To achieve this, reliable disk management software such as Qiling Partition Master can be used to help.
The software is efficient and reliable in configuring RAID 0 or RAID 1 configurations.
Qiling Partition Master Enterprise
Your trustworthy Windows Server disk manager.
- Extend System drive, combine/split partitions.
- Clone disk, migrate OS to HDD/SSD.
- Convert MBR to GPT, GPT to MBR, no data loss.
- 1-click adjust disk layout, create volumes at one time.
First, Install Disks
Connect or install all disks into your Server computer via SATA cables.
Next, Combine All Disks as Dynamic
The steps here are to combine all disk spaces by converting the disk from basic to dynamic, which is a feature created by Qiling Partition Master.
Step 1. Install and open Qiling Partition Master on your Windows computer.
Step 2. Select the disk you want to convert, right-click it and choose the conversion option.
- Basic to Dynamic: right-click a basic disk and select "Convert to Dynamic".
- Dynamic to Basic: right-click a dynamic disk and select "Convert to Basic".
Step 3. Click "OK" on the pop-up notice window and you will add this conversion to begin to convert the basic disk to dynamic or dynamic to basic.
Last, Create RAID 0 or RAID 1
You can create a Stripping volume for RAID 0 or a Mirrored volume for RAID 1 using Qiling Partition Master by following these steps:
Step 1. Launch Qiling Partition Master and right-click on the unallocated space on your hard drive or external storage device to select "Create".
Step 2. Adjust the partition size, file system (selecting the file system based on your needs), label, etc. for the new partition and click "OK" to proceed.
After following the full guide, you'll be able to set up and use RAID 0 or RAID 1 on your computer, which can enhance its performance and reliability.
Bonus Tip: Manage and Make Use RAID 0 and RAID 1 Disks
Aside from the guide on creating RAID 0 or RAID 1, here are some additional tips to help you manage and make full use of your RAID disks.
- Back up essential data or content to an external storage device or cloud drive using RAID 0, which is a data redundancy method that provides high performance and data protection by duplicating data across multiple drives.
- To avoid losing data when using a RAID disk setup, it's essential to have a backup plan in place. This can be done by regularly backing up your data to an external drive or cloud storage. Additionally, consider implementing a RAID setup with redundancy, such as RAID 1 or RAID 5, which can provide some level of protection against data loss.
- Use the clone tool if you need to upgrade RAID 0 or RAID 1 disk to even bigger drives. See: Clone RAID.
- When you lose data in a RAID 0 configuration, it's essential to seek assistance from reliable data recovery software. For guidance, you can refer to the article "Recover RAID 0 data" for assistance.
- To create partitions on RAID drives, you can use Qiling Partition Master.
Conclusion
We compared RAID 0 and RAID 1 on this page, highlighting their differences. You can also create both disk modes on your own using the guide provided, allowing you to experiment with and understand these two types of disks.
You can use Qiling Partition Master to create RAID 0 or RAID 1 on your computer by following the software RAID guide, which provides an easier way to do so.
Related Articles
- How to Partition Hard Drive Disk without Formatting
- [New] How to Add Unallocated Space to C Drive in Windows 11/10
- Extend Volume Greyed Out? Fix Can't Extend Volume in Windows [New]
- 4 Best Ways to Fix 'The Format Did Not Complete Successfully' Error
- How to Format 64GB SD Card for 3Ds Efficiently
Are you in constant need of more storage space for your games on your Nintendo 3DS? Find out how to format 64GB SD cards for 3DS efficiently in this guide. - How Do You Format a Micro SD Card [Step-by-Step Guide on Each Way]
This article gives detailed guides on how do you format a Micro SD card and introduces a professional format tool to help. It elaborates on why format SD card and how to format an SD card.