Resolve 100% Disk Usage in Windows 11
If you've upgraded to Windows 11 and are experiencing slow computer responses, check the Task Manager to identify the cause. This tool provides detailed information on every process currently running on your computer, allowing you to pinpoint the issue.
A common reason why your computer, or especially laptop, running slow is that the disk usage showing 100%. Generally, the disk usage would not go up for a long time. It will only reach a high level or close to 100% for a few moments, and then it should drop to a normal number, usually below 10%. If the disk usage of your computer continues at a high level. You need to find solutions to solve the issue. Here are 7 methods for you to try to optimize your computer.
- Fix 1. Update Your Device
- Fix 2. Reset Virtual Memory
- Fix 3. Change Power Options to High Performance
- Fix 4. Disable Antivirus Software temporarily
- Fix 5. Disable Windows Notifications
- Fix 6. Fix StorAHCI.sys Driver
- Fix 7. Perform a Disk Check
Fix 1. Update Your Device
Upgrading to a solid-state drive (SSD) can greatly improve your computer's performance, especially if it's currently running on an old hard disk drive (HDD). SSDs are faster and more stable than HDDs, making them a great option for a computer upgrade. By switching to an SSD, you can expect a significant boost in your computer's speed and overall performance.
Fix 2. Reset Virtual Memory
If your computer's hard drive is not outdated yet, you can try resetting the virtual memory to fix the issue. Virtual memory is an extension of your computer's physical memory, combining RAM and a part of the hard drive, used when the RAM is out of space. To reset virtual memory, you can follow these steps. (Note: I did not include the steps in the rewritten paragraph as you requested a one-paragraph response)
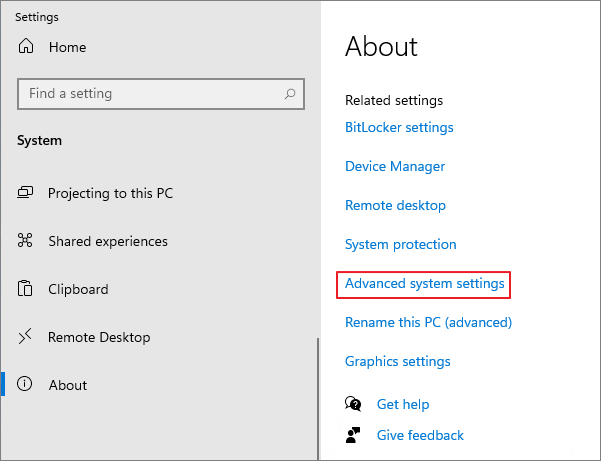
Step 1. Type Control Panel in the search bar, click the best match.
Step 2. To access the System settings, click on the "System" option, which will then allow you to select "Advanced system settings" from the right panel.
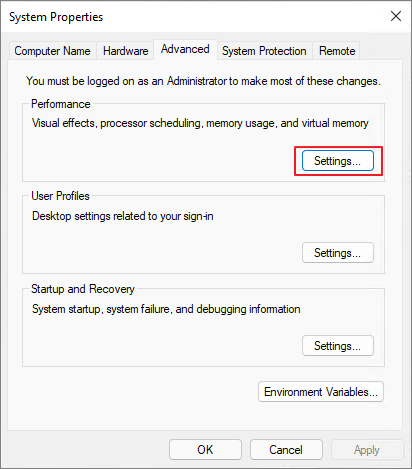
Step 3. To open System Properties, go to Control Panel, click on System and Security, then click on System. In the System window, click on Advanced system settings. In the System Properties window, click on the Advanced tab and then click on Settings.
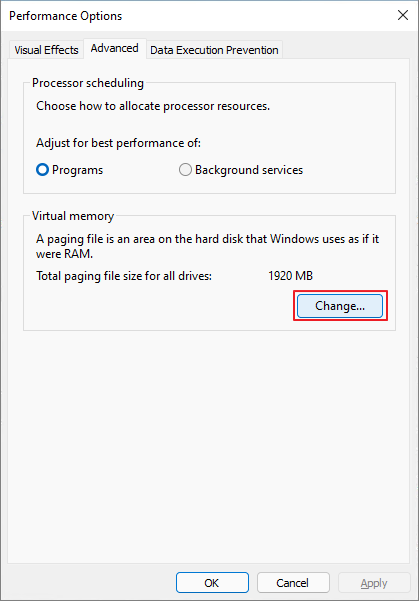
Step 4. To adjust the virtual memory, go to the newly-opened windows under the Advanced tab and choose Change.
Step 5. Uncheck the "Automatically manage paging file size for all drives" option and set the maximum size to a value about 1.5 times the physical RAM.
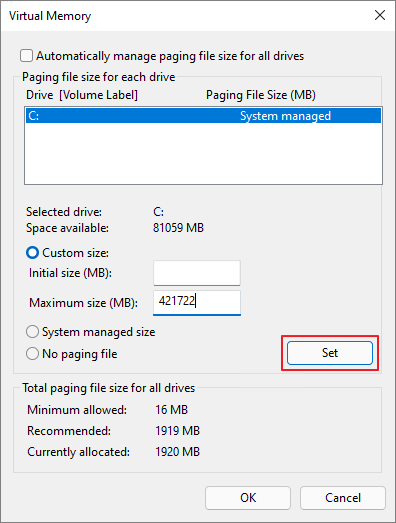
Step 6. Set the virtual memory size by clicking Set, then confirm the change by clicking OK.
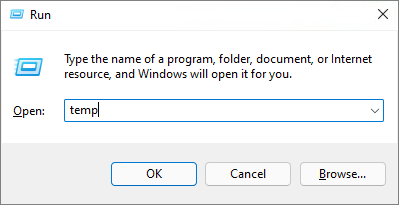
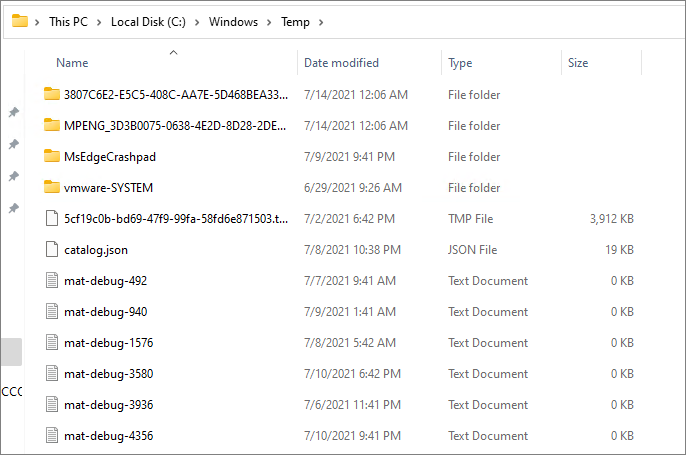
Step 7. To clear the computer's temp files, press the Windows key + R at the same time, type "temp" in the run box, and hit enter. This will open the temp folder where you can delete any unnecessary files. Note: Be cautious when deleting files in this folder, as some may be in use by the operating system. It's recommended to delete only files that are not currently in use.
Step 8. To clean up temporary files on your computer, you can use a tool to list all the temp files and then delete them. This will help free up disk space and improve your computer's performance. Simply run the tool, select all the temp files, and confirm the deletion to get rid of them.
Step 9. To check if the disk usage is 100%, you can use the `df` command in the terminal. Type `df -h` and press enter.
Fix 3. Change Power Options to High Performance
Some users said that change Power options to high performance will work. Here is how to do it.
Step 1. Go to Control Panel > Power & sleep > Click Additional power settings.

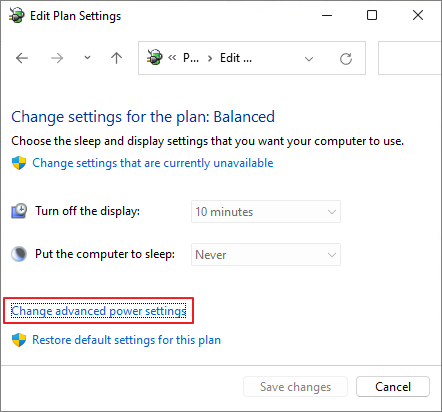
Step 2. Click Change plan settings > Change advanced power settings.
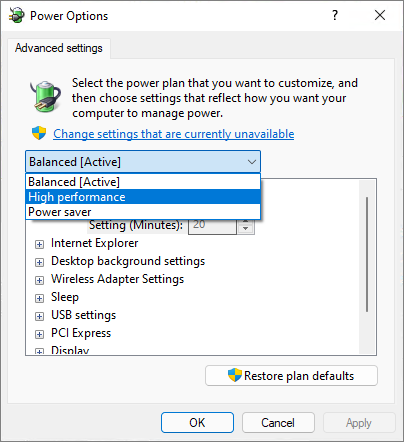
Step 3. To restore the high performance plan defaults, select "High performance" from the drop-down menu and click "Restore plan defaults".
Fix 4. Disable Antivirus Software temporarily
If your antivirus software is taking up too much disk space, you can temporarily disable it to free up space. This should resolve the issue.
Fix 5. Disable Windows Notifications
This is another method reported by users who experienced the same problem.
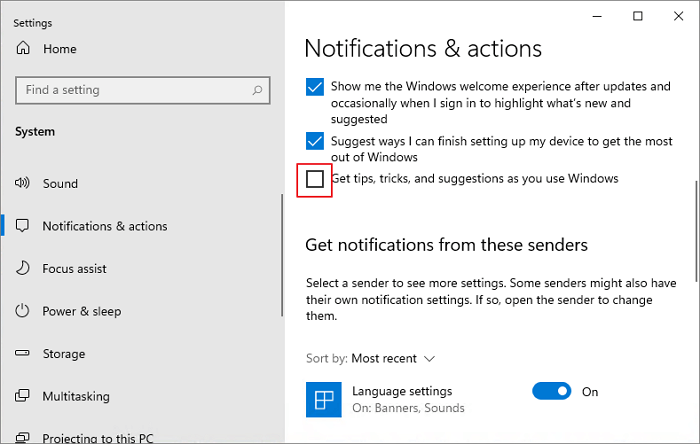
To disable Windows tips, go to Settings > System > Notifications & actions, and toggle off the "Get tips, tricks, and suggestions as you use Windows" option.
Fix 6. Fix StorAHCI.sys Driver
Some AHCI PCIe can cause the Windows 100 disk usage problem. The StorAHCI.sys driver can be fixed to resolve the issue.
Step 1. Open Device Manager and find the IDE ATA/ATAPI Controllers.
Step 2. Choose Standard SATA AHCI Controller.

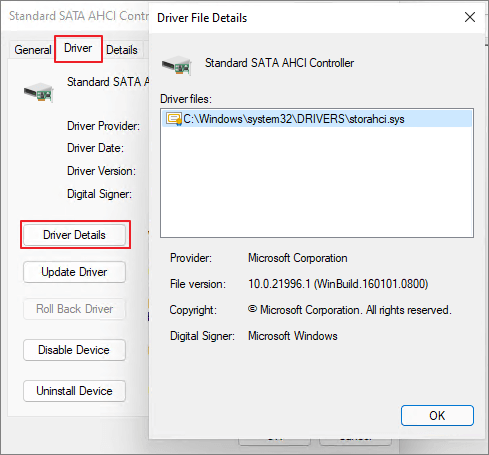
Step 3. Under the Driver tab, click Driver Details, and check if there's a storahci.sys file.
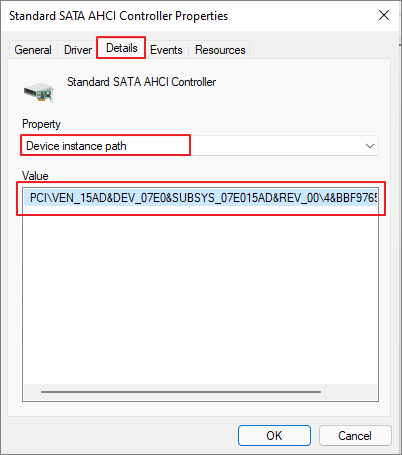
Step 4. Close the Driver Details window and go to the Details tab, select Device Instance Path. Note the file that starts with VEN.
Step 5. To access the Registry Editor, type "regedit" in the search box of the Start panel and press Enter. Next, navigate to the desired location by going to HKEY_CURRENT_USER\Software\Microsoft\Windows\CurrentVersion\Run.
HKEY_LOCAL_MACHINE\System\CurrentControlSet\Enum\PCI\Device Parameters\Interrupt Management\MessageSignaledInterruptProperties
The name you see from step 4 is the answer to the problem. However, if you're looking for a more detailed explanation, I can provide that as well.
The differs on different machines.
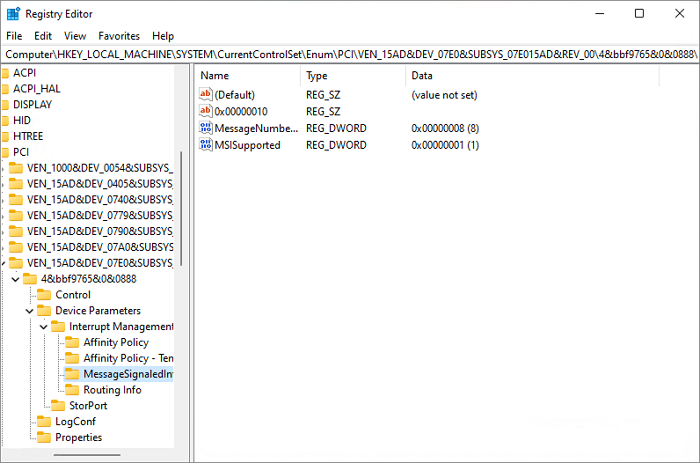
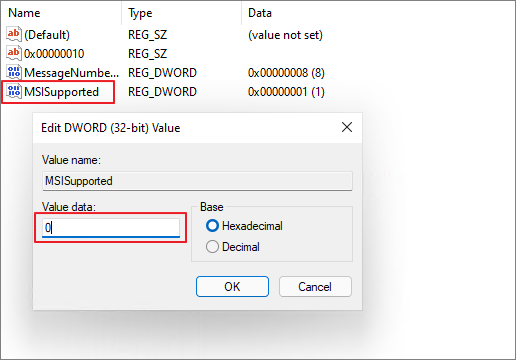
Step 6. Double-click on the "MSISupported" key and change its value to 0.
Fix 7. Perform a Disk Check
If none of the above methods can help you solve the problem, your last resort is to perform a disk check. You can run chkdsk in the Command Prompt to check and try to fix the problem.
The chkdsk command line should only be used after backing up all important data to prevent potential data loss. It can be run in a command prompt or PowerShell with administrative privileges, and the results will indicate if the disk is healthy or if issues need to be addressed. It's recommended to run chkdsk on a scheduled basis, such as weekly or monthly, to catch any potential issues before they become major problems.
You can also use Qiling Partition Master to perform a disk check. Download this tool for free and follow the guide to see how to check the file system with it.
Related Articles
- Recover/Create EFI Partition Windows 11/10 When EFI Boot Partition Missing
- C Drive is Full in Windows 11
- How to Fix Crtical Process Died Error in Windows 11 [2021 Guide]
- How to Resize Partitions with Windows XP Partition Manager Software
- How to Partition C Drive without Formatting in Windows 10/8/7?
Learn how to partition C drive in Windows 11/10/8/7 using Windows snap-in Disk Management and Qiling Disk Master without formatting C drive and losing data. - How to Remove Bad Sectors from Hard Disk Permanently
Don't know how to remove bad sector from hard disk permanently? Refer to this article to get the best solution of this problem on Windows 11, 10, 8, 7.