Full Guide to Check and Fix Disk Error in Windows 11
| Workable Solutions | Step-by-step Troubleshooting |
|---|---|
| #1. Run Disk Check in Properties | Step 1. Open the File Explorer tab and click on This PC. Locate the system disk, right-click on the HDD/SSD...Full steps |
| #2. Run CHKDSK Command via CMD | Step 1. Press the Windows key, type cmd in the search box, and right-click on Command Prompt to select Run...Full steps |
| #3. Run SFC Command | Step 1. Search for cmd in the Windows search box. From the displayed results, locate Command Prompt...Full steps |
| #4. Run Qiling Partition Master | Step 1. Open Qiling Partition Master on your computer. Then, locate the disk, right-click the partition you want to check...Full steps |
Complete Guide to Check and Fix Disk Error in Windows 11 - Qiling
To check disk errors in Windows 11, go to Settings > System > Storage > This PC, and click on the "Properties" button next to your hard drive. Then, click on the "Check" button under the "Tools" section to run a disk check. Alternatively, you can also use the Command Prompt or PowerShell to run the built-in Check Disk (chkdsk) utility.
- Disk or storage device suddenly becomes inaccessible
- Windows report errors were detected on the target disk
- The storage device or hard drive volumes do not display as average volumes, such as unknown, raw, etc., due to incorrect volume label or file system type, or because the volume is not properly initialized or formatted.
If you're experiencing issues with your Windows 11 system, you might need a guide on checking and fixing disk errors. Fortunately, we have compiled the best methods for you, which are practical, easy to follow, and work on the older version of Windows as well.
How Do I Check Disk Errors in Windows 11?
To check and fix disk errors in Windows 11, you can use one of the following four practical methods. Firstly, you can use the built-in Check Disk (chkdsk) tool to scan and repair disk errors.
- 1. Run Disk Check in Properties in Windows 11
- 2. Run CHKDSK Command Using CMD in Windows 11
- 3. Run SFC Command Using CMD in Windows 11
- 4. Run Third-Party Disk Checker Software to Fix Disk Errors Windows 11
Before using either Method 2 or Method 3, which are more technical and best suited for experts, users are advised to exercise caution. These methods, along with the others, have been tested and proven to be effective.
#1. Run Disk Check in Properties in Windows 11
Running Disk Check on your Windows 11 computer is relatively easy. To run CHKDSK, right-click on the Start button, select "Computer Management", then click on "Disk Management" in the left panel. In the right panel, right-click on the drive you want to check and select "Properties", then click on the "Tools" tab and select "Check" under the "Error-checking" section.
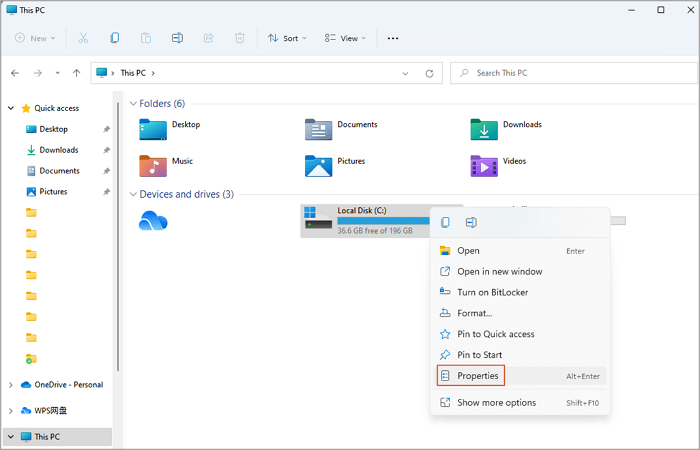
Step 1. Open the File Explorer tab, click on This PC, locate the system disk, right-click on the HDD/SSD, and select Properties.
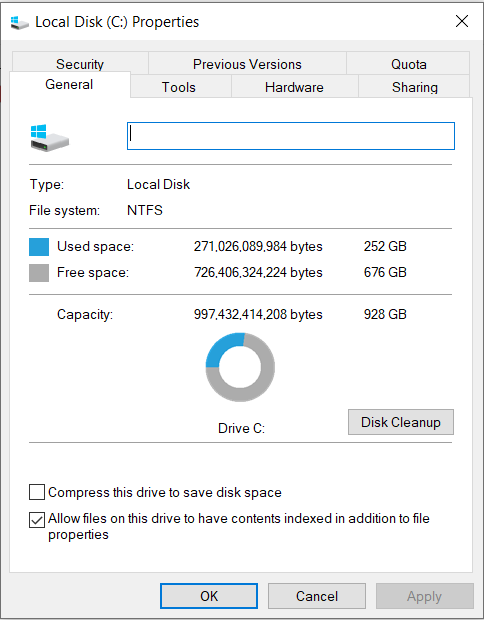
Step 2. The properties window opens with heading tabs such as Security, Previous Versions, Quota, and Sharing. The Tools tab is clicked, followed by selecting the Check option under Error-checking.
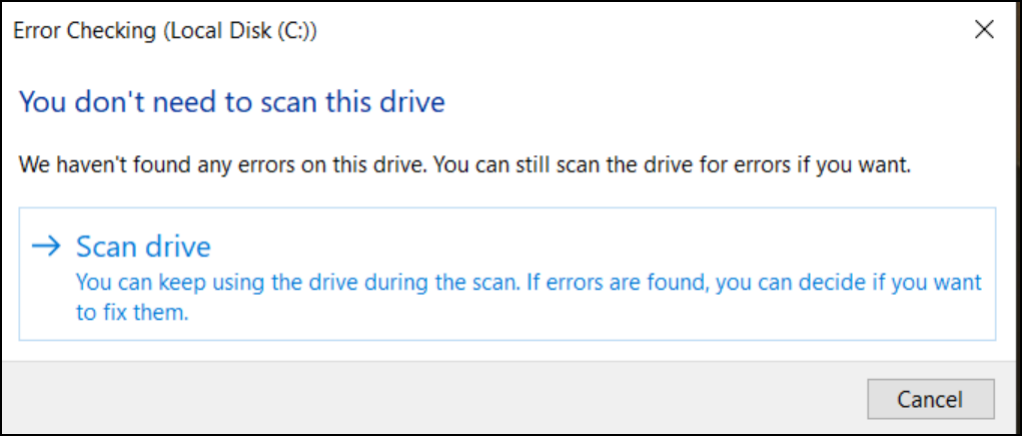
Step 3. To find disk errors in Windows 11, choose the "Scan drive" option, allowing you to continue using the disk while the scan is performed.
Step 4. When the scan completes, select "Show Details" to view the CHKDSK activities under Event Viewer.
#2. Run CHKDSK Command via CMD to Check and Fix Disk Errors in Windows 11
To check and fix disk errors in Windows 11, you can run the CHKDSK command via the Command Prompt (CMD). This method is effective in fixing unknown, inaccessible, RAW, or other disk errors. You simply enter the designated command lines and wait for the process to complete.
Step 1. Press the Windows key, type cmd in the search box, and right-click on Command Prompt to select Run as administrator.
Step 2. The command prompt should open. Enter the following command and hit Enter.
chkdsk [drive letter]: /f /r /x
Replace the "drive letter" with the specific name of the targeted HDD/SSD.
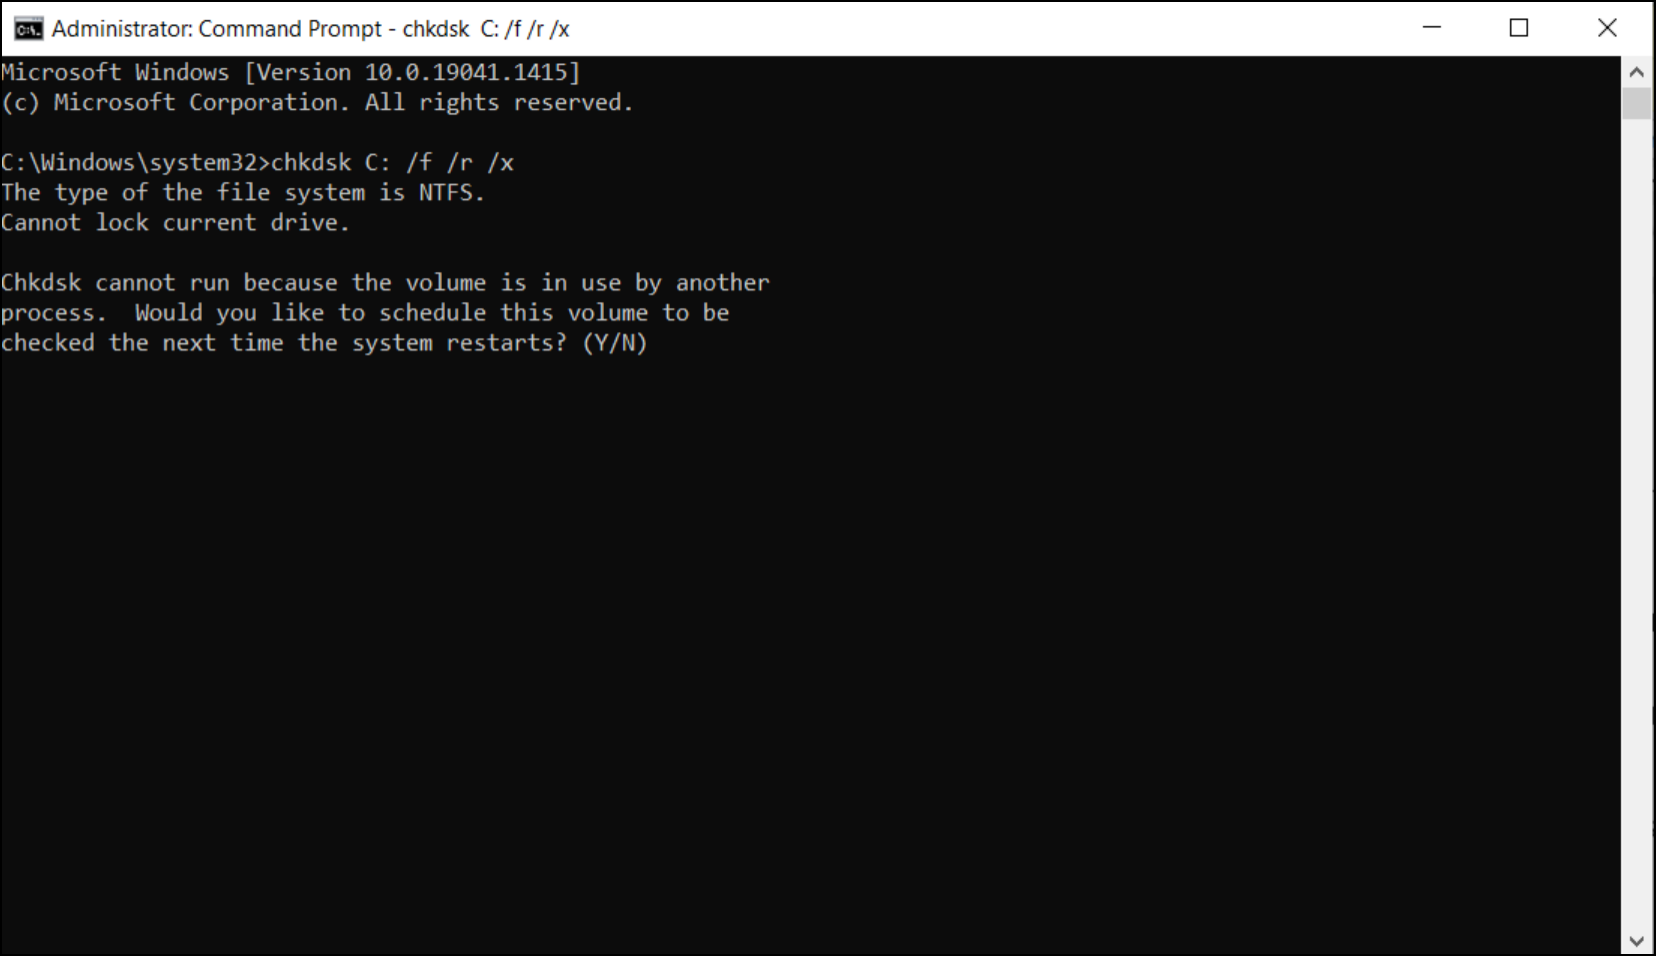
Step 3. If Windows is installed on the targeted disk, you'll receive a message asking if you want to run CHKDSK on the next system boot and restart the computer. You'll need to type 'Y' to accept this and proceed.
Step 4. Wait for CHKDSK to finish running, and restart the computer again.
#3. Run SFC Command to Repair Disk Errors Windows 11
System File Checker (SFC) is a built-in tool in Windows 11 and earlier versions that scans for disk errors, specifically checking for missing or corrupted system files. The SFC command locates the Windows image and replaces any problematic files it finds.
To run the SFC command and repair disk errors in Windows 11, open Command Prompt as an administrator, type "sfc /scannow" and press Enter. This command will scan all protected system files and replace any corrupted ones.
Step 1. To run the Command Prompt as an administrator, search for "cmd" in the Windows search box, locate the Command Prompt result, and right-click it to select "Run as administrator".
Step 2. To open the Command Prompt, select "Yes" on the prompt. This will open the Command Prompt window.
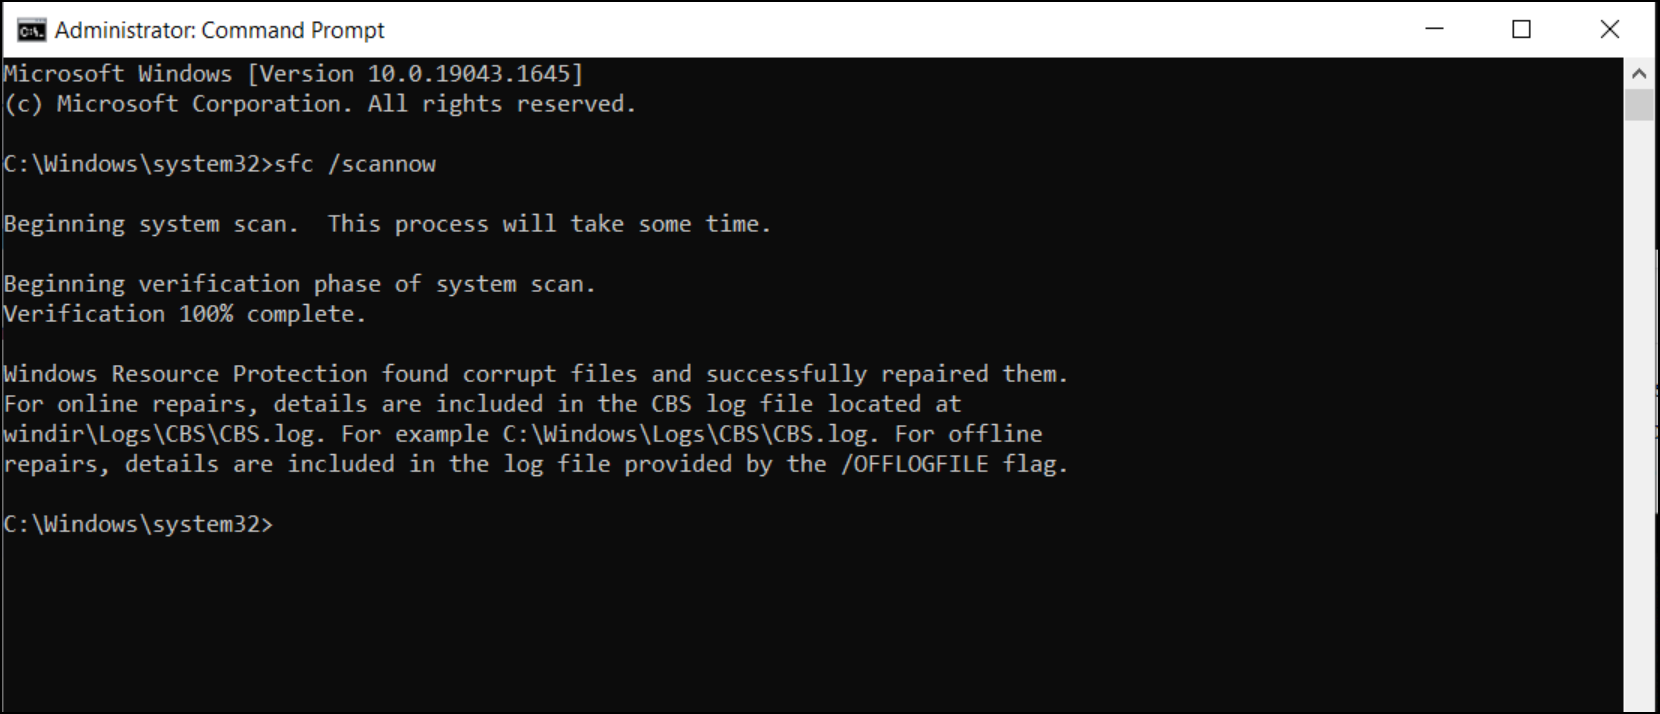
Step 3. To run the System File Checker (SFC) tool, open the Command Prompt window, type 'sfc /scannow', and press Enter. This command will scan and replace any corrupted system files with a fresh copy from the Windows installation media.

Step 4. Wait till the process gets to 100%. You should get one of these messages: "Windows Resource Protection did not find any integrity violations", "Windows Resource Protection found corrupt files and successfully repaired them", or "Windows Resource Protection found corrupt files but was unable to fix some of them." Close the command prompt and restart the computer after that.
Step 5. You should run the System File Checker (SFC) tool to scan and replace corrupted system files, and then restart your computer. If the issue persists, you may need to run the DISM tool to scan and repair the integrity of Windows components. If the issue still persists, you may need to run the System File Checker (SFC) tool with administrative privileges to scan and replace corrupted system files, and then restart your computer. If the issue still persists, you may need to run the DISM tool with administrative privileges to scan and repair the integrity of Windows components.
- 1. Run SFC scan again.
- 2. Use the Deployment Image Servicing and Management Tool (DISM) to fix errors with the disk image. DISM is a command-line tool that can be used to repair corrupted or damaged Windows images.
- 3. Restore your computer.
- 4. Reset your Windows 11 computer.
#4. Run Third-party Disk Checker Software to Repair Disk in Windows 11
Qiling Partition Master is a tool that fully replaces CHKDSK and Disk Checking features in Windows 11, checking and fixing disk errors, and also allows resizing, formatting, wiping, or creating new disk partitions.
Get started today by visiting the official page to download and follow the guide below to check and fix errors in Windows 11.
Step 1. Open Qiling Partition Master, locate the disk, right-click the partition to check, and choose "Advanced" > "Check File System".
Step 2. In the Check File System window, select the "Fix the error on the disk" option and click "Proceed".
Step 3. The software will begin checking your partition file system on your disk, then click "Finish" once it's completed.
Conclusion
To check and fix disk errors in Windows 11, you can run the Disk Checker via the Command Prompt or Windows properties. This method also works on other Windows versions. The Disk Checker can be accessed through the Command Prompt by typing "chkdsk" and following the prompts, or by right-clicking on the drive in Windows Explorer and selecting "Properties" to access the "Tools" tab. These methods provide a simple and effective way to identify and resolve disk errors.
You can also run a hard disk health check and fix disk errors using Qiling Partition Master, which offers an automatic process to repair and check disk errors in Windows 11. This is a user-friendly option.
Related Articles
- How to Fix Can't Shrink Volume in Windows 11/10/8/7
- What Is Surface Test? How to Do Disk Surface Test HDD/SSD on Windows 10
- How to Reformat Windows 11/10 PC/Laptop | In-depth tutorial
- Windows 11/10 Search Not Working 2022? Fix It Now!
- How to Find Hard Disk Serial Number in Windows 10
Do you want to check the serial number of your disk without taking out the hard drive? If so, continue reading, and I will tell you how to find hard disk serial number in Windows 10 in an easy way. - How to Fix USB Is Write Protected or Read Only, Help
This article can explain why write protection or read-only happen and provide practical solutions to help you remove the write protection and get the USB back to use.