Create Windows 10 Recovery USB (Including Windows 11, 8.1, 7)
Ⅰ. What Is a Windows 10 Recovery USB?
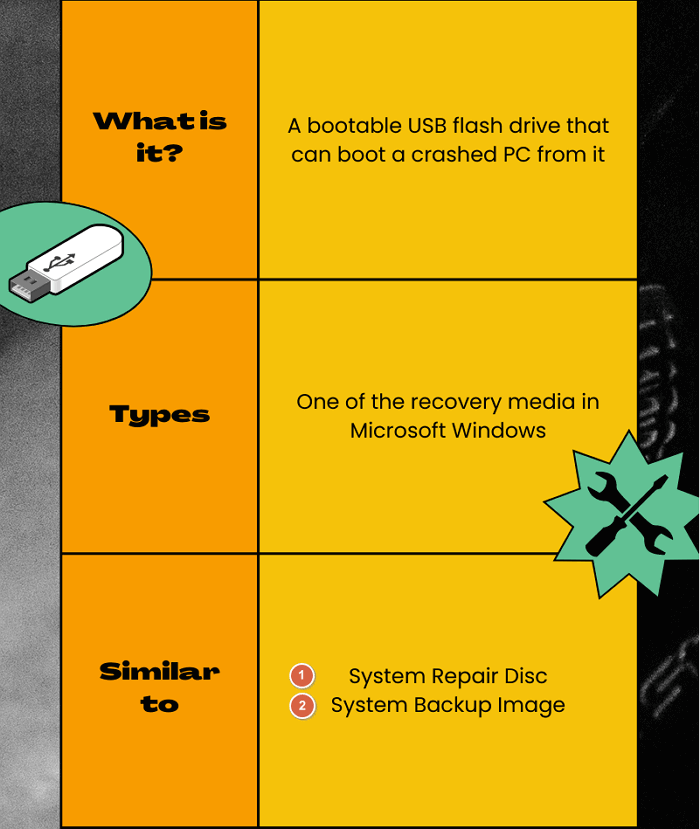
A Windows 10 recovery USB, disk, or drive is a bootable drive containing essential Windows installation files, providing access to advanced startup options like System Restore, Startup Repair, Safe Mode, and Command Prompt. It's essentially a complete copy of your Windows 10 environment kept on an external source, such as a USB flash drive.
A Windows 10 recovery USB drive is a bootable drive that allows you to repair or reinstall Windows 10 on a computer that's experiencing hardware failure or system corruption, effectively reviving it.
LEARN MORE
There are multiple types of recovery media available in Windows 10, including a Windows 10 recovery USB, which is a bootable USB drive that can be used to recover or reinstall Windows 10. You can find more information about these options and tools by following the linked article. Additionally, you can also use other types of recovery media, such as a Windows 10 recovery DVD, or a Windows 10 recovery ISO file.
Ⅱ. Recovery Drive vs. System Repair Disc
A system repair disc is an older type of recovery media that was used in Windows XP and earlier versions. It's a physical disc that contains a copy of the Windows operating system's system files, which can be used to repair or restore a Windows installation if it becomes corrupted or crashes. In contrast, a recovery USB drive is a more modern and versatile tool that can be used to recover a Windows installation from a USB drive, and is often used in conjunction with Windows 10 and later versions.
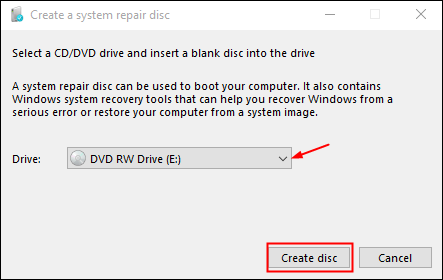
A system repair disc is a bootable CD/DVD that comes with Windows installation files and recovery tools, allowing you to troubleshoot startup issues and restore your computer from a system image backup.
The difference between a Windows 10 recovery USB and a system repair disc lies in their creation and usage. In Windows 8.1, 10, and 11, a recovery USB is created through the "Create a recovery drive" option, whereas in Windows 7, a system repair disc is created using the "Windows Backup and Restore" tool. Furthermore, a recovery USB drive can be used with a portable USB flash drive or pen drive, whereas a system repair disc requires an old-fashioned CD/DVD disc.
A recovery drive setup allows users to back up system files, enabling the use of a recovery drive to reinstall Windows, whereas a system repair disc can be used on another computer with the same OS version for recovery.

LEARN MORE
The difference between a system repair disc and a recovery drive is that a system repair disc is a physical disc that contains a copy of the system files and can be used to repair or reinstall Windows, whereas a recovery drive is a USB drive that contains a copy of the system files and can be used to repair or reinstall Windows, but is more portable and can be used on multiple computers.
Ⅲ. Recovery Drive vs. System Image Backup
A system image backup is a complete backup of your computer's operating system, including all installed programs, settings, and data. It's essentially a snapshot of your entire system at a specific point in time, which can be restored in case of a system failure, malware infection, or other issues. Unlike a Windows Recovery Drive, which only contains the necessary files to restore the operating system to a working state, a system image backup includes all user data, installed programs, and settings, making it a more comprehensive backup solution.
A system image backup is a snapshot of your Windows environment, including programs, settings, and files, allowing you to restore your computer to a previous state if needed.
In Windows 10, you can create a system image backup using the Backup and Restore tool, which stores the large image on an external hard drive or network location. This allows you to roll back to a previous state if your computer crashes completely.
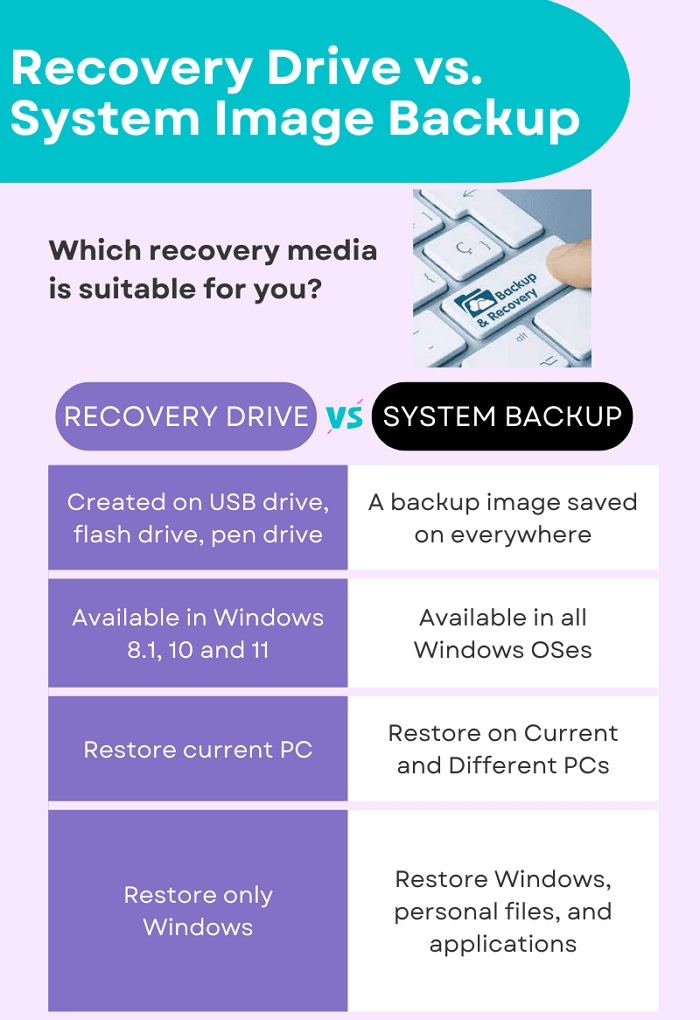
Windows Recovery Drive and System Image Backup are both used for Windows reinstallation, but they serve different purposes. A Windows Recovery Drive is a bootable USB drive that helps troubleshoot Windows startup issues, whereas a System Image Backup is an image file of your Windows environment that allows you to restore your computer to a previous state.
A Windows Recovery Drive contains only Windows installation files and recovery tools, whereas a System Image Backup includes all programs, settings, and files. If you only want a clean Windows 10 reinstall, a Recovery Drive is sufficient, but for a full system restore, a System Image Backup is needed.
LEARN MORE
In modern Windows, system backup images have become the preferred method for recovery over traditional recovery USB drives, offering more advanced capabilities.
IV. How to Create a Windows 10 Recovery USB Drive (with Pictures)
* Microsoft Windows 8.1, 10, and 11 has the default option to let users create a recovery USB for unbootable Windows troubleshooting, so the following guide can be applicable to the covered operating systems. Microsoft suggests Windows 7 users create a system repair disc or use third-party backup and recovery software.
To create a Windows 10 recovery USB drive, you'll need a blank USB drive with at least 16 GB of free space, a computer with Windows 10 installed, and an administrator account. You can use the built-in tool called "Media Creation Tool" to create the recovery USB drive, or a third-party tool like Rufus. Simply download the tool, run it, select the USB drive as the media type, and follow the on-screen instructions to create the recovery drive. Once you've created the recovery drive, you can use it to boot up your computer and access the recovery options if you encounter any issues with your Windows 10 installation.
USB Requirements:
- 16GB or larger USB flash drive with empty storage space
- If you're using a used USB drive, back up its contents first, as the creation process will erase any data on the drive.
- Keep the USB flash formatted with FAT32
- An internet connection
To create a recovery drive, you can directly search for the "Recovery Media Creator" in your computer. This will open a window where you can select the drive you want to use and the media type you want to create. From there, you can follow the prompts to create your recovery drive.
Step 1. To create a recovery drive in Windows 10, type "create a recovery drive" in the Search box and click "Open" to proceed. This will allow you to create a recovery drive.
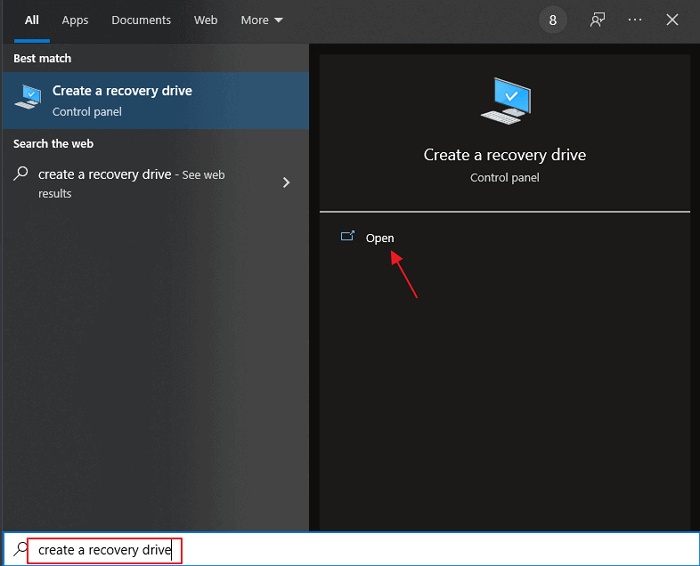
Due to the different build version of Windows 10, if you don't see the result in the picture, try to enter "winver" in the search bar to check your Windows 10 version.recovery" instead, this will bring you to the Control Panel, where the "create a recovery drive" option is located. Refer to the screenshot.
Figure 1.
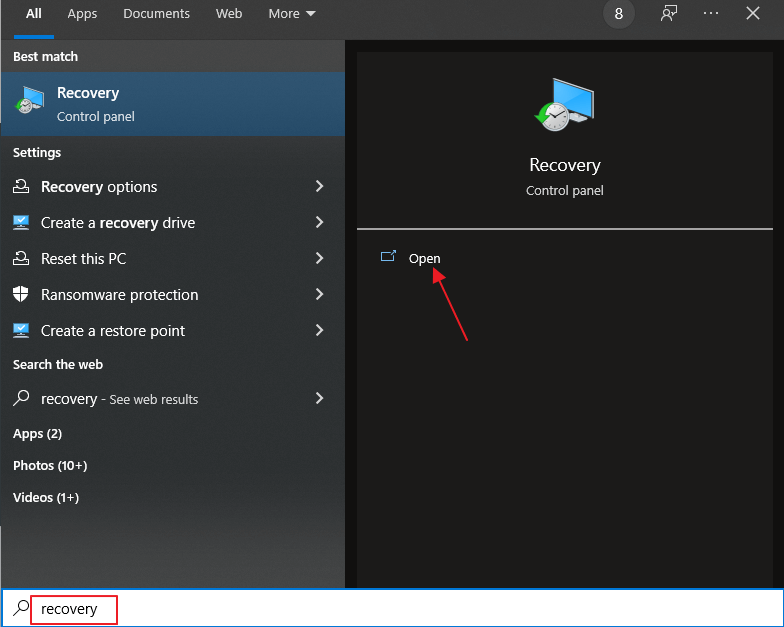
Figure 2.
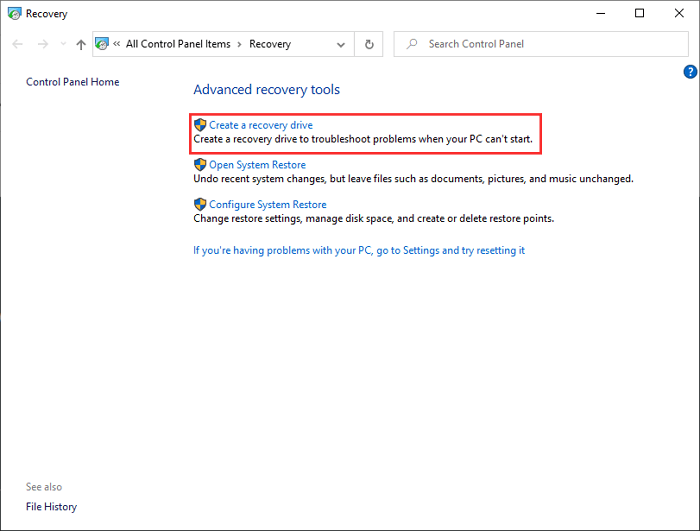
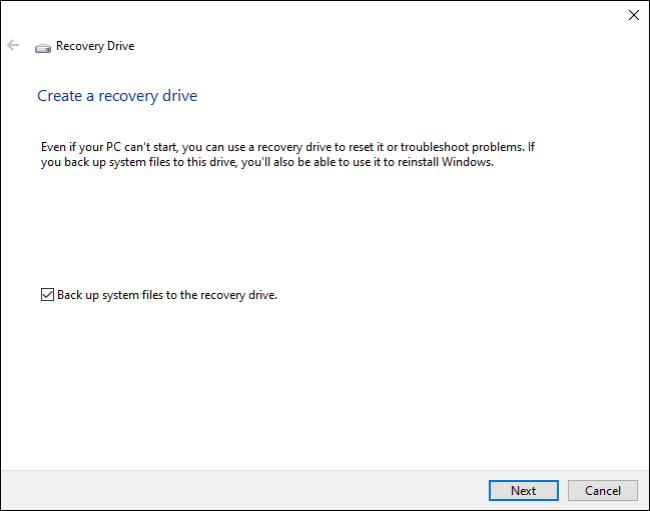
Step 2. After clicking "Create a recovery drive", you'll be guided through a setup wizard. You'll be able to reset or troubleshoot your PC even if it can't start, and use the drive to reinstall Windows if you've backed up system files to it. Make sure to select the option to "Back up system files to the recovery drive" and then click "Next".
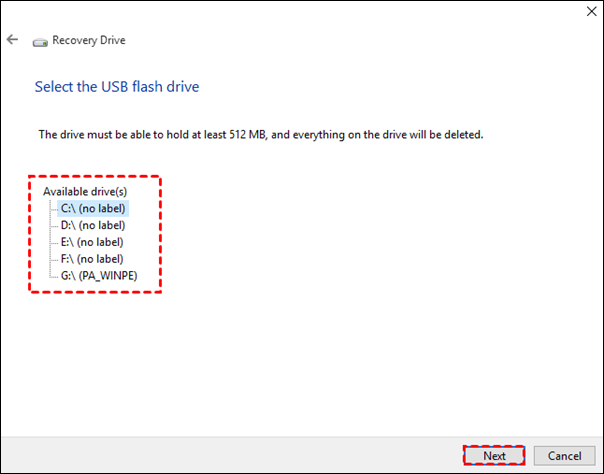
Step 3. Connect your prepared USB flash drive, select it from the list and confirm to proceed. Click "Next".
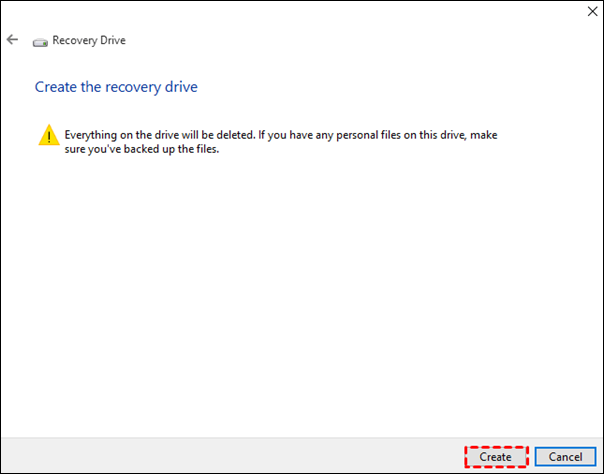
Step 4. This is the last chance to copy important files from the USB flash drive before everything on it will be deleted. Click "Create".
Tip: How long does it take to create a Windows 10 recovery USB?
The process of creating a recovery USB drive takes around 15-60 minutes, depending on your internet speed and the type of USB port you're using, with USB 2.0 taking longer than USB 3.0.
Ⅴ. How to Repair Windows 10 with a Recovery USB Drive
If your Windows PC won't turn on, plug in a recovery USB drive and boot from it. This will take you to advanced recovery settings, where you can run an automatic repair.
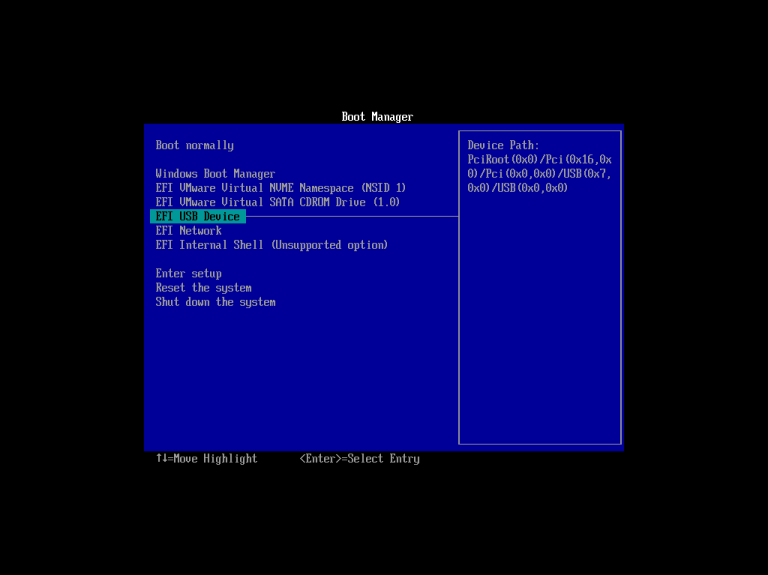
Step 1. If your PC automatically boots from the recovery USB drive, you'll see the Windows recovery screen. If not, press the specific boot menu key (usually F2, F10, Esc) when turning on your PC to access the boot menu. Select the USB flash drive as the boot drive to power on your computer. If you're unsure which key to press, search your PC's model number in Google to find the correct key. Once you've accessed the boot menu, select the USB drive to boot from it.
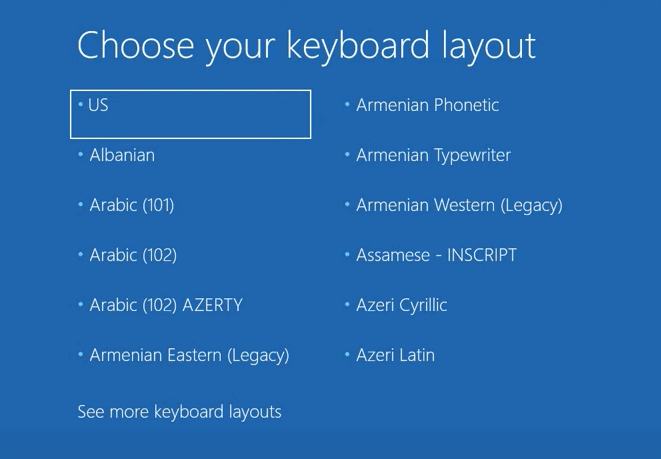
Step 2. Select the keyboard layout and proceed.
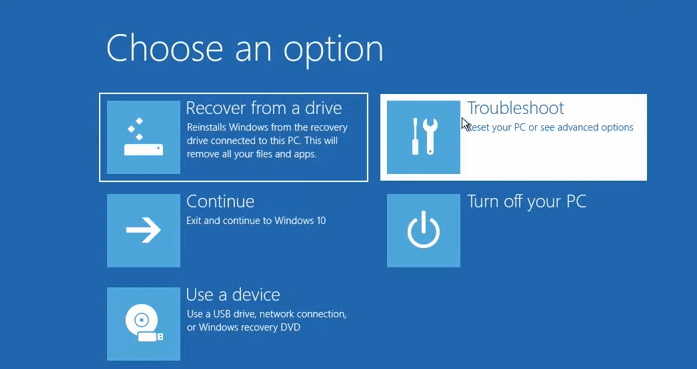
Step 3. If you want an automatic repair at first, click "Troubleshoot" to start the process.
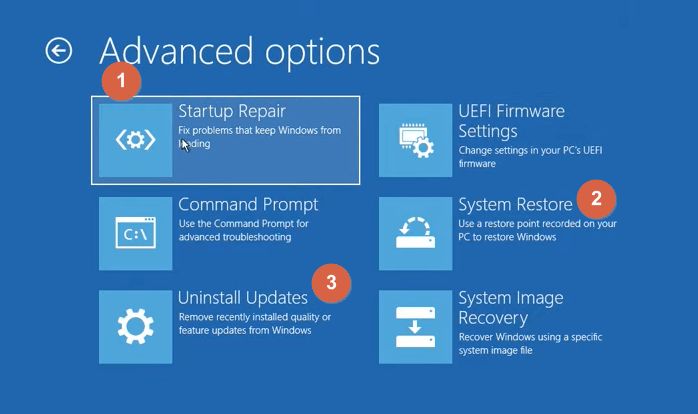
Step 4. Windows has a built-in troubleshooting feature called Advanced options that can help resolve startup issues. You can try Startup Repair, which attempts to fix the problem by determining what's stopping Windows from loading, or System Restore, which takes you back to a previous working state. If you suspect a recent system update is the cause, you can also try Uninstalling Updates. These options can help resolve startup issues.
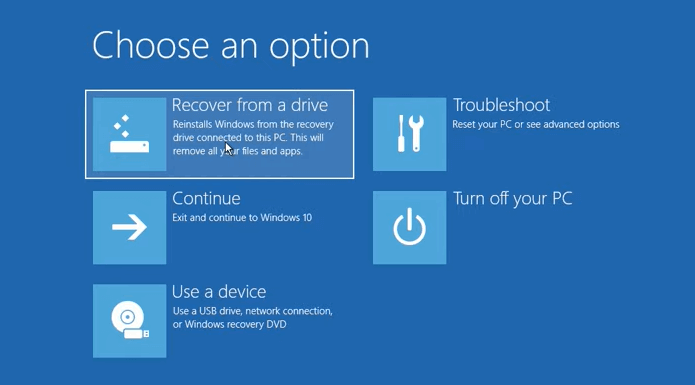
Step 5. If none of the three options work for you, you can go back to the Troubleshoot menu and choose the "Recover from a drive" option. This will completely wipe your computer and restore it to its original state, so use this option with caution and only as a last resort.
Ⅵ. Can You Make Windows 10 Recovery USB for Another Computer?
If your Windows 10 system crashes before creating a recovery drive, you can try booting from a Windows installation media (such as a USB drive or CD/DVD) to access the recovery options and potentially repair or restore your system. Alternatively, you can use a third-party recovery software or a Linux-based live CD to try and recover your system. However, if none of these methods work, you may need to perform a clean installation of Windows 10.
You can create a recovery drive from a working PC, boot from it, and perform a recovery task or reinstall the OS. Microsoft offers a native method to create a Windows 10 installation media with a USB, DVD, or ISO file for another PC. However, a better and faster way is to use Qiling Backup to restore a system image to another computer.
LEARN MORE
To create a recovery USB drive for Windows 10 on another computer, you can either use the built-in tool called "Media Creation Tool" or use a third-party tool like Rufus. The Media Creation Tool is a free utility provided by Microsoft that allows you to create a recovery drive for Windows 10, and it can be downloaded from the official Microsoft website. Alternatively, you can use Rufus, a free and open-source tool that can create a recovery drive for Windows 10, as well as other operating systems.
To begin with, you need to download the Windows backup software on a working PC.
An overall introduction to Qiling Backup:
- Create full/incremental/differential backup
- This software enables users to create a backup of their entire hard drive, a specific partition, individual files, emails, and even the operating system, providing a comprehensive and flexible backup solution.
- Save backup images on a network drive or cloud storage so you can access them remotely.
- To clone a failed computer hard drive on a new working hard drive without losing data, you can use a software tool specifically designed for this purpose. One popular option is Qiling Backup, which allows you to create a bit-for-bit copy of the failed hard drive, including all files, folders, and operating system configurations.
- To create a WinPE bootable rescue media, you can use the Windows Assessment and Deployment Kit (ADK) to create a bootable USB drive or CD/DVD. This allows you to boot into a minimal Windows environment, which can be used to run system restore and potentially recover your crashed computer.
To make a recovery USB drive for another computer and restore the system, follow these steps: create a bootable USB drive using a tool like Rufus or PowerISO, download the recovery image for the desired operating system (e.g.
Step 1. Create an emergency disk on a healthy computer
To save your time and energy, we suggest creating an emergency disk on a USB or external hard drive instead of a healthy computer using Qiling Backup.
1. Connect an empty USB flash drive or external hard drive with over 100GB space to your PC.
2. Run Qiling Backup and click "Tools > Create bootable Disk".
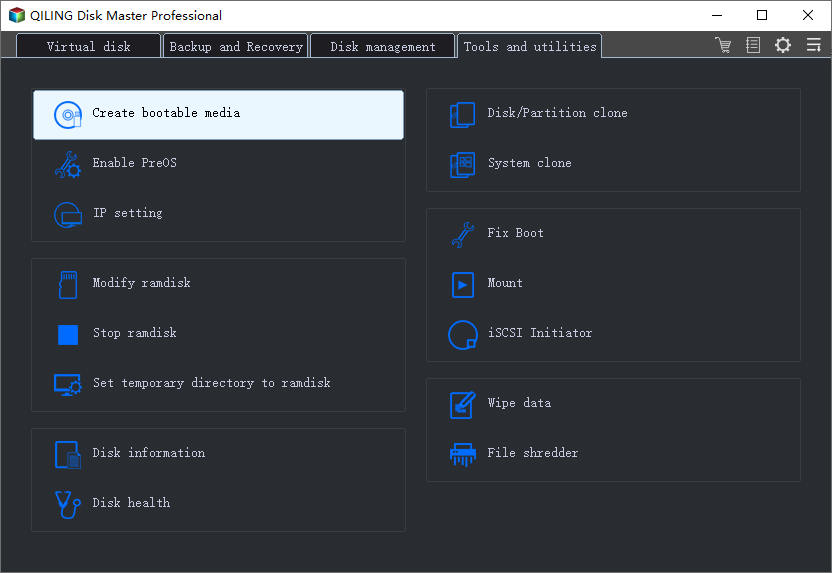
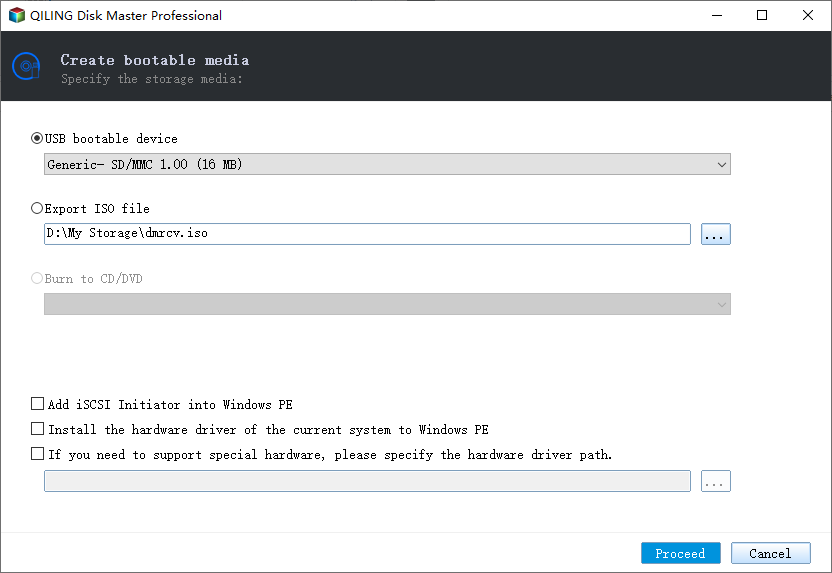
3. Choose USB as the disk location to create an emergency disk that will help boot the computer when it fails to boot or restore the system to a new PC.
4. Click "Proceed".
Step 2. Create a Windows system image backup for restoring to dissimilar hardware
1. Run Qiling Backup on the healthy computer and click "System backup" on the Backup and recovery page to back it up.
2. To create a system image on a Windows OS, select the operating system and choose the USB flash drive containing the emergency disk as the destination disk to save the system image.
If you're concerned about data loss from saving the system image to the emergency disk drive, you can also save the system backup to another empty external hard drive with over 100GB of free space.
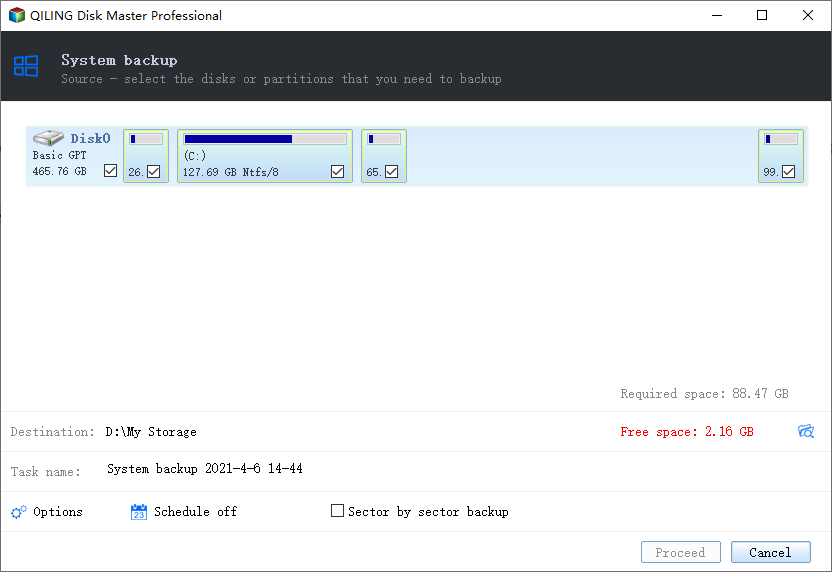
To create a full backup of your Windows system and all installed programs, applications on your C drive, you can use the built-in backup feature to copy everything to a selected device. This will ensure that all data, including installed programs and applications, is safely backed up.
3. To begin creating a system backup image, click the "Proceed" button. This will initiate the backup process, which will capture the current state of the system, including all installed applications, settings, and data.
Step 3. Boot the dissimilar hardware/computer from Qiling Backup emergency disk
1. Connect the USB flash drive or external hard drive with the system backup image and emergency disk to the new computer.
2. Restart PC and press F2/F8 to boot into BIOS.
3. To change the boot drive, you need to set the computer to boot from the Qiling Backup emergency disk.
Then you'll enter Qiling Backup main interface.
Step 4. Transfer and recover the system to dissimilar hardware or new computer
1. On Qiling Backup main window, select backup image and click "Recovery".
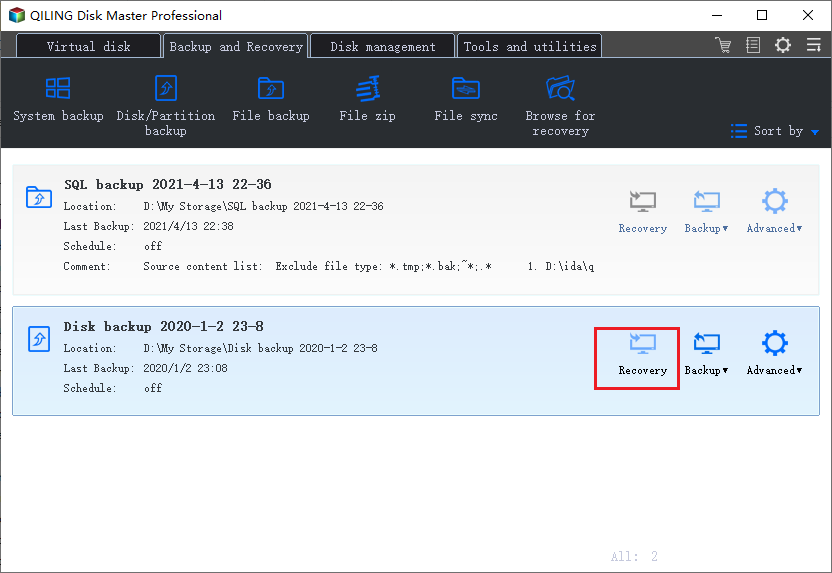
2. The system image on your drive is selected by clicking on it and then clicking the "Next" button to proceed.
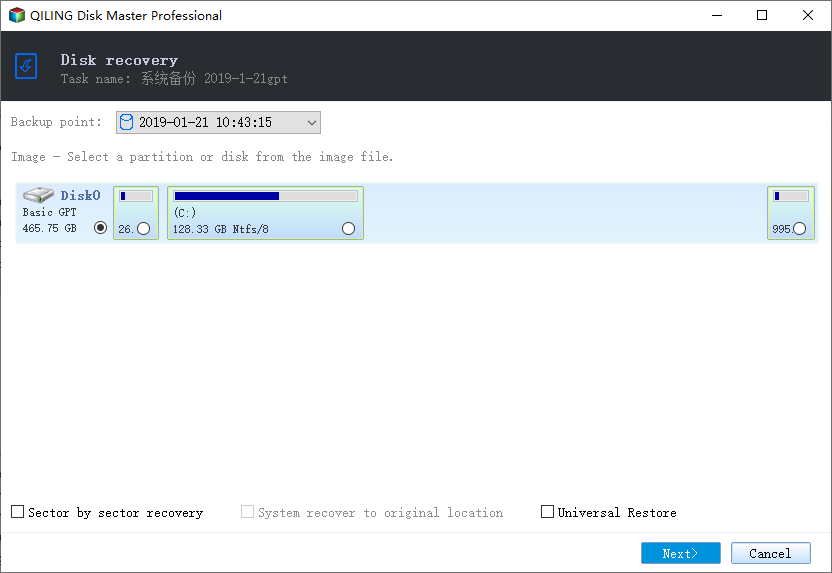
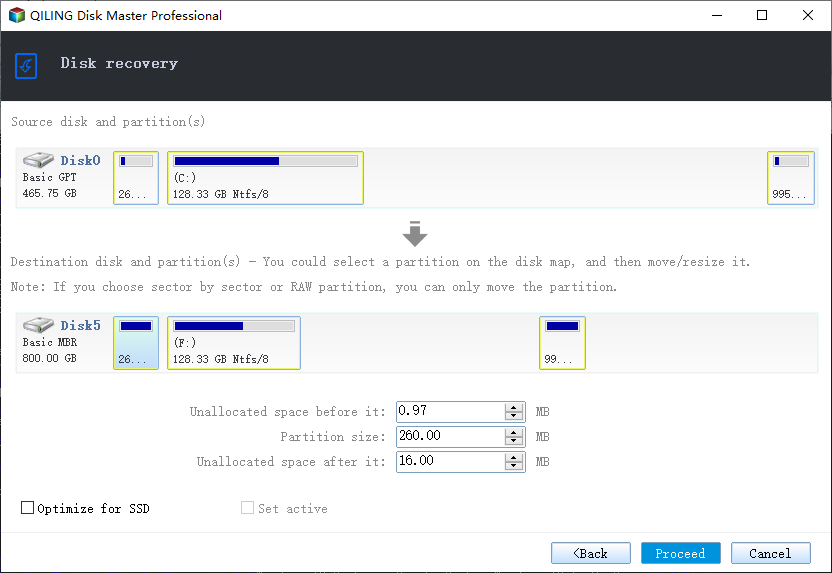
3.To begin the transfer process, click "Proceed" to start moving system and some installed programs from the C: drive on the old computer to the new hardware computer.
Step 5. Restart PC with transferred system
1. Change boot sequence in BIOS to set the computer to boot up from the drive with the transferred system.
2. Save all changes and restart your computer.
3. To ensure a seamless transition to the new computer, update all drive drivers and programs to guarantee that everything will work smoothly and efficiently.
Ⅶ. How to Fix Windows 10 Can't Create a Recovery Drive
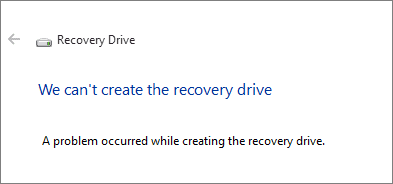
Congratulations on recognizing the importance of a recovery USB for Windows 10 and how it can revive a PC. However, despite its benefits, the default tool to create a recovery drive in Windows 10 has its shortcomings, particularly the frustrating error message "can't create a recovery drive. A problem occurred while creating the recovery drive".
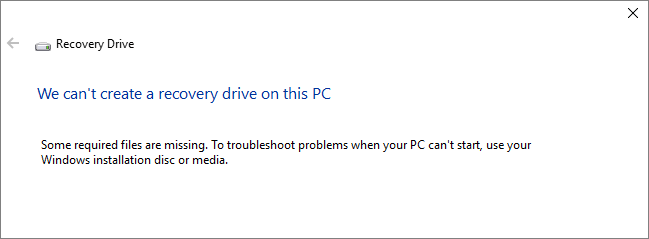
The message indicates that the system is unable to create a recovery drive due to missing required files. This could be due to various reasons such as corrupted system files, incomplete installation, or issues with the Windows operating system. To resolve this issue, you may need to run a system file checker, reinstall Windows, or use a third-party recovery software. If the problem persists, it may be necessary to seek assistance from a professional or contact Microsoft support for further guidance.
There are several potential causes for this error, including issues with the code itself, problems with the environment or setup, or even limitations in the programming language being used.
- USB errors, including bad sectors, incompatible file system, insufficient capacity...
- There are conflicting background services
- Some temporary glitches
If you're having trouble completing the creation process, don't get discouraged. First, rule out any issues with your USB flash drive, as mentioned earlier. Then, take a closer look at what's going on and where things are going wrong. This should help you identify the root of the problem and find a solution.
To fix the issue of being unable to create a recovery drive on Windows 10, there are six possible solutions. Firstly, checking the drive letter assigned to the USB drive can resolve the issue.
Solution 1. Prepare another USB flash drive
Solution 2. Disable Antivirus software
Solution 3. Check & repair system files corruption via CMD
Solution 4. Check and format the USB drive
Solution 5. Run DISM tool via CMD
Solution 6. Create a USB recovery drive in another way
LEARN MORE
If you're having trouble creating a Windows 10 recovery drive, don't worry, it's not a complex issue. You can try some fixing methods like using the Command Prompt, which requires a higher level of computer skill, but if you're confident, you can follow a step-by-step guide to troubleshoot the issue.
Ⅷ. Conclusion
Windows recovery USB is a broad topic, but we've covered the basics, including defining what a Windows 10 recovery USB is, how it differs from a Windows 7 system repair disc and a system backup image, and how to create and use one to restore a crashed computer. We've also provided an additional solution for creating a recovery USB drive for a different PC using the best third-party Windows 10 backup software.
To create a recovery USB drive for Windows, we provide step-by-step guidance to ensure a successful process. However, if you encounter issues, we also offer general troubleshooting methods to help you resolve the problem and complete the process.
*Watch the video review - What makes Qiling Backup the best Windows backup software.
Related Articles
- One for All Guideline: How to Clone a Hard Drive
- System & Files | Backup Windows 10 PC with Backup and Restore Tool
- 2022 Ultimate Guide: How to Factory Reset PC
- (2022) SD Card Backup and Restore on Android, PC and Raspberry Pi
- Five Excellent NAS for Small Business Backup 2022
The NAS (Network-Attached Storage) device is a great option for small businesses, offering not only a large storage capacity for files but also the ability to share files among team members. Many businesses choose NAS to back up their computers, ensuring work continuity in case of data loss or system failure. In this article, we will recommend the top five NAS devices and provide a step-by-step guide on how to back up files to a NAS device. - How to Fix Windows 10 Nearby Sharing Not Working
Windows 10 Nearby Sharing is not working. To fix the issue, you can try various methods. Alternatively, you can use Qiling Disk Master to transfer data, applications, or user accounts between PCs easily and quickly. This program can serve as a Nearby Sharing alternative, allowing you to share and transfer files and settings between devices.