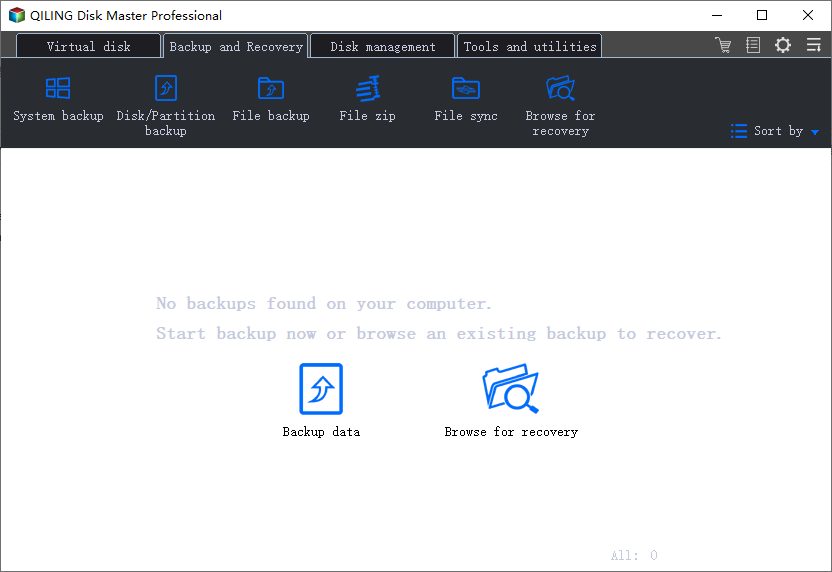
[100% Efficient] Create Windows 10 Image Backup with 2 Ways
What Is A Windows 10 Image Backup
A Windows 10 image backup is a file that contains all the data on your Windows 10 system, including the operating system, installed programs, user settings, and files. This backup can be used to restore your system to its original state or create a new installation of Windows 10. There are several ways to create a Windows 10 image backup, and this article will guide you through two efficient methods.
How Do You Create A Windows 10 Image Backup
Windows built-While Windows 10's built-in utility can help users create an image backup, third-party backup software is generally more efficient. This is because third-party software is often easier to use, with a simpler interface and streamlined operation process, making it unnecessary to spend time learning how to use it. Additionally, third-party backup software typically offers more advanced features, such as additional backup options and better file management, making it a more effective choice for users.
Method 1. Efficient and Simple: Create Windows 10 Image Backup with Qiling Backup
Qiling Backup is a popular tool that allows users to create a Windows 10 image backup, offering more backup options than the built-in Backup and Restore. It supports backing up various data types, including files, folders, disks, partitions, systems, and Outlook emails.
To create a Windows 10 image backup with Qiling Backup, you have two options: using the "System Backup" or the "Disk/Partition Backup".
- System Backup will back up the entire system, including the operating system, installed programs, user settings, and files.
- Disk/Partition Backup will only back up the selected disk or partition, allowing manual selection of the system disk or partition, making it a flexible option depending on user needs.
Qiling Backup allows you to create a Windows 10 image for free, all you need is a backup hard drive, preferably an external one to save the backup files. Once prepared, download Qiling Backup and follow the guide to create a Windows 10 image backup.
Step 1. On the main page, click "System backup" button to start.
Step 2. Qiling Backup will automatically select your system partition, requiring only a selection of the backup destination.
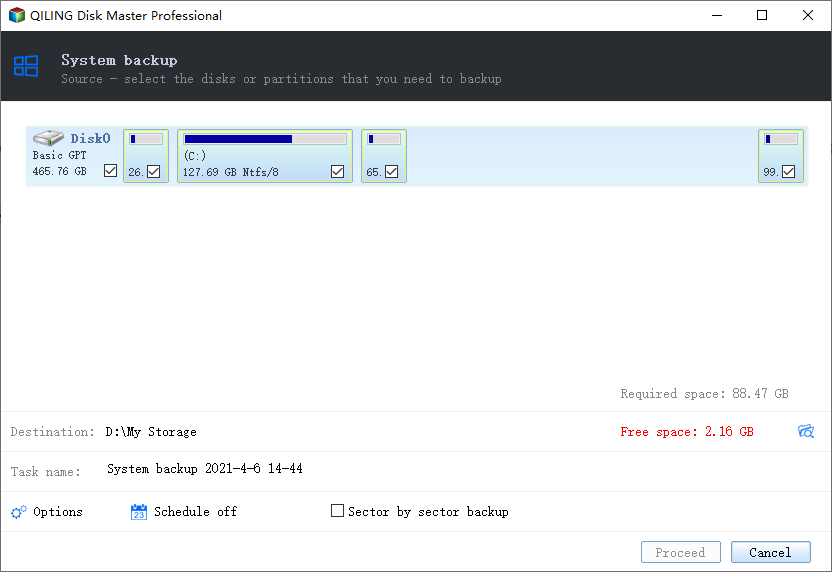
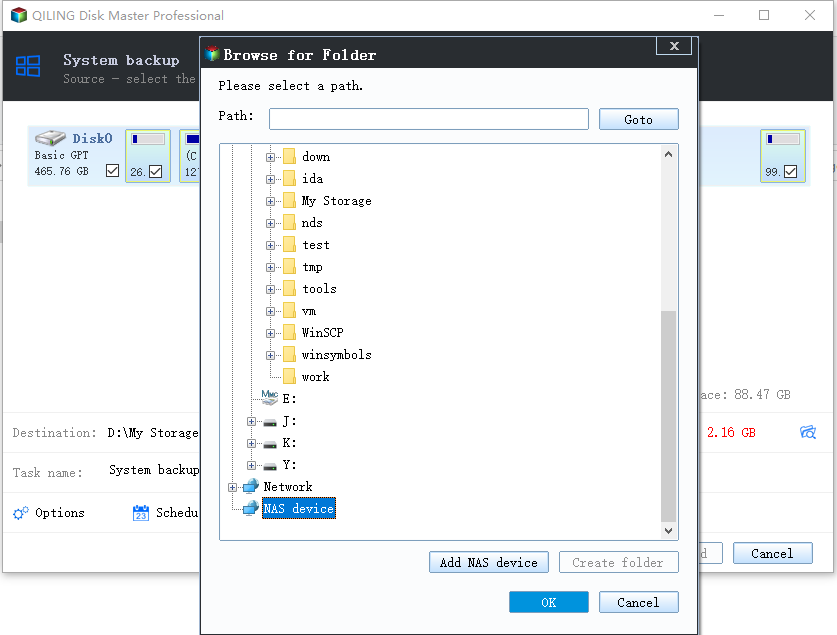
Step 3. Both Local Drive and NAS are available for you to save the backup file.
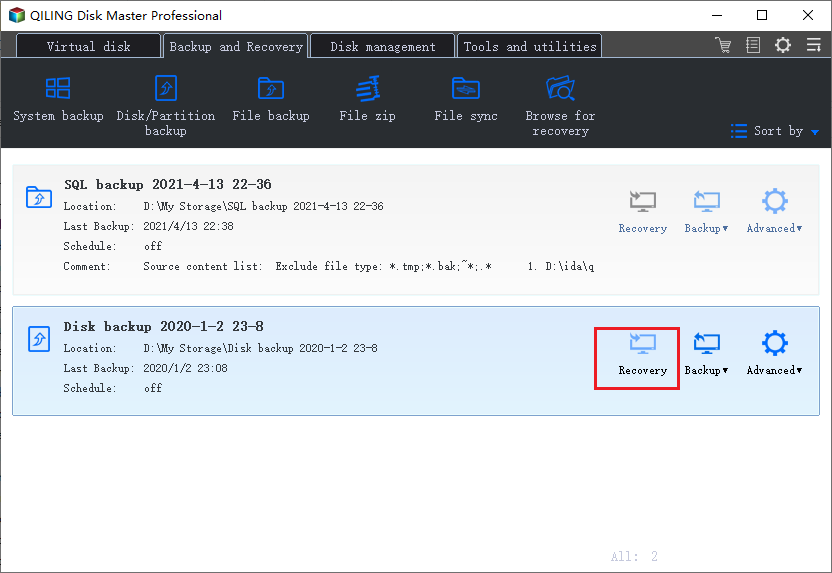
Step 4. After completing the backup process, you can view the backup status, restore, access, or erase the backup by clicking on the backup task on the left.
🎈Qiling Backup offers a free version that is sufficient for backing up computer data, while its home version provides additional features, which can be explored further in the provided article.Qiling Backup Free vs. Home.
🎈Users who want to clone a disk as a backup can do so to access the backed-up files without restoring them, and can refer to an article that explains the difference between a backup image and a clone.Disk Clone vs. Entire Machine Backup.
Method 2. Backup Windows 10 with Backup and Restore (Microsoft's Recommendation)
In Windows 10 and 11, users can utilize built-in backup utilities, including File History to back up different versions of selected files and folders, and Backup and Restore to backup files and create a system image. Although Microsoft is nudging users to sync files to OneDrive, the Backup and Restore feature remains unchanged, allowing users to create a Windows 10 image backup using the tools that come with Windows.
*It is recommended that you prepare an external hard drive to save Backup and Restore created images.
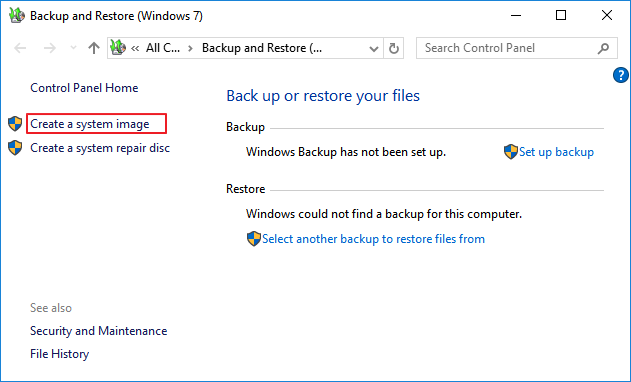
Step 1. To find Backup and Restore on your computer, open the Control Panel and click on "Backup and Restore (Windows 7)" under System and Security.
Step 2. There are two options in the left panel, click on "create a system image".
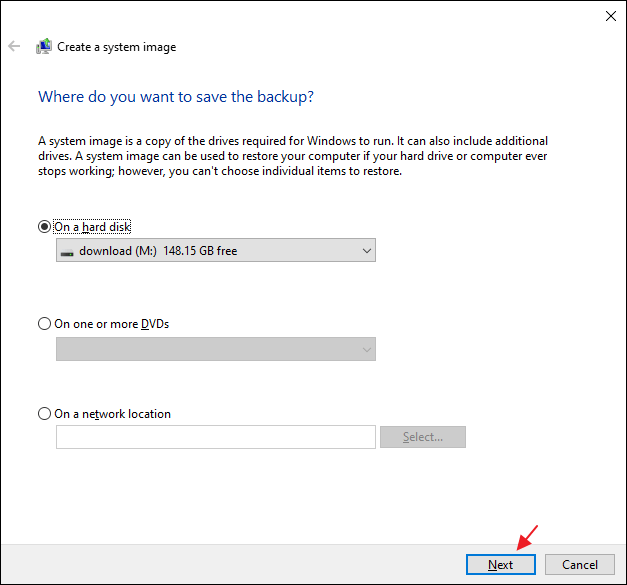
Step 3. Windows will ask where you want to save the image, so choose your external backup drive as the destination. Make sure it's connected to your computer beforehand. You can also save it to a CD/DVD or a network location.
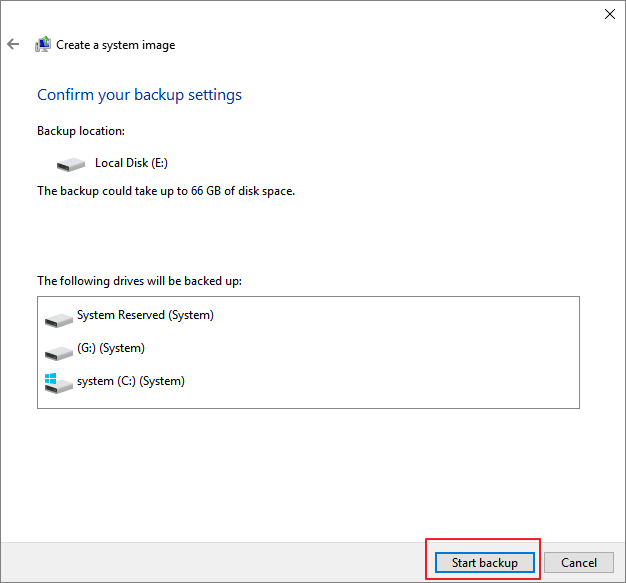
Step 4. Windows will automatically select your system drive by default, so you don't need to do anything else in this step. Just let it run and it will complete the backup process.
Step 5. The next step is to confirm the previous image-creating settings, then click "Start backup" to initiate the Windows image backup process to the specified drive.
When the creating a system image process is finished, you will have a Windows 10 image backup.
The Benefits of Having Windows 10 Image Backup
Having a Windows 10 image backup has several benefits. Now that you know how to create a Windows image, you should be aware of its advantages. This backup provides a quick and easy way to restore your system to a previous state, minimizing downtime and data loss in case of a problem or disaster.
- You can use a backup to restore your system and data when your computer crashes or when you accidentally delete files. This can be a lifesaver in case of a system failure or data loss.
- It's a great way to upgrade to a new hard drive or even a new computer, as you can quickly get everything back to how it was before, by using the cloning software to transfer all your files and programs to the new device.
- You can use a virtual machine to run an older version of Windows on your current computer, essentially creating a virtual environment that allows you to switch between different operating systems.
What to Do if You Need to Restore the System
If you need to use the image backup to restore your system, follow these steps:
Step 1. Connect the external hard drive that stores the system image backup to your computer.
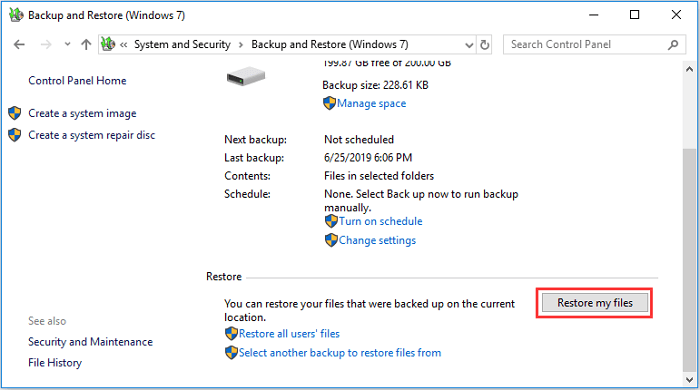
Step 2. Open Control Panel and go to Backup and Restore (Windows 7).
Step 3. In the left panel, click "Restore my files".
Step 4. Click on the type of file you want to restore and select "Next".
Step 5. After extracting the data from the backup, choose a location to store the restored files and click "Restore" to complete the process.
When restoring files from a system image, you can only choose to restore them to their original location or a different location, with no option to select individual files for restoration.
FAQs
1. Does Windows 10 have system image backup?
Windows 10's System Image Backup feature allows you to create a backup image of your computer, which can be restored later if needed. This feature enables you to preserve your system's current state, including installed applications, settings, and files, in case of a system failure or other issues.
2. Is Windows 10 image backup any good?
It's a great way to upgrade to a new hard drive or even a new computer, as you can quickly get everything back to how it was before.
3. What does a Windows 10 system image backup contain?
The image backup includes all data on your computer, such as the operating system, installed software, settings, and personal files.
Related Articles
- Boot Drive vs Recovery Drive: Are They the Same Thing?
- How to Migrate or Clone Windows 10/11 from HDD to SSD
- How to Backup Only New or Changed Files in Windows 10 [2 Ways]
- Clone GPT Disk in Windows 10 - This Method Would Work!
- Outlook Backup and Restore in 2 Ways [with Video]
To backup and restore Outlook emails, you can either use a professional email backup software or the built-in Microsoft Outlook backup feature, allowing you to securely save and recover your emails. - Paragon Backup & Recovery Review in 2022: Pro, Cons and All-around Alternative for You
Are you not content with the Paragon Backup & Recovery software? If yes, check out where Paragon fails and which tool is the all-around alternative for Paragon.