System Repair Disc vs Recovery Drive: Same or Not?
Part 1. Introduction
The terms disk recovery, recovery drive, and system repair disc are often confused with one another, despite their distinct functions. While they may appear similar, each serves a specific purpose that Windows users should be aware of.
We've created this guide to help you understand the difference between system restore points and recovery CDs in Windows 7/10. We'll dive deeper into these topics, including how to use recovery CDs, which can be a valuable skill to have in the long run.
Part 2. Key Differences Between System Repair Disc and Recovery Drive
Creating a system repair CD is possible with Windows 10, 8, and 7. This CD can be specially created to include various system repair programs, allowing users to troubleshoot and fix issues with their computer.
A system repair CD/DVD contains tools such as Startup Repair, System Restore, System Image Recovery, Windows Memory Diagnostic, and Command Prompt, allowing users to troubleshoot and fix issues with their computer.
A recovery disk is similar to a repair disk, but not exactly the same. It provides similar repair tools as the system recovery CD.
A recovery disk, also known as a system repair disk, contains Windows system files, enabling you to reinstall Windows 10 or 8 when needed, essentially providing a backup of the operating system.
USB sticks and CDs can be used as recovery drives, and some manufacturers, like HP, offer recovery DVDs for sale on platforms like Amazon.
OEM recovery CDs were once included with laptops and desktops, but are now less common, with bootable hard disk partitions often used instead.
While Amazon does sell a recovery drive, you may not need one, as Windows 10's Recovery Media Creator program can create a USB recovery disk. However, this feature is not available on Windows 7.
Part 3. Access to Create a Recovery Drive in Windows 11/10/8.1/7
To prepare for potential issues, create a separate backup of your data on another hard drive or storage device. This way, if you experience a major problem like a hardware failure, you can reinstall Windows 11 using the recovery disc and restore your backed-up data.
Microsoft recommends creating a new recovery drive every year to ensure you have the latest security and performance updates for Windows.
You will need to create a bootable USB drive with at least 16 GB of storage capacity, which will not back up your data or installed programs, in order to reset your PC.
For Windows 7
Step 1: Before you start, make sure you have an empty disc in your computer and that it's being recognized by your system.
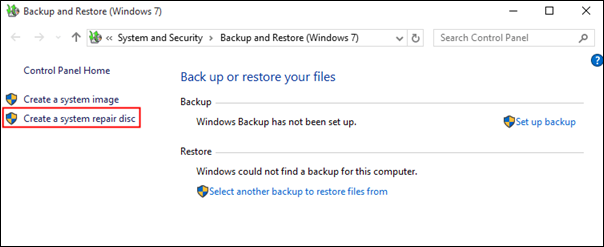
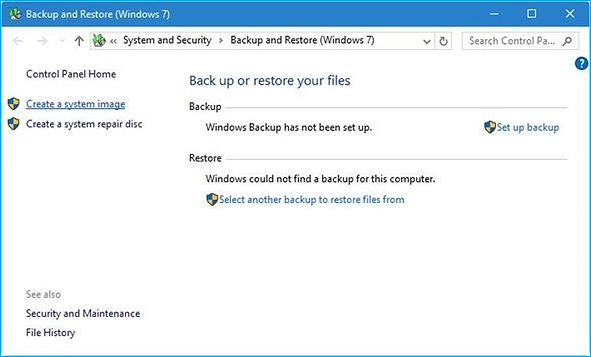
Step 2: To backup your computer, enter "backup" in the search box and select "Backup and Restore" from the results. This will allow you to create a backup of your files and settings, which can be restored if needed.
Step 3: To create a system repair disc, click on the "Create a system repair disc" option in the left pane. This will open the "Create a system image" window, where you can select the drive where you want to save the disc image.
Step 4: The operating system automatically identifies the CD/DVD disc, or you can choose it yourself. Once identified, select the "Create disc" option.
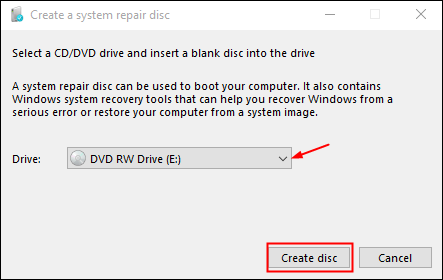
Step 5: When you initiate the process, Windows will start creating the disc.
Windows 8/8.1/10/11
Step 1: The USB disk should be connected to your computer.
Step 2: Type "recovery drive" into the search bar and select the option to create a recovery drive from the results.
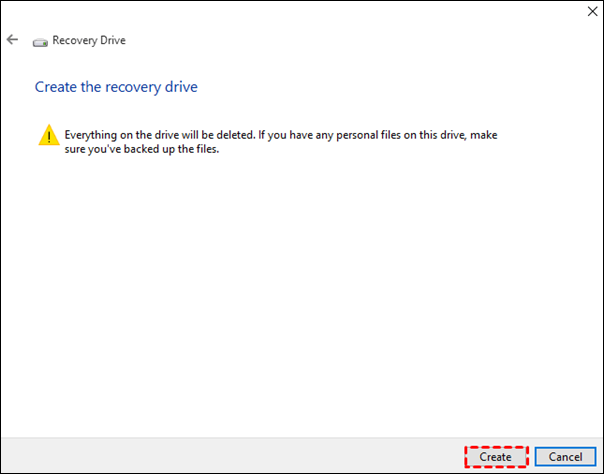
Step 3: Select the option to back up system files to the recovery disk and click Next in the pop-up box.
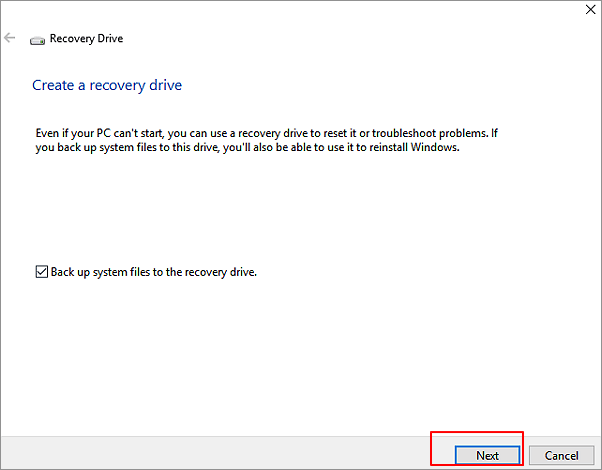
You can reinstall your computer, but first, you need to click the box for backing up system files to the recovery disk, which allows you to restore your system to its original state, including all installed programs and settings. This way, you can start fresh with a clean installation while still having the option to go back to your previous setup if needed.
Step 4: Click Next to proceed after selecting a USB flash disk.
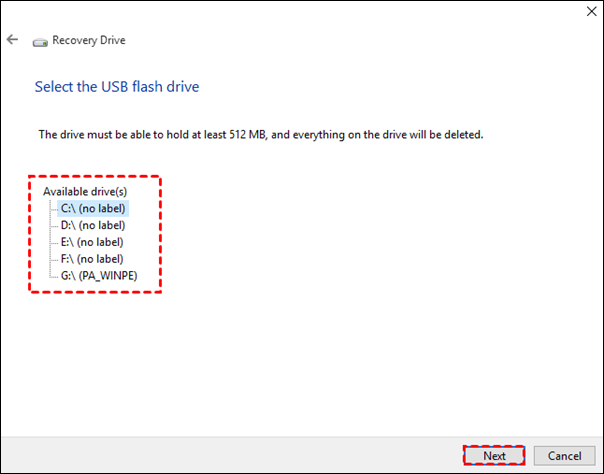
Step 5: To start creating a recovery disk, click the "Create" button.
To make a Windows 7/8.1/8/10 system repair disc, you can use the built-in tool in Windows. The system repair disc is a bootable disc that can be used to repair or restore your Windows system in case of problems. Once you have created the system repair disc, you can insert it into your computer and restart it. The system will then boot from the disc and allow you to access the repair tools. If your computer is set to boot directly from the hard drive, you can use the BIOS to set it to boot from a CD/DVD or USB drive instead, allowing you to use the system repair disc.
Part 4. Access to Create a System Repair Disc in Windows 11/10/8.1/7
If a significant mistake occurs, you may use system recovery options to fix Windows, but you'll need a Windows installation CD or access to your company's recovery options, or create a repair disc if those aren't available.
For Windows 10/11
Press Windows+R, enter Control, press F3, select Restore, and hit Enter.
Click on "Backup and restore" and "Create System Repair Disk" to proceed.
For Windows 7
Step 1: Select "Start Control Panel", then "Control Panel", followed by "System & Maintenance" and finally "Backup and Restore".
Step 2: To create a system repair disc, follow the directions in the left pane, and ensure that administrators have access to the system. If prompted, enter the administrative password or confirmation. This will allow you to create a system repair disc.
Windows 8/8.1
Step 1: When you get to the Start Menu, type "recdisc."

The process requires a blank DVD to be installed beforehand, with the option to use CDs, but this would necessitate using multiple discs. A single DVD is sufficient to achieve the same result.
Step 2: To select a CD/DVD drive, go to the device menu and choose the drive you want to use from the list of available devices.
The repair disc manufacturing tool will take just a few minutes to complete its operation, after which you'll be able to use any Windows 8 repair disc's functions.
Part 5. Make an Easier System Backup with Qiling Backup
You can use Qiling Backup to back up your Windows system in various ways, including creating whole images, incremental images, and differential images. This allows you to restore your system to a previous state in case of a problem.
Windows users can create a backup plan that runs daily, weekly, monthly, or yearly, and also perform tasks such as cloning and migrating the operating system to an SSD.
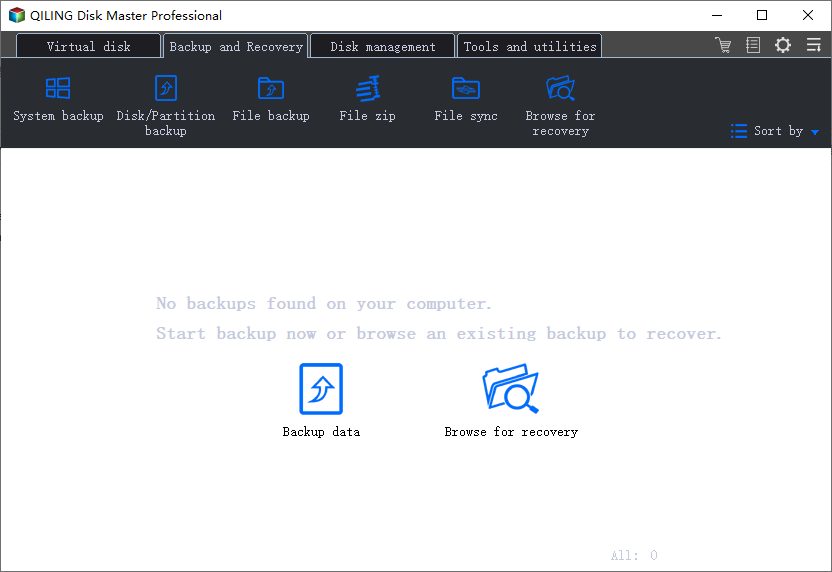
Step 1. To initiate a system backup using Qiling Backup, select the "System Backup" option on the "Backup and recovery" page within the Qiling Backup interface.
Step 2.The system partition will be automatically selected, you only need to choose the location to install the system.
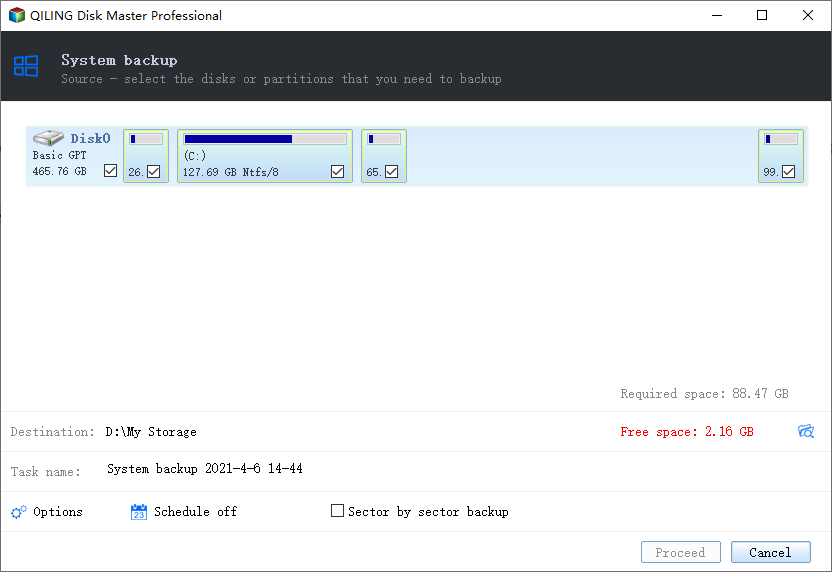
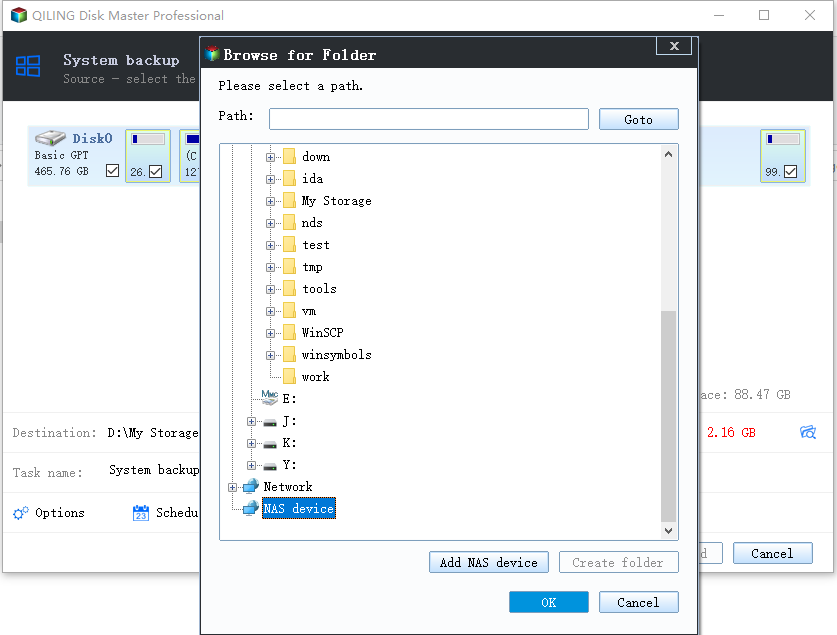
Step 3. You can save the backup file to your local drive, cloud storage, NAS, or connect an external hard drive to preserve system backup files.
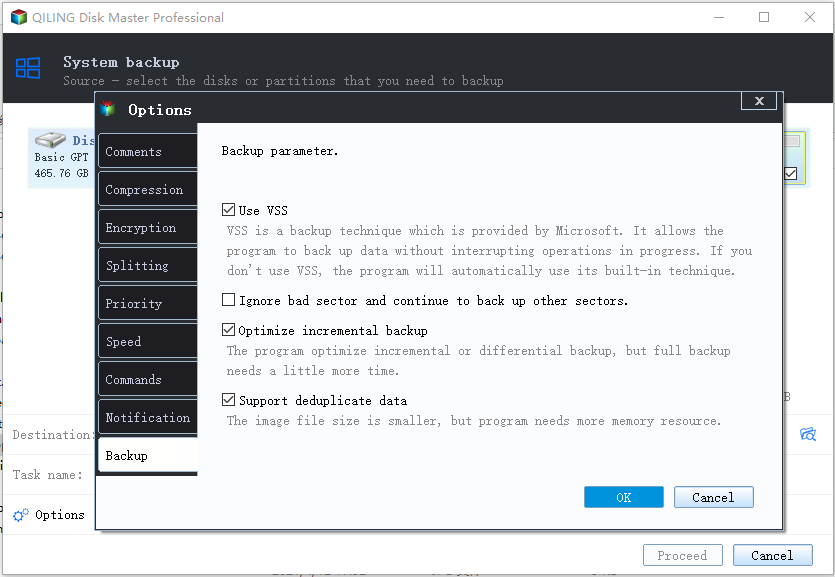
Step 4.You can customize the settings in "Options" at the left bottom. Then, click "Proceed" to start the process.
After completing the backup process, you can check the backup status, recover, open, or delete the backup by right-clicking on the backup task on the left.
Conclusion
The System Repair Disc and Recovery Drive may seem like the same thing, but they have distinct features and functions. While they share some similarities, they serve different purposes, making one not entirely the same as the other. Hopefully, this review has helped you understand the differences between the two and navigate them with confidence!
Related Articles
- Which One is Better: Backup or Copy Files
- 9 Ways to Fix Google Drive Upload Stuck Problem
- Qiling Backup Free vs Home: Am I Giving Too Much Away?
- Tips for Clean Install Windows 10 without Losing Data
- How to Backup External Drive to OneDrive with Every Possible Way
To back up an external drive to OneDrive, you can either use the OneDrive desktop app to select the external drive as the backup location, or use the OneDrive website to upload files from the external drive to OneDrive. This can be done by dragging and dropping files from the external drive into the OneDrive folder, or by right-clicking on the files and selecting the “Upload to OneDrive” option. This will ensure that your data is safely stored in the cloud, and can be easily accessed from anywhere. - How to Backup Files and Settings in Windows 8.1? 2022 Complete Guide
This guide covers a complete guide that you can follow and successfully back up files and settings in Windows 8.1. Windows 8 or newer Windows users may also apply tips on this page to back up everything on their computer. Ready to protect your Windows 8.1 essentials? here.