Beginner's Guide - Install A New Hard Drive/SSD in Windows 10/8/7
To install and set up a new hard drive or SSD on your Windows 10/8/7 computer, follow this complete guide. This tutorial will walk you through the process of making your new drive work on your PC or laptop, providing a detailed step-by-step guide to get you up and running.
PAGE CONTENT:
- Install New Drive to PC or Laptop
- Set Up New Drive in Windows 10/8/7
- Choose Your New Hard Drive
- FAQs About Install A New Hard Drive
Part 1. Install New Drive to PC or Laptop
To install the new hard drive or SSD, you'll need to follow a series of steps. First, you'll need the necessary tools, which include a screwdriver and any other specific tools required for your device. Once you have these, you can proceed with the installation process, which involves physically inserting the new drive into your PC or laptop and securing it in place with screws. From there, you'll need to connect the drive to your device, which may involve attaching cables or configuring settings in your device's BIOS or UEFI.
Tools You Need
To install a new disk on your PC or laptop, you'll need some basic tools like a screwdriver (preferably a Torx or Phillips head for the specific type of screw used in your device), a plastic spudger or similar tool for prying open the casing, and a can of compressed air to clean out any dust or debris. You may also need a disk cloning software or a separate disk to clone from, depending on your specific needs.
- A screwdriver
- The new drive - a regular hard drive or SSD
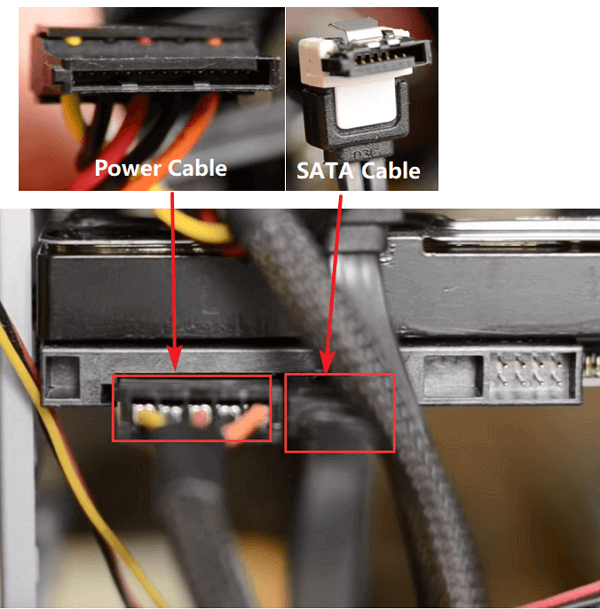
- A SATA connection cable
Steps to Install The New Drive
To install a new hard drive, the process differs slightly between desktops and laptops due to their distinct designs. Follow these detailed steps to install the new disk on your computer.
For PC:
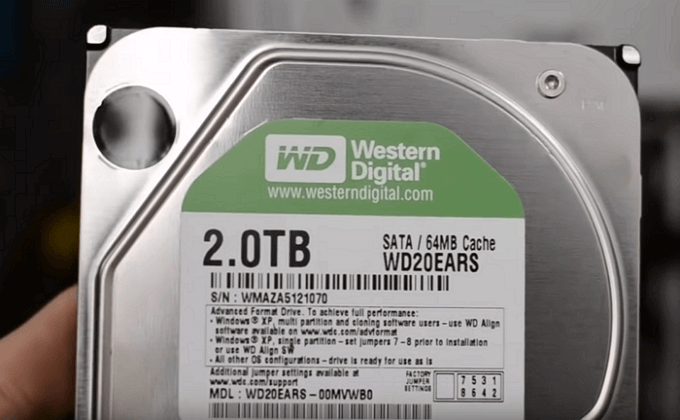
To install a 2TB hard drive into a desktop computer, start by shutting down the computer and unplugging the power cord. Next, locate the drive bay on the computer case and remove any screws holding the existing hard drive in place.
Step 1. Shut down your computer and take the new drive out of the drive case or box.
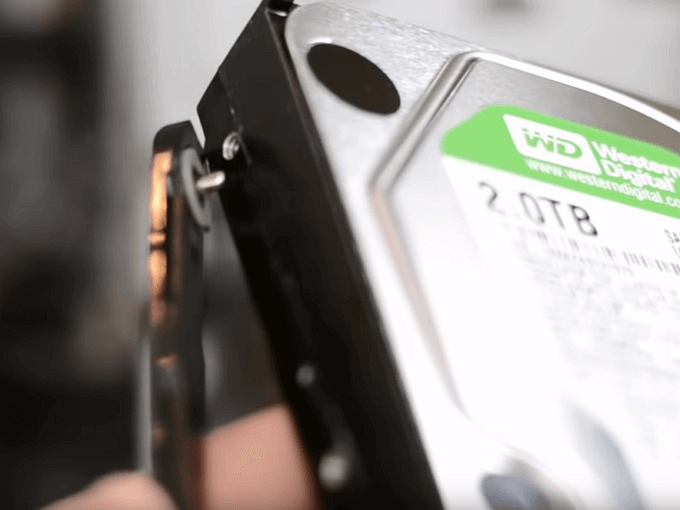
Step 2. Prepare the new drive.
If it's a new hard drive, remove the screws on both sides of this disk. This will make it easier to install.
To install a new drive into a computer case, first, ensure the case is powered off and any cables are disconnected. Next, remove the screws holding the drive bay in place. Then, slide the drive bays into the screw holes on both sides of the new drive.
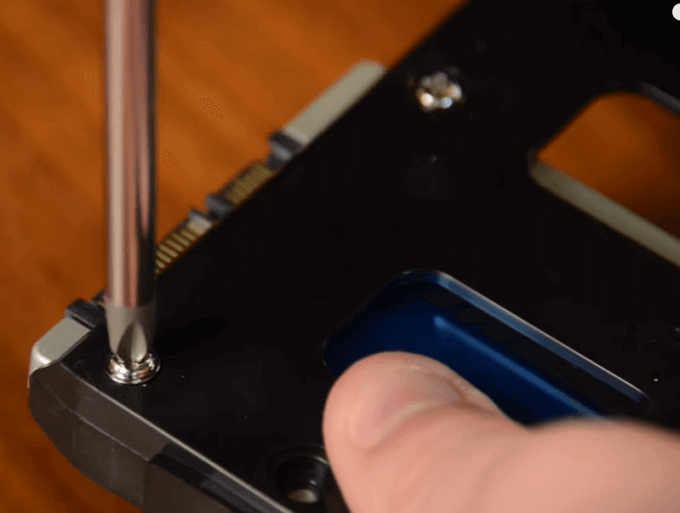
If it's an SSD, you will need to add a special mounting slot or a drive adapter to fit in 3.5" slots with screws. This is because SSDs have a different form factor than traditional hard drives.
Step 3. Remove the desktop computer case.
If it's locked by screws, remove them with your screwdriver.
Step 4. Slide your new drive into the computer case next to your old drive.
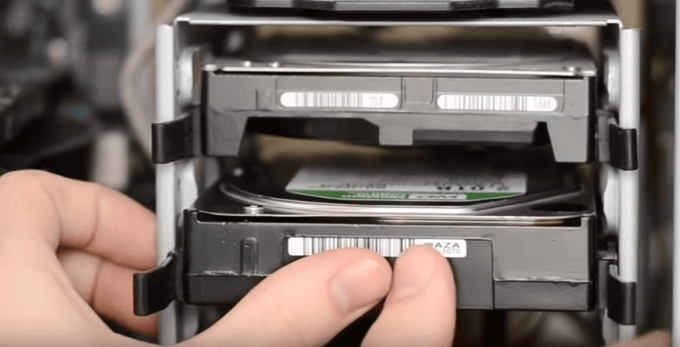
Step 5. Connect the new drive to your computer motherboard with the SATA cable and plug in a power cable to power on the drive.
Step 6. Close up your computer case and reboot it.
For Laptop:
Many modern laptops now support adding two or more hard drives, which is a departure from the typical single hard drive bay found in older laptops and some newer, slim models.
If your laptop has a free hard drive bay, you can simply insert the new drive and it will work seamlessly.
You can either replace your existing hard drive with the new one, or install the new drive in place of a DVD drive, CD drive, or other secondary storage device, if you have one.
Add 2nd HDD/SSD to Laptop By Replacing DVD or Blu-ray Drive
You can add a second hard drive or SSD to your laptop by replacing the DVD or Blu-ray drive, using the resources found on this detailed guide. This guide provides helpful information to assist you in this process.
To add a 2nd HDD/SSD to a laptop, you can replace the DVD or Blu-ray drive with a 2.5" HDD/SSD caddy.
Part 2. Set Up New Drive in Windows 10/8/7
Now that the new drive is installed, you can proceed to set it up and make it functional on your laptop.
To save your time and energy, we recommend using Qiling Partition Master to easily initialize disk and partition a hard drive.
Key features of Qiling Partition Master:
- Manage your computer partitions with a few clicks.
- Migrate OS to SSD to speed up Windows.
- Enable you to delete as well as create partitions.
- Smart adjust your drive size. Enlarge C drive in one-click.
To manage your new drive, download Qiling Partition Master and follow the guide below.
To make the new drive work for you, go through the next two stages. First, you need to format the drive to make it usable.
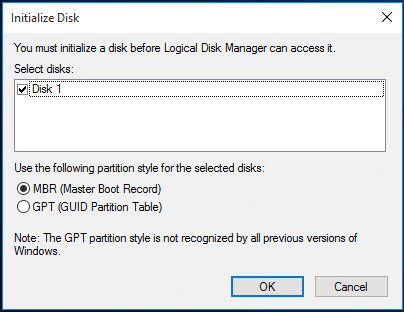
# 1. Initialize Disk to MBR or GPT
To initialize the new drive, go to Disk Management, right-click on the unallocated drive, and select "Initialize". This will make the drive available for use.
Notice:
If you're planning to use the new disk to replace your system disk, you'll need to initialize it to match the partition style of your existing system disk. This ensures compatibility and a smooth transition.
Follow to get your new disk ready:
Step 1. Install the new disk to your computer properly.
Step 2. Restart PC and enter Disk Management to find your new disk.
Step 3. Right-click the new disk and initialize it to MBR or GPT.
# 2. Make Use of The New Hard Drive
Upgrading your system disk to a new drive can be easily done using the Migrate OS feature of Qiling Partition Master. This feature allows you to seamlessly transfer your operating system to the new drive, making it a convenient and efficient solution for upgrading your system disk.
If you plan to use the second hard drive as a data disk, you can utilize the partition hard drive feature in this software to create new partitions with ease. This feature allows you to divide the hard drive into multiple sections, making it easier to organize and manage your files.
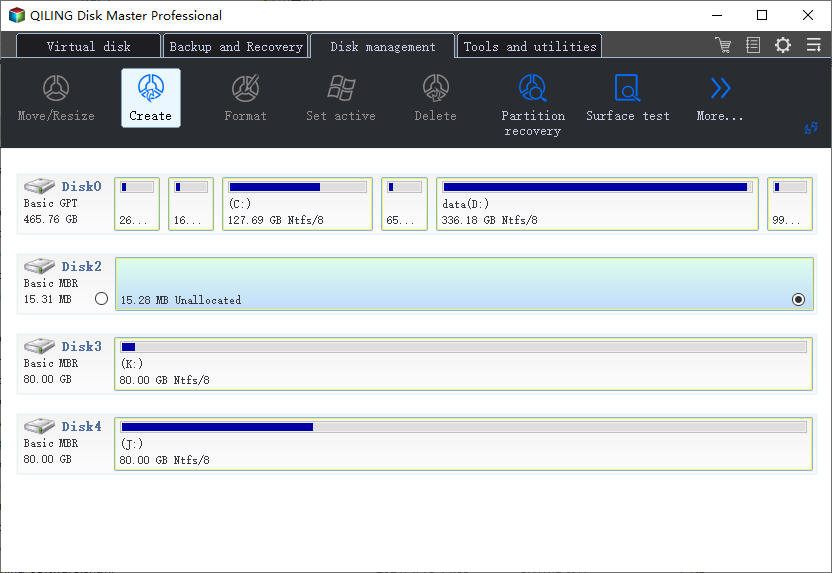
Step 1. Launch Qiling Partition Master. On the main window, right-click on the unallocated space on your hard drive or external storage device and select "Create" in "Disk management" page.
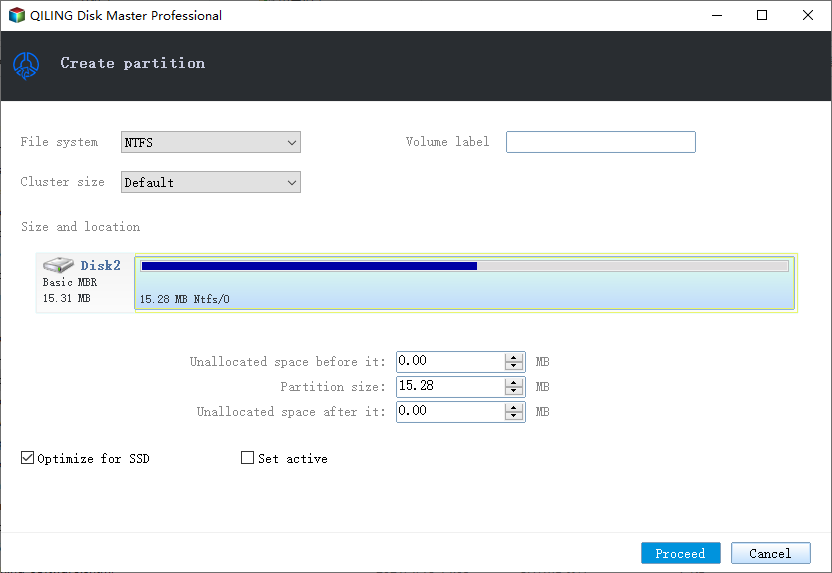
Step 2. Adjust the partition size, file system, label, etc. for the new partition and click "Proceed" to create a new partition.
Preparation. Choose Your New Hard Drive
If you're buying a new hard drive, you can skip this part and follow the guide to install the new hard drive or SSD. If you're not buying a new hard drive, you may need to upgrade your existing one.
If you haven't yet chosen a suitable drive, here below are some critical factors that may help you to decide which drive you would like to apply and install on your computer - a regular hard drive or an SSD disk.
1. The Price
If you're not planning to spend a lot of money on a new disk, a regular hard drive is likely your best option. This is because, although the price of solid-state disks (SSDs) has decreased, they are still relatively expensive for the average person. Regular hard drives, on the other hand, are a more affordable choice.
2. Your Purpose
If you're considering installing a new drive, it's essential to clarify whether your intention is to migrate your operating system (OS) to the new drive or simply increase the storage capacity of your existing drive. This distinction is crucial because it will determine the steps you need to take and the potential impact on your system.
If your computer system performance is slow, it's likely due to an old hard drive. Upgrading to a new SSD (Solid-State Drive) can greatly improve system performance and is a wise choice.
If your computer's hard drive is full, you can add a second hard drive to free up space by using it as a data drive, which can be a regular hard drive with sufficient storage capacity.
3. The SATA Interface
The number of SATA interfaces on a motherboard determines the maximum number of hard drives that can be added to the computer.
If your computer or laptop only has one SATA interface, you can only install one disk, so you would need to buy a new and bigger drive to install on your PC.
- For less money with a bigger space, a normal hard drive is your best choice.
- For faster speed and more storage space, an SSD (solid-state drive) is a good option.
For more details on the comparison between SSDs and HDDs, you can refer to the link provided: HDD vs SSD. This link likely provides a comprehensive overview of the key differences between solid-state drives (SSDs) and hard disk drives (HDDs), including their storage capacity, speed, power consumption, durability, and cost.
FAQs About Install A New Hard Drive
Some of you may still have questions about installing a new hard drive to your Desktop or Laptop. Here we gathered 5 top concerned questions and listed a brief answer to help you.
1. How do I set up a new hard drive?
To initialize the new hard drive, use Disk Management or Qiling Partition Master as shown in Part 2 on this page. This will prepare the drive for use.
To create new partitions for usage, you can utilize either Disk Management or Qiling Partition Master.
For upgrading the system disk, you may follow Migrate OS to SSD as a guide.
2. How do I install a new hard drive in Windows 10?
To create a new user account, go to the website's login page and click on the "Create a new account" button. Enter a valid email address and a strong password, and then click on the "Create account" button.
- To prepare your computer for a new hard drive, first, shut down the computer completely. Then, gather the necessary materials, which include a new hard drive, a screwdriver, and a SATA cable.
- To upgrade your computer or laptop, you'll need to remove the existing case, which can be a bit tricky, but it's doable. Once the case is off, you'll have access to the internal components, including the hard drive.
- To resolve the issue, reboot the PC and initialize the hard drive, then partition the hard drive or migrate the operating system using Qiling Partition Master.
For a detailed guide, follow up provided guidelines on this page.
3. How to format a new hard drive?
When a new hard drive is installed, if it's not initialized, the computer may not be able to detect it, making it necessary to initialize the drive to make it accessible and usable.
To set up a new hard drive, open Disk Management, right-click on the drive and select to initialize it, then create a new partition by right-clicking on the unallocated space and selecting to create a new simple volume.
After this, you can format the new hard drive by right-clicking to format the created partitions.
4. What to do after installing a new hard drive?
After installing a new hard drive, it's a good idea to initialize it first using Disk Management or a partition manager software like Qiling Partition Master. This will prepare the drive for use and allow you to partition it and format it as needed.
Then you need to re-think your purpose of installing this drive.
- To expand storage capacity, you can create a new partition on the existing drive and relocate your data to the new partition. This allows you to utilize the available space more efficiently.
- To upgrade the system disk, you will need to transfer the system to a new disk using a tool like Qiling Partition Master or other system migration tools.
5. How to use the old hard drive as a second data drive?
- The first step to installing a new hard drive is to physically install it into your computer or laptop. This typically involves removing the side panel of your computer case and locating the drive bays, where you can insert the new hard drive. You may need to remove any existing hard drives or other components to make space for the new one.
- Follow the system migration video on this page in Part 2 to migrate the system to the new hard drive.
- To complete the process, reboot the computer from the new hard drive by changing the BIOS boot sequence, then use Disk Management or Qiling Partition Master to delete the old system drive and create new partitions on the old drive to save data.
Related Articles
- How to Format a Hard Drive Partition for Free
- Extend C drive or system partition in Windows 10
- How to Fix DPC Watchdog Violation Error in Windows 10
- Fixes for 'File Is Too Large for Destination File System' on USB/External Hard Drive
- Auto Backup Folders to USB Drive in Windows 10 (When Plugged in)
This tutorial demonstrates two methods for automatically backing up a folder to a USB drive, with the second method being the recommended approach if you don't want to constantly connect the drive. - Backup Active Directory on Server 2019 – Learn Top 2 Ways Here
Backing up Active Directory 2019 can be achieved in two simple ways. Windows Server Backup can be used to create a backup of the directory, or a third-party tool can be utilized to complete the task.