Create System Image on USB Drive in Windows 10/8/7
If you're looking for a solution on creating a Windows system image to an external USB drive, this page provides a complete guide to help you achieve that.
PAGE CONTENT:
- Benefits of Create a System Image on USB Drive
- Guide to Create a System Image on USB Drive in Windows 10/8/7 (2 Methods)
- Troubleshoot "Can't Create System Image on USB" Error (4 Methods)
Benefits of Create a System Image on USB Drive
Many users choose to create a system image on a USB drive, and here are some benefits and reasons why:
- 1. You can free up space on the system hard drive by deleting unnecessary files, uninstalling unused applications, and using the built-in disk cleanup tool to remove temporary files and system logs. This will save more usable storage space on the system hard drive, allowing you to install new software, store important documents, and run the operating system smoothly.
- 2. To safely back up your Windows system, installed programs, and saved data on the system drive, consider using the built-in Windows tools like File History and System Restore. File History allows you to automatically back up your personal files to an external drive or network location, while System Restore creates a snapshot of your system at regular intervals, enabling you to revert to a previous state in case of issues.
- 3. Portable to restore system image to any computer
- 4. Emergency restore refers to the process of bringing a system back to its previous stable state when it experiences a failure or malfunction. This involves restoring the system to a known good configuration, often by reverting to a previous backup or snapshot, to prevent further damage and minimize downtime.
Creating a system image offers the advantage of portability, allowing you to save the backup on a local drive or an external storage device. This differs from a system restore point, which is typically stored on the local drive.
To create a system image to a USB drive, follow these guidelines. The process is similar on Windows 10, 8, or 7. First, ensure your USB drive is large enough to hold the system image.
Guide to Create a System Image on USB Drive in Windows 10/8/7
Here are some important things to know in advance:
Important
1. External USB storage drives and USB flash drives can both be used to save system backup images.
2. The USB drive must be empty and have enough storage space to match or exceed the used space on your system partition.
3. To restore a system image, use the same tool that you used to create the system image. This ensures that the system is restored to its original state and that any changes made since the image was created are undone.
You can create a system backup image to a USB drive using either automated Windows backup software or the built-in Windows tool.
Method 1. Use Automated Windows Backup Software for Help
Advantages: 100% secure, 3-To compress the system image and save storage space on a USB drive, follow these simple steps. First, ensure you have a compatible USB drive with sufficient storage capacity.
If you're not familiar with system backup in Windows or need a quick way to create a system image to a USB drive, you're in the right place.
Qiling Backup, a professional Windows backup recovery software, allows for flexible backup and saving of system images to various storage devices, such as hard drive partitions, external hard disks, USB drives, or SD cards, without requiring additional operations.
Connect the empty USB to your PC, and follow the below steps to create a system image to the USB on your own:
Step 1. To backup your Windows 10/8/7 to a USB storage device, safely connect the USB to your computer, let Windows recognize it and assign an invalid drive letter. Then, launch Qiling Backup.
Step 2. Click "System backup" on the "Backup and recovery" page to start.
Step 3. In the lower area, users can manage some of the backup settings, such as editing system backup info by assigning a plan name and a text description.

To backup the operating system to a USB drive, click "Browse" in the "Destination" area to choose the USB drive as the backup location, which can be found under the "Computer" directory. Click "OK".

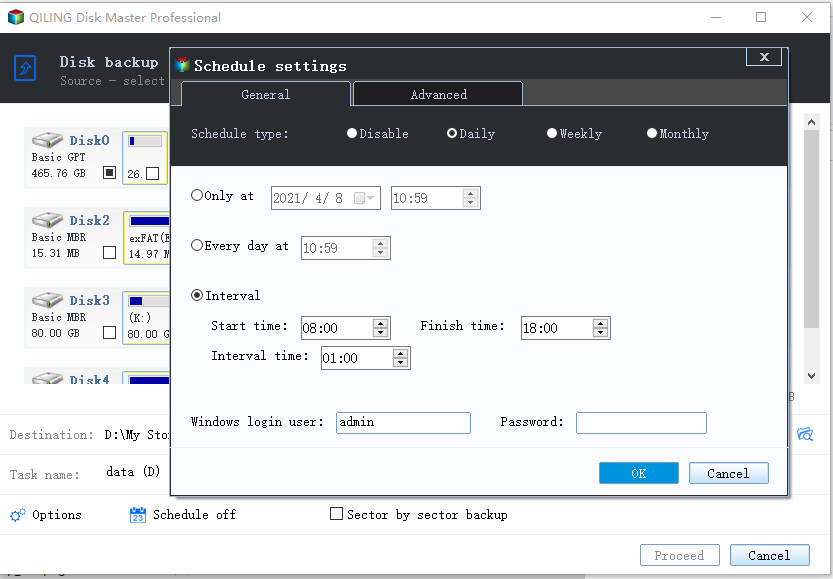
Here, don't miss one noticeable feature if you wish an automatic way to backup Windows operating system as soon as plugged in the USB flash drive the next time. Click "Schedule" and choose "the "Schedule Type".
Step 4. Click "Proceed". Wait for a while so you can have a system backup on your USB flash drive!
Wait patiently for the backup process to finish. You can restore your system anytime using the saved image.
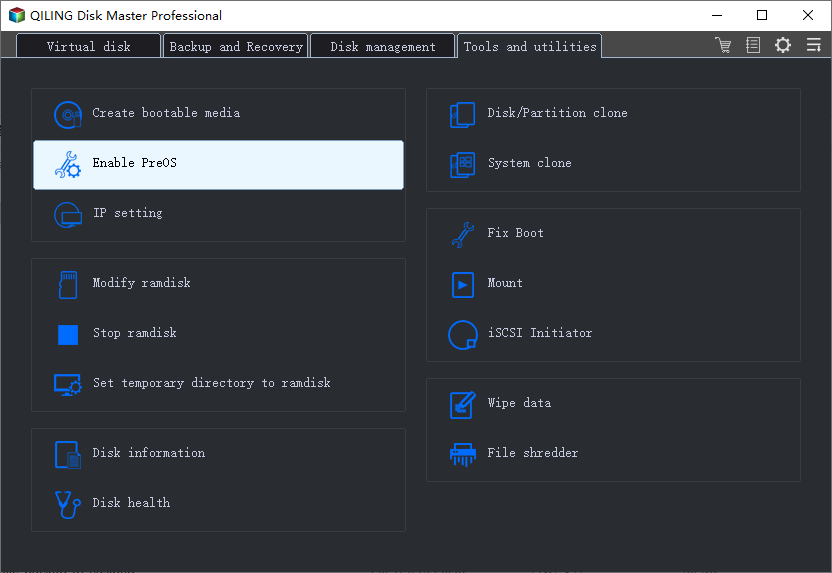
In case of a system failure, Qiling Backup's Enable PreOS feature allows you to boot from a USB drive and restore the Windows system from a previously created image. This feature helps to quickly recover the system in case of a failure.
Method 2. Use Windows Built-in Tool - Backup and Restore(Windows 7) for Help
Advantages: free
Although the Windows Backup and Restore option compresses the system image, the resulting file still takes up a significant amount of space on the USB drive.
Before creating a system image to a USB flash drive, make sure it's formatted to NTFS in advance, as formatting to other file systems may result in the "can't create system image to USB drive" error. The solutions to this error are covered in Part 3 of this page.
To manually create a system image on Windows 10/8/7, follow these steps: Connect an external hard drive or a USB drive with enough space to hold the system image. Open the Control Panel, click on System and Security, then click on Backup and Restore (Windows 7) or Backup (Windows 8/10).
Step 1. Connect the empty USB flash drive to your PC. If it's a USB flash drive, format it to NTFS first.
Step 2. Open "Backup and Restore" (Windows 7) pane.
- On Windows 7: Right-To access the Backup and Restore section, click on the Start icon, select "Control Panel", and choose to open "Backup and Restore".
- On Windows 10/8: Right-To access the Backup and Restore feature in Windows, click on the Windows icon, select "Search", type in "Control Panel", and select to open it. Then, click on "Backup and Restore (Windows 7)".
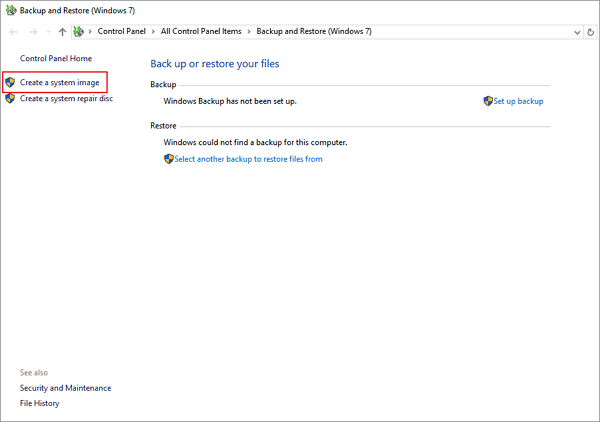
Step 3. Click "Create a system image".
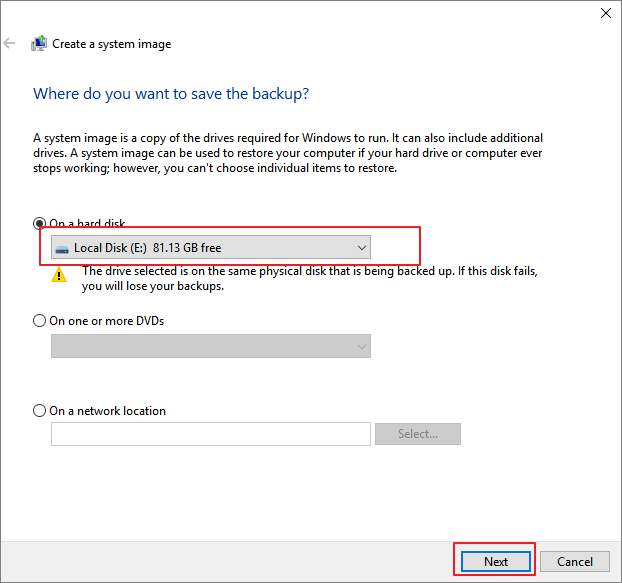
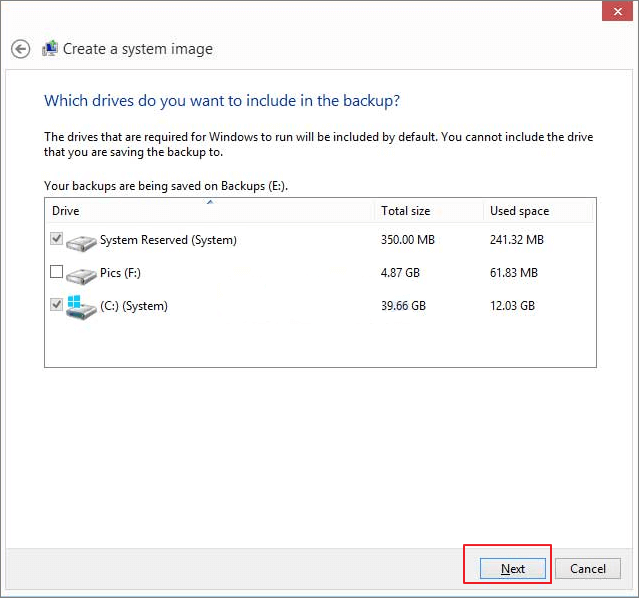
Select the external USB drive or USB flash drive as the destination disk to save the Windows system image, and click "Next" to proceed.
Step 4. The System and the System Reserved partitions to be selected by default, click "Next" to continue the process.
Step 5. Click "Start backup" to begin creating your current system image to the USB drive
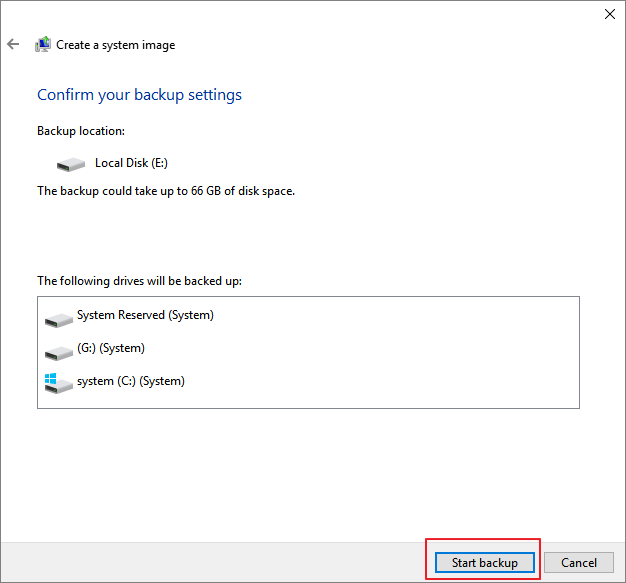
When the process finishes, you've successfully created the system backup image to your USB drive.
For Your Information:
1. The system image created by Windows Backup and Restore can only be restored when the current Windows OS is able to boot up or boot into the restore window.
When the system can't boot up, you can't restore Windows from the image in your USB drive.
2. The system image can only be used to restore to the source computer.
3. You can't restore a system image from one computer to another with a different operating system, such as from a Windows 7 system image to a Windows 10 computer. It's not supported.
Troubleshoot "Can't Create System Image on USB" Error
If you're unable to create a system image on a USB drive or save it to your target USB drive, You can try a few things to troubleshoot the issue.
By following provided solutions here, you'll effectively resolve this issue on your own.
Troubleshoot - "This drive cannot be used to store a system image.."
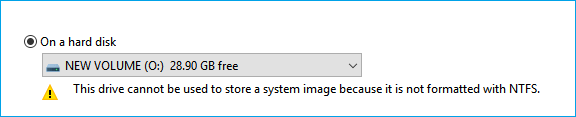
If Windows prompts the error message "This device cannot be used to store a system image because it is not formatted with NTFS", you can simply go back to the method in Part 1 and use Qiling Backup to create a system image.
Or you can also effectively resolve this issue by formatting the USB drive with the below steps:
Step 1. Connect the USB drive to your PC and open Windows Explorer.
Step 2. Locate and right-click on the USB drive, select "Format".
Step 3. Set the file system to "NTFS" and click "Start".

After completing the process in Part 1, you can proceed with creating a system image to your USB drive by following the same steps in Part 2, Method 2.
Troubleshoot - "The drive is not a valid backup location"

Due to system errors or USB drive issues, you may encounter problems creating a system image on the USB drive. The varied causes of these issues also mean that the solutions will differ, making it challenging to pinpoint a single fix.
To resolve the issue of a USB not being available for saving a system image in Windows 10/8/7, try each of the following solutions in order until the USB becomes available again. First, ensure the USB drive is properly connected and recognized by the system.
Method 1. Check and Fix USB Drive Error
When a USB drive contains file system errors or internal errors, it may not work as expected.
You can use Qiling Partition Master, a partition manager software, to repair a USB drive error by applying its check file system error feature.
If you're experiencing issues with your USB drive, you can manually check and fix the error by following these steps. First, safely remove the USB drive from your computer to prevent any data loss.
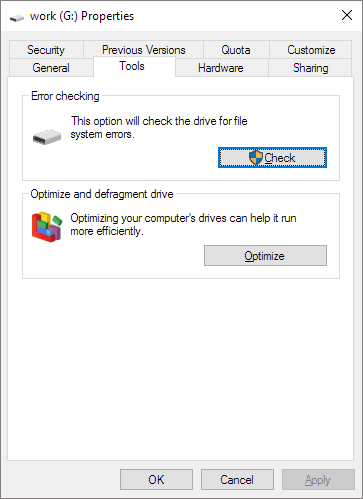
Step 1. Connect the USB to your PC, open File Explorer and right-click on your USB, select "Properties".
Step 2. Go to the Tools tab and click the Check button
Step 3. Let the scan process complete, then close the scan window.
Step 4. Eject the USB and reconnect it to your PC again.
If the USB drive shows up and can be accessed without any issues, you can proceed with the system image creation process again.
If your USB drive isn't showing up properly, you can try updating your USB drive driver to fix the issue.
Method 2. Update USB Drive Driver
If the USB driver is outdated, it may stop you from creating a system image, as well as other issues.
Here are the steps to update your USB drive driver:
Step 1. Connect the USB flash drive or external USB drive to PC, open "Device Manager" and then expand "Disk drives".
Step 2. Find and right-click the problematic USB drive and select "Update driver".
Step 3. Click "automatically search for driver software online".
Wait for the driver to be updated, then reboot your computer. Afterward, you can try to reconnect your USB drive to PC and check whether the USB drive shows up or not.
Method 3. Create a Directory on USB Drive and Share It as A Network Drive
Step 1. Format USB to NTFS and create a new folder at the black place in the Drive.
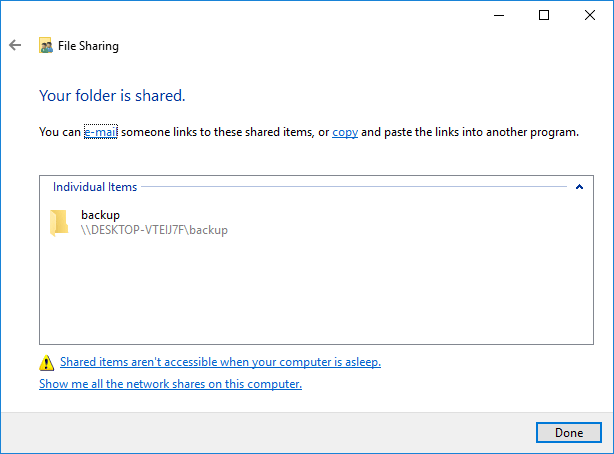
Step 2. Share the USB as a network drive:
- Right-click the directory and choose "Share with", "Specific people".
- To share a list of users, select the desired users from the list and click "Share". Then, click "Done" to complete the sharing process.
Step 3. Ensure the advanced share allow permissions are set to full control.
- Right-click the directory, select "Properties".
- At the Sharing tab, click "Advanced Sharing".
- Click "Permissions" and set all permissions to "Full Control".
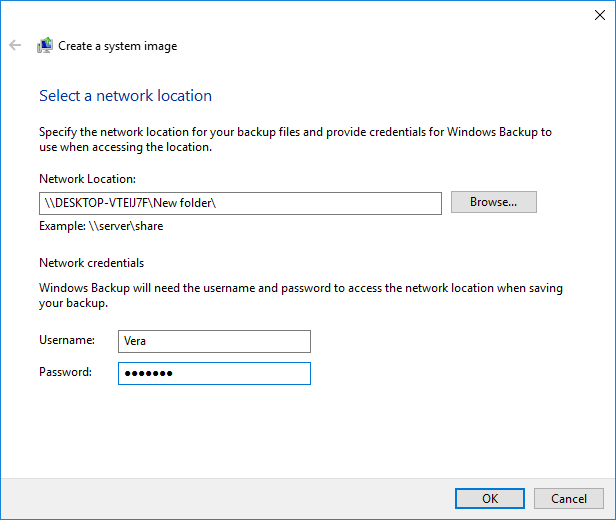
Step 4. Create the system image to the USB shared network drive with steps in Method 2 Part 2.
Select the target drive to save the system image, and browse to your own computer's USB share. If prompted, enter your computer's login credentials, using a space for a blank password if necessary, and click "OK".
After following the provided methods, you can now repeat the steps to create a system image to your USB drive again.
To Sum UP
To protect your Windows system, you can create a system backup image and save it on a USB drive, which is a secure and space-saving method.
To back up Windows, you can either use automated software or manually do it yourself. Automated options like Qiling Backup are available for a secure and time-saving solution.
If you're unable to create the image to a USB drive, you can find a detailed and effective solution in Part 3.
Related Articles
- How to Clone SSD to Larger SSD in Windows 10/8/7
- Make External Hard Drive Bootable in Windows 10
- How to Clone Windows 10 to USB Drive on Your Own
- How to Clone C Drive to SSD in Windows 10
- Auto Backup VMware with Best VMware Backup Software
- How to Backup Don't Starve World?
If you're looking for the most efficient way to backup your Don't Starve world, you've come to the right place. This post will provide you with all the useful tips and guidance you need to solve this problem.