How to Backup Files and Settings in Windows 8.1? 2022 Complete Guide
Are you looking for a complete guide to assist you in successfully backing up Windows 8.1 files and settings on your own? Follow this page, and you'll get 3 reliable solutions that work to back up your files and settings in Windows 8.1 with ease. Let's get started here.
How Do I Backup My Windows 8.1 Files and Settings? 3 Reliable Methods
Some of you may want to know, "Does Windows 8.1 have a backup utility?", and the answer is Yes. Windows 8.1, is similar to Windows 7 and the newest Windows 10/11, and also has a built-in backup utility.
In fact, Windows 8.1 has two backup tools that allow users to successfully back up their files and settings on their desktop computers or laptops in a few clicks. These two tools are Windows Backup and Restore and Windows File History.
Aside from these two built-in backup utilities, you can also turn to third-party Windows backup software like Qiling Backup Home for help.
Windows 8.1 File and Settings Backup Solutions Comparison
So what are the methods that you can apply to back up Windows 8.1 files and settings? They are:
And what are the differences? Here is a comparison table that you can follow and learn the differences among them instantly:
| Comparison | Pros | Cons |
|---|---|---|
| Qiling Backup |
|
|
| Backup and Restore |
|
|
| File History |
|
|
According to this table, it's easy to figure out that third-party backup software - Qiling Backup Home is more powerful in file and system backup on Windows PCs. Windows Backup and Restore works better than File History in files and setting backup in Windows 8.1.
- If you are a Windows beginner or looking for an easy way to efficiently back up Windows files and settings together, take Qiling Backup for help.
- If you are an experienced Windows user, Backup and Restore Windows 8.1 can fulfill your request to protect files and settings on your computer.
So, how to back up files and settings in Windows 8.1? Follow the respective method and tutorial guide below, and you'll efficiently backup everything on your computer.
#1. Backup Files and Settings in Windows 8.1 with Qiling Backup
Duration: 5-30 minutes
Tool: Qiling Backup, an empty external hard drive
Qiling Backup simplifies the process of backing up files and settings in Windows computers, and you can simply connect an empty external hard drive to Windows 8.1. Then, follow the next two tutorials to backup files and settings instantly:
Guide 1: Back Up Files in Windows 8.1
Step 1. Click the "File backup" button to initiate a backup.
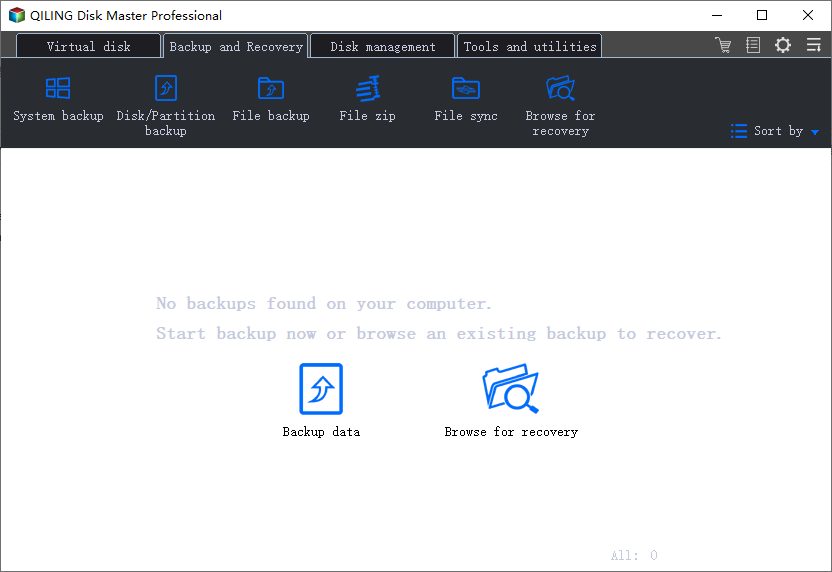
Step 2. Local and network files will be displayed on the left side. You may extend the directory to choose which files to back up.
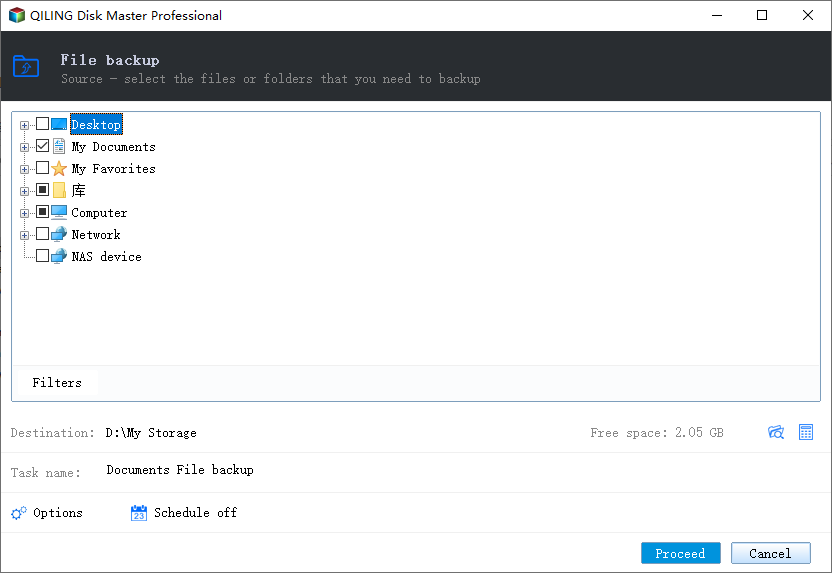
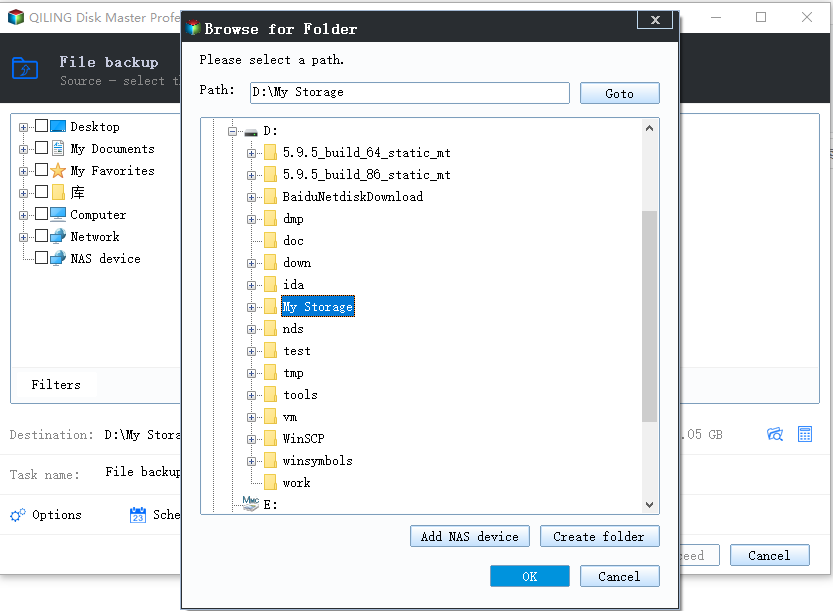
Step 3. Select the location where you want to store the backup by following the on-screen instructions.
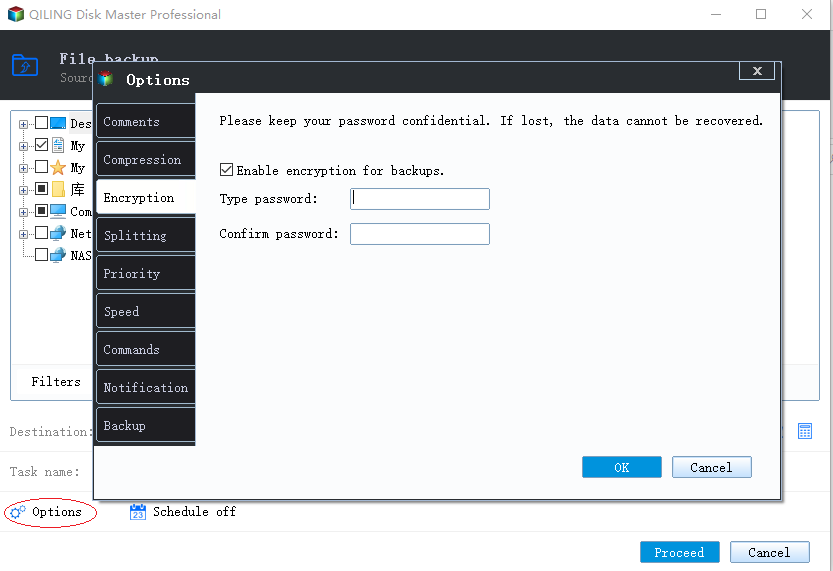
Step 4. Click "Options" to encrypt the backup with a password in "Backup Options". There are a variety of other customization options available for the backup process.
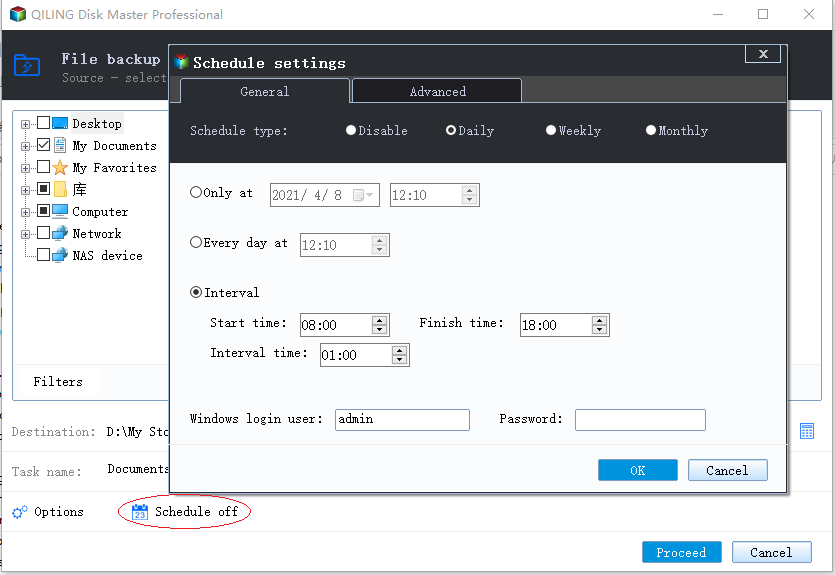
And to setup a backup schedule and choose to initiate a backup at a certain event in "Backup Scheme".
Step 5. You may save the backup to a local disk, Qiling' online service, or a NAS.
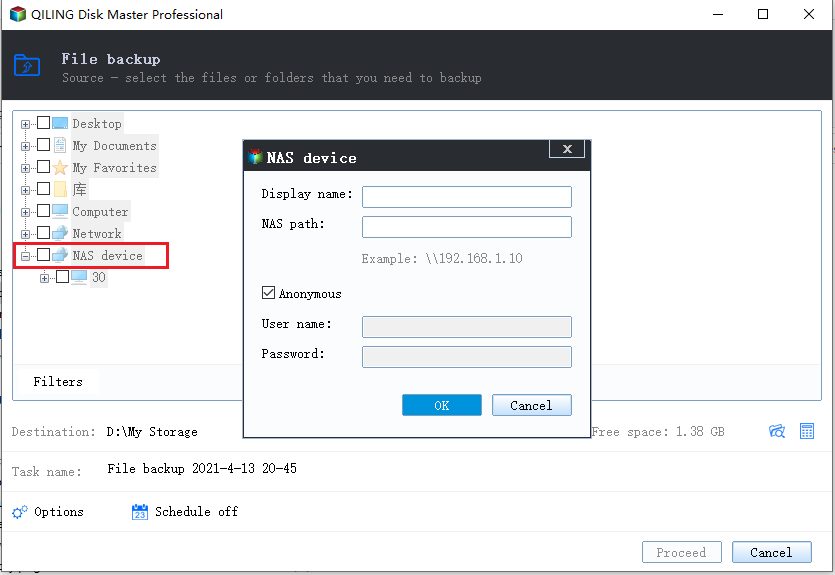
Step 6. Qiling Backup enables customers to back up data to a third-party cloud drive and its own cloud drive.
If you want to back up data to a third-party cloud drive, choose Local Drive, scroll down to add Cloud Device, add your account, and then log in.
Step 7. To begin backup, click "Proceed" Once the backup process has been finished, it will be shown as a card on the panel's left side. To further manage a backup job, right-click it.
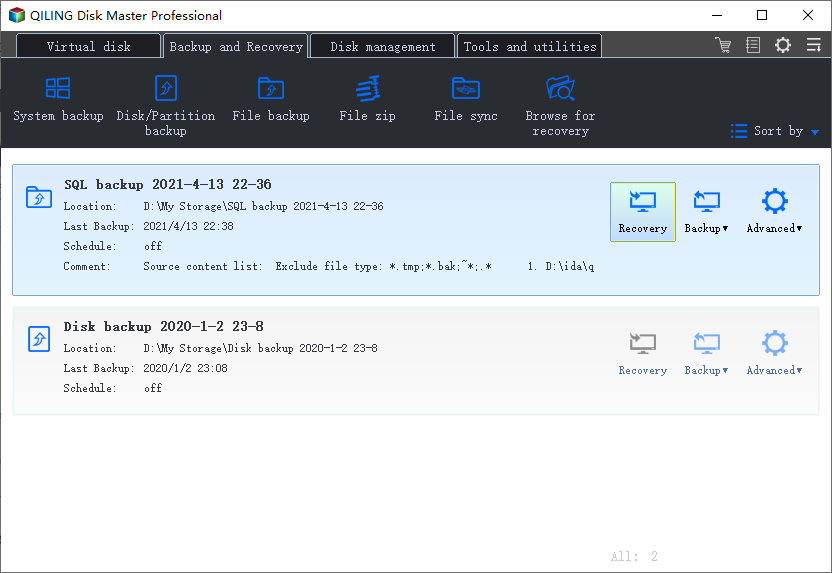
Guide 2: Back Up Settings in Windows 8.1
Note that Settings is mostly related to Windows operating systems, therefore, you'll need to back up the OS with settings together. And here is how to do so:
Step 1. On the main page, click the "System backup" button to start backup.

Step 2. Qiling Backup will automatically select your system partition, you only need to select the backup destination.
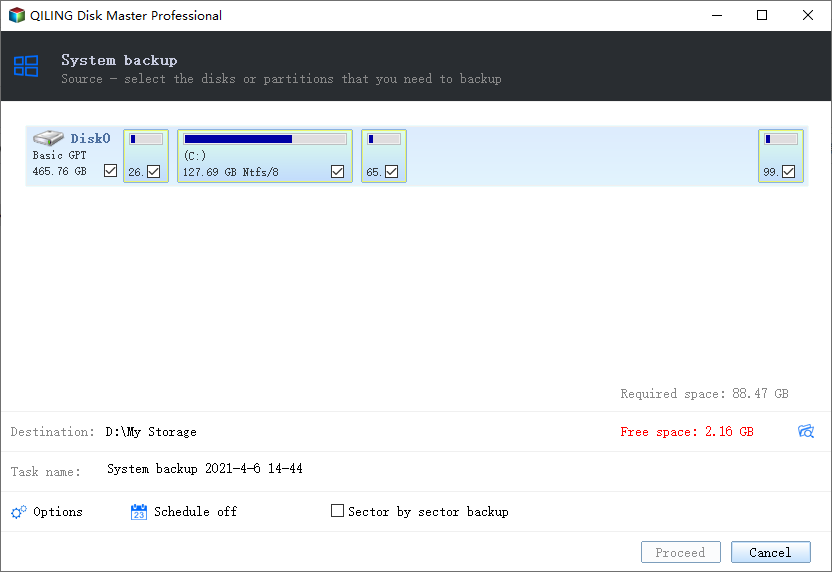
Step 3. Both Local Drive and NAS are available for you to save the backup file.
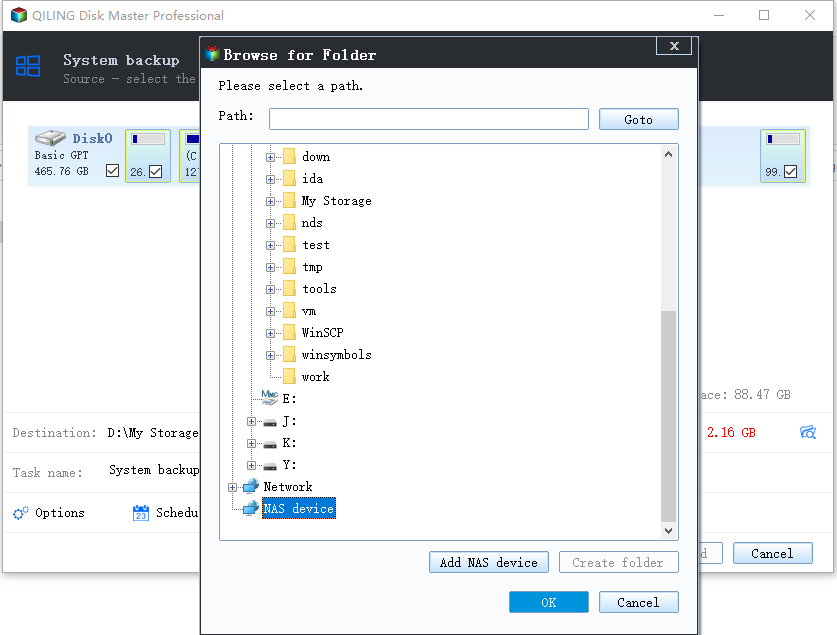
Step 4. After finishing the backup process, you can check the backup status, recover, open, or delete the backup by clicking the backup task on the left.
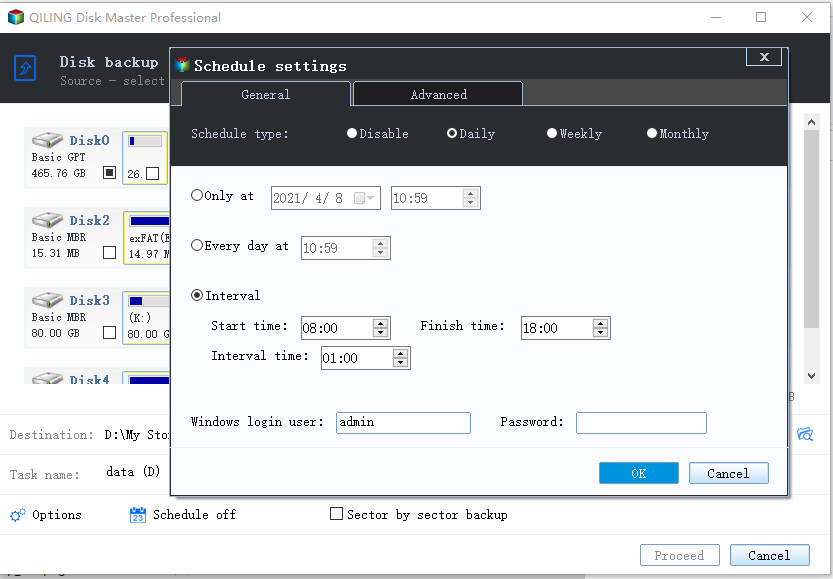
Alongside backing up files and settings on Window computer, Windows 8.1 users can also apply Qiling Backup Home to:
- Clone HDD to SSD
- Backup OneDrive to external drive
- Create Windows recovery USB
- Clone PC to new PC, and more.
#2. Backup Files and Settings in Windows 8.1 with Backup and Restore
Duration: 5-30 minutes
Tool: Backup and Restore (Windows 7), local C drive
Note that Windows Backup and Restore will save the backup image in the local C drive. And if your C drive is out of space, prepare an external hard drive and connect it to your PC. Then follow the steps here to start the backup:
Step 1. Go to Control Panel, click "Backup and Restore (Windows 7) under System and Security.
Step 2. Click "Create a system image", and then click "Set up backup" on the right side.
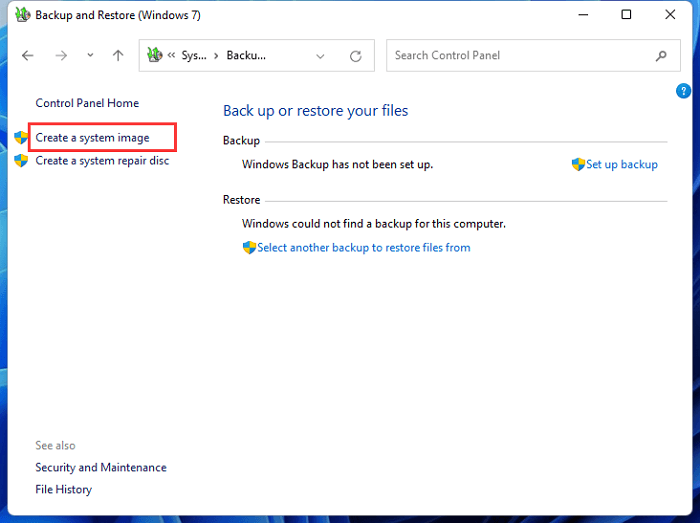
Step 3. Select the drive you want to save your backup, whether it be a local drive or an external hard drive. Click "Next" to continue.
Step 4. Select the dive that you want to include for creating a backup of files and settings on Windows 8.1. And click "Next" to continue.
Here, if you tick C drive, Windows Backup and Restore will automatically back up everything on your C drive, including files, settings, and even the OS, to the target drive.
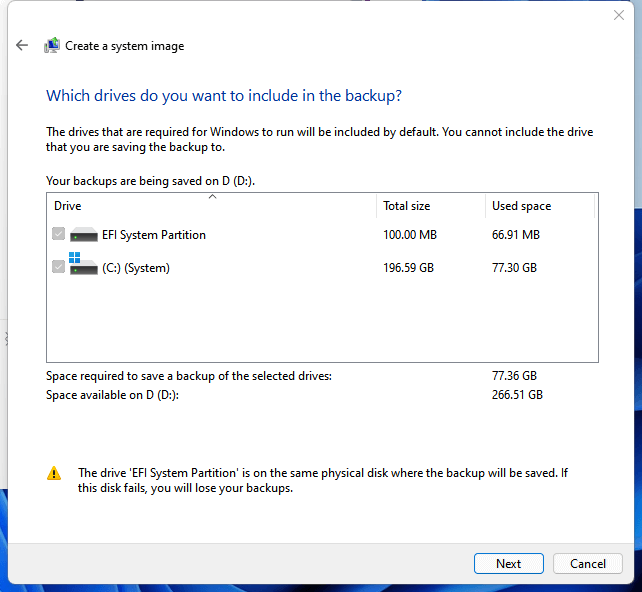
Step 5. Then click "Start backup" and wait for the backup process to complete.
Note that Windows Backup and Restore can only backup files and systems on the C drive, and if you are planning to backup partition data on a non-system drive, you can turn to Qiling Backup for help. It provides you with more flexible options in selectively backing up anything you need.
If Windows Backup and Restore is not working properly on your computer, follow this guide, and you'll be able to make it function well:
Windows 7 Backup and Restore Not Working with Blank Screen
Is Windows Backup and Restore showing a blank screen or not working? You are in the right place. Please keep reading, and we'll explain why the problem occurs and practical solutions.
#3. Backup Files in Windows 8.1 with File History
Duration: 5-20 minutes
Tool: Windows File History
Unlike Windows Backup and Restore, File History is a utility that aims to take incremental backups for files and folders saved on a Windows computer. If you only plan to back up files in Windows 8.1, follow the steps below for help:
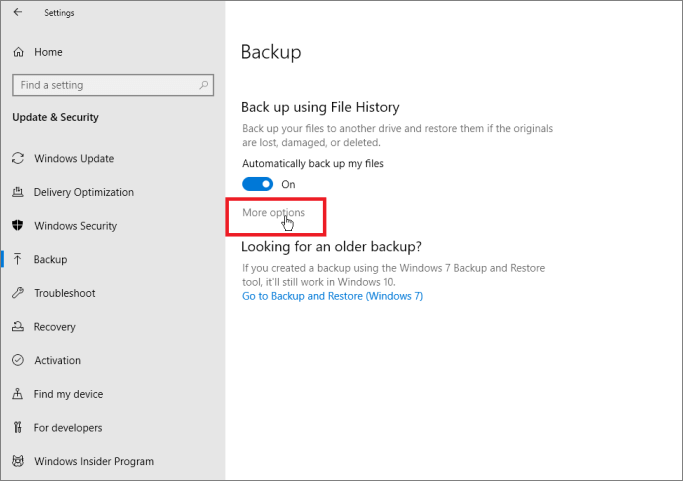
Step 1. Go to Settings, click "Update & Security" and "Backup" and click "More options" under Back up using the File History section.
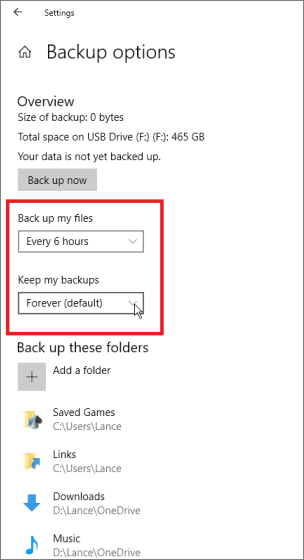
Step 2. To set a scheduled backup plan for your files, you may go to set the frequency below "Back up file files" by hours, days, weeks, months, etc.
Step 3. Once done, go back to File History and click "Add a drive", and select the drive you want to save file backups on your computer.
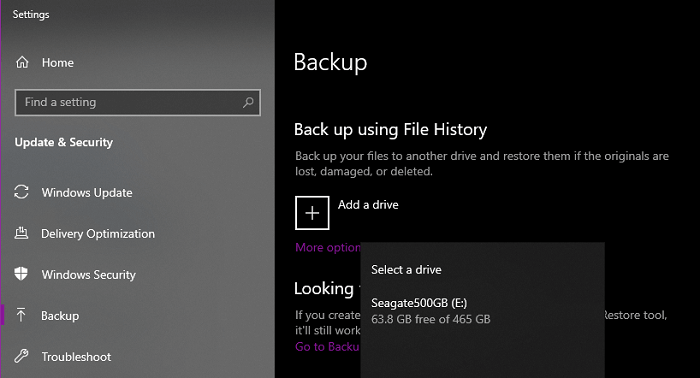
Step 4. Then, you are good to select files and folders on the C drive, like the Downloads folder, Documents, Videos, etc., to backup. Click "OK" to start backing up files.
Note that if you haven't set up File History to backup files on your computer, follow this guide and learn the detailed process:
Beginners Guide: How to Use File History Windows 10
This is an ultimate guide on how to use File History Windows 10, including how File History works, and how to set it up. Windows 8.1/8 and Windows 11 users can also follow this guide to set up File History.

To Wrap Up
On this page, we present you with 3 reliable solutions that work to fully backup files and settings in Windows 8.1. Among the 3 methods, third-party backup software - Qiling Backup, is most suitable for beginners. It simplifies the files and settings backup process in only a few simple clicks.
Between Windows Backup and Restore and File History, we recommend you try Windows Backup and Restore if you prefer a built-in backup tool. The reason is that Windows Backup and Restore covers more files and supports backing up files, settings, and even the OS at once.
FAQs About Backup Files and Settings in Windows 8.1
Here in this part, we also covered some hot questions related to Windows 8.1 files and settings backup. If you are interested, follow and learn the answers here:
1. How to backup files in Windows 8?
You can either try backup software like Qiling Backup for help or turn to File History to create a file backup in Windows 8.1.
To backup files with Qiling Backup, you'll need to:
- Launch Qiling Backup, select Files.
- Select files you want to backup, and select the target drive to save the backup.
- Click "OK" to start the backup.
- To backup files with File History:
- Click "Start", go to Settings > Update & Security > Backup.
- Select "Add a drive" to set backup destination and select files to backup.
2. How to back up the Windows 8.1 system image?
To backup Windows 8.1 system image, you can turn to Windows Backup and Restore for help:
- Go to Control Panel, click "Backup and Restore (Windows 7)".
- Click "Create a system image", and "Set up backup".
- Select the drive you want to save your backup, and click "Next".
- Select C drive to include for creating a system image.
- Then click "Start backup".
3. How do I transfer files from my computer to an external hard drive Windows 8?
You have 2 direct ways to transfer files from a computer to an external hard drive:
- #1. Manually copy and paste files from the computer to an external hard drive.
- #2. Use backup software like Qiling Backup to back up all files at one time and select to store the backup to your external hard drive.
Related Articles
- Fix "Recovery Drive Please Wait" [Step-by-Step Guide]
- Boot Drive vs Recovery Drive: Are They the Same Thing?
- [99%'s Choice] How to Backup Entire Hard Drive Windows 10
- Top 5 Best Open Source Cloning Software in 2022 [100% Free & Clone Your Disk Anytime]
