How to Backup Dell Laptops in Windows 10 [Ultimate Guide]
Losing all your data in a fraction of a second while facing issues with your Dell laptop can be a frustrating situation. Whether it's personal photos and media, study data, projects, or professional requirements, losing your data can impact your life in various ways. Fortunately, there are effective methods to back up your Dell laptop in Windows 10, which can help prevent data loss and provide peace of mind.
Why Do We Need To Back Up Dell Laptops in Windows 10?
To ensure the safety of your Dell laptop data, it's crucial to back up your system regularly, especially in Windows 10, to prevent data loss due to software or hardware failures, virus attacks, malware, or accidental deletion.
Here are some reasons why data loss may occur abruptly:
- Windows 10 Failure
- Malicious files
- Virus on your laptop
- Deleting your files by mistake
- Software glitches
- Corrupted data
- Malfunctioned hardware
Having a backup of your laptop can help protect your data and prevent loss in case of a crash or other issues.
How to Back Up Dell Laptop in Windows 10?
- Method 1. Back-Up Dell Laptop in Windows 10 with Qiling Backup
- Method 2. Back-Up Dell Laptop in Windows 10 via Dell Backup and Recovery
- Method 3. Back-Up Dell Laptop in Windows 10 with File History
Losing up all your precious memories, school and college projects, and other important documents is a wreck. Hence, it would help if you considered backing up your laptop to stay on the safer side. There are several methods to create a Dell Laptop Backup in Windows 10. You can either go for the most straightforward and most influential third-party tool not to have a hassle, use the Dell Backup and Recovery Program if your laptop has it, or use File History. Let's dig into detail!
Method 1. Back-Up Dell Laptop in Windows 10 with Qiling Backup
Backing up your Dell laptop is simple with Qiling Backup, a free and professional software that outshines inbuilt backup methods. This underrated gem is effective, useful, easy to use, and a better alternative to traditional backup applications.
Qiling Backup creates a system image, zip files, or any other format you prefer, allowing for a full offline backup to an external drive. It also offers a Cloud Drive option for a more reliable solution, making it a suitable choice for those who cannot afford expensive external hard drives.
When considering how to backup Dell laptops in Windows 10, Qiling Backup stands out as the best option due to its superior features and capabilities.
- Prevents Data Loss: The software prevents data loss by backing up all your files, documents, media, apps, and software.
- Multiple Backup Option: You can create a complete system image and use it to retrieve your data, and on a hard disk, you can do partitioned backups.
- Easy to Use: The interface of Qiling is similar to that of Windows OS, making it easy for a novice to use.
- Quick Backup: The software is designed to quickly and easily back up your computer, making it a convenient option for users who want to protect their data.
- Suitable for Personal and Professional Use: Whether you need to back up for personal or professional needs, Qiling has been a reliable choice for years.
- Free Trial with 250 GB of Cloud StoragIf you're unsure about committing to a service, you can sign up for its free trial period, which allows you to use it for backup and provides 250 GB of Cloud Storage.
You can use Qiling Backup by downloading the software, creating a backup job, and then running the backup. To do this, follow these steps:
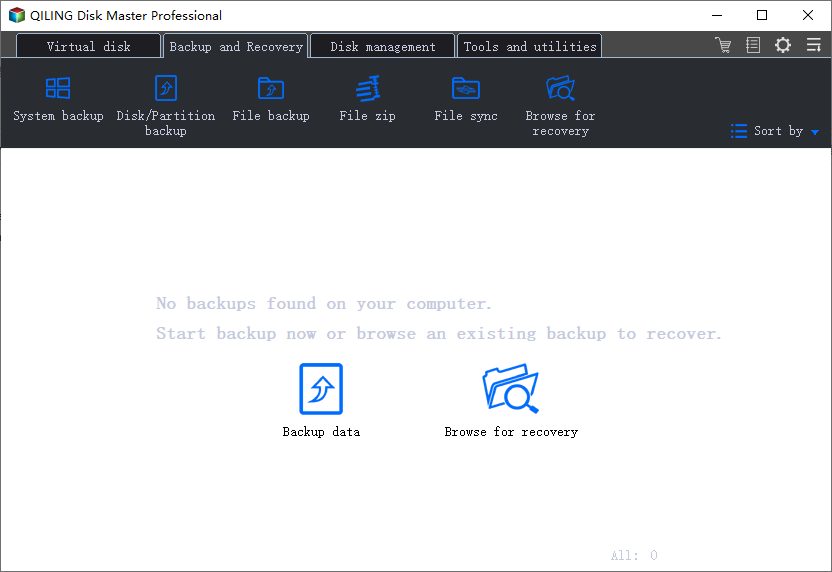
Step 1. To initiate a backup, click the File button.
Step 2. On the left, both local and network files will be shown, allowing you to navigate and select the desired backup files.
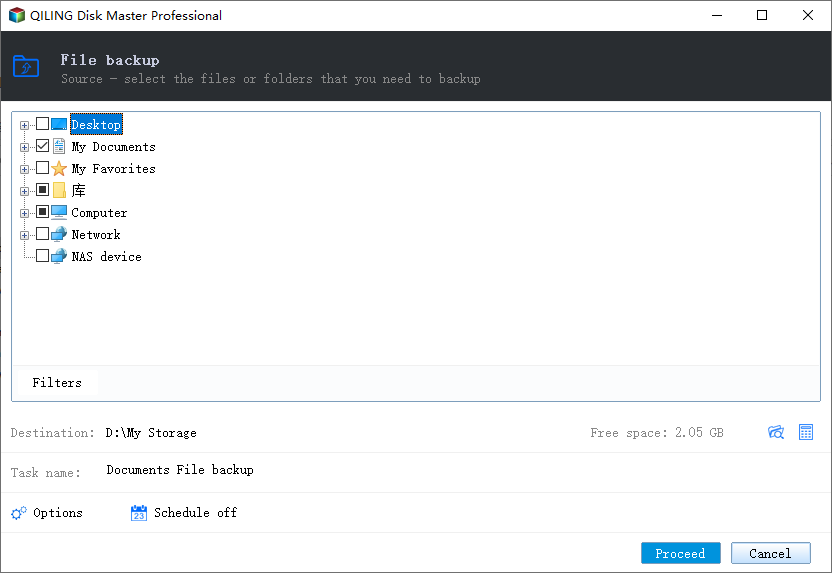
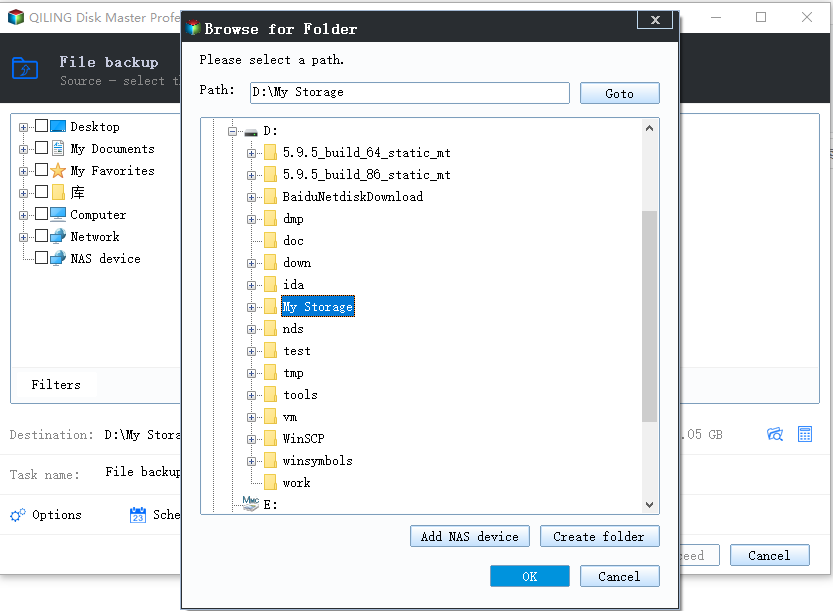
Step 3. Follow the on-screen instructions to select a location to store the backup.
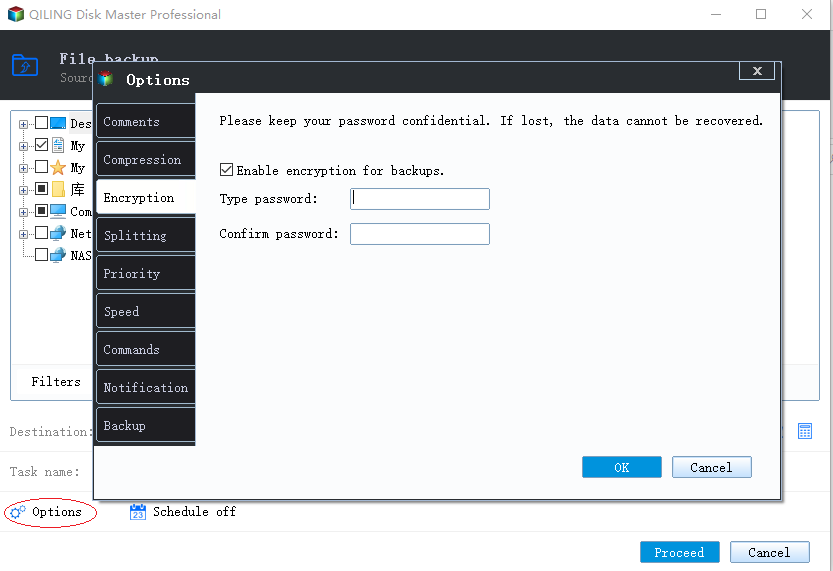
Step 4. To encrypt the backup with a password, click on the "Options" tab in the "Backup Options" section, where you can set a password to secure your backup. This allows you to customize the backup process to suit your specific needs.
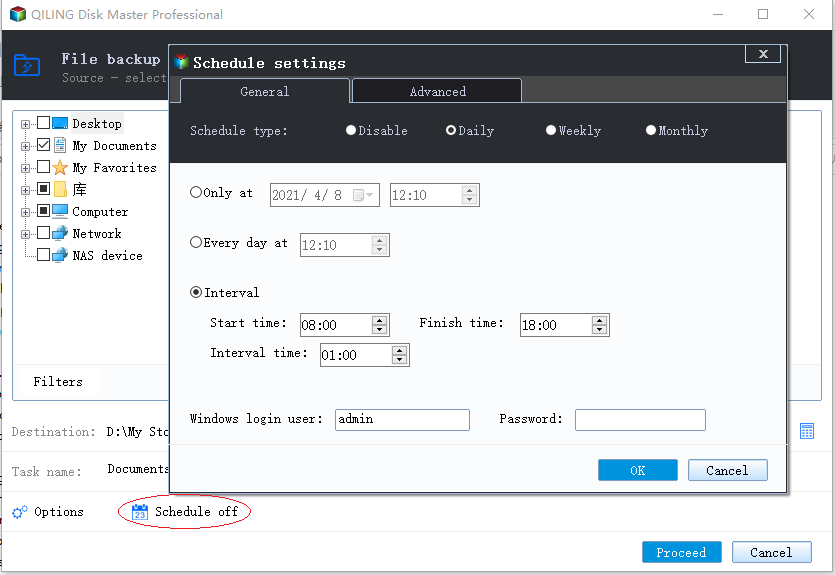
To specify the backup schedule, click on the Backup Scheme button and select the desired schedule. This can be a daily, weekly, or monthly schedule, depending on your needs.
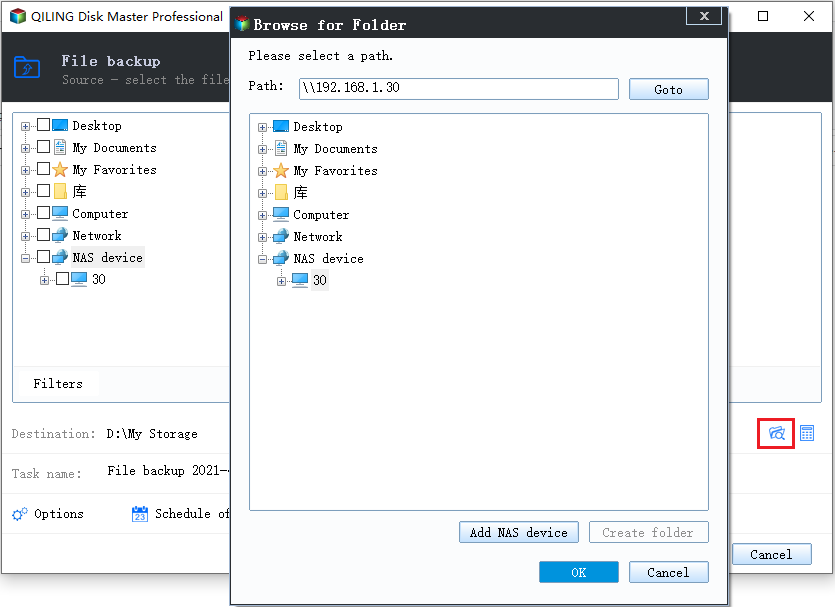
Step 5. The backup may be stored on a local disk, Qiling's online service, or NAS.
Step 6. Qiling Backup allows users to save their data to both a third-party cloud service and their own cloud storage, providing a convenient and secure backup solution.
To back up data to a cloud drive provided by a third party, select Local Drive, scroll down to add Cloud Device, and then add and log in to your account.
Step 7. To start the backup process, click "Proceed". Once the backup is complete, a card will appear on the left side of the panel, allowing you to manage the backup job further.

Qiling Backup has a restore function that can recover systems, data, hard drives, or partitions, helping to prevent data loss and unexpected disasters.
Method 2. Back-Up Dell Laptop in Windows 10 via Dell Backup and Recovery
Dell's DBAR program safeguards system files, prevents data loss, and allows for data retrieval.
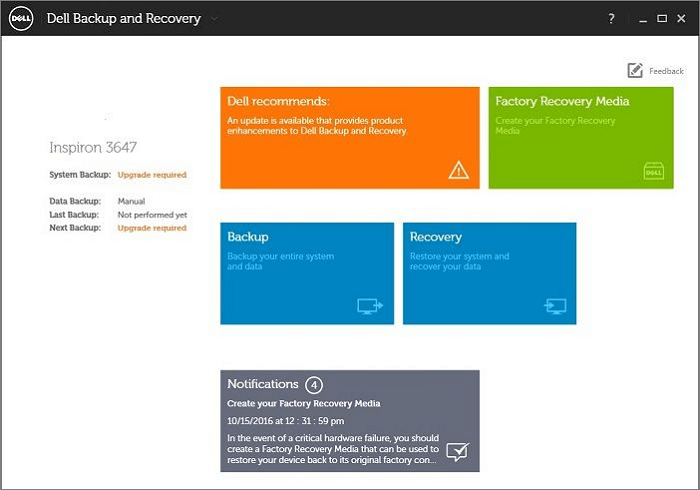
The Dell Backup and Recovery Program (DBAR) is a built-in feature on Dell laptops running Windows 7 or 8, but it only becomes accessible after upgrading to Windows 10. Using DBAR allows you to automatically back up your data to an external hard drive, create recovery disks, factory reset your laptop, or perform a full backup to protect and restore it as needed.
Backing up using Dell Backup and Recover involves considering three key aspects: determining what needs to be backed up (e.g. entire data, specific files), selecting an external storage device (such as a hard drive or USB), and scheduling the backup process (either immediately or at a designated time).
Dell Backup and Recovery comes in two versions: Basic and Premium. The Basic version is preinstalled on some Dell laptops, but to access more advanced features, you need to upgrade to the Premium plan.
Here's how you can Backup your Dell Laptop in Windows 10 via Dell Backup and Recovery:
Step 1. Connect the hard drive or USB drive to which you want to back up your Dell system.
Step 2. To back up your Dell laptop, open Dell Backup and Recovery on your laptop and go to the backup section.
Step 3. Select a backup location and set up your external drive, then click "Continue" to proceed.
You can still access the DBAR program by booting your device in safe mode and then accessing the program from there. If you're unable to boot in safe mode, you can try booting from a USB drive or CD/DVD with a Linux distribution. Once you have access to the DBAR program, you can use it to resolve the boot failure issue.
To run DBAR while booting your laptop, follow these steps: First, ensure that your laptop is set to boot from the USB drive containing the DBAR software. Next, insert the USB drive into a USB port on your laptop and save any unsaved work on your laptop.

Step 1. When your laptop boots, press the "F12" key.
Step 2. Select the "Dell Backup and Recovery" option from the boot menu.
If you have disabled function keys on your Windows 10 OS, you won't be able to run the function.
Here are some methods on how to backup your computer:
Method 3. Back-Up Dell Laptop in Windows 10 with File History
This method is quite complicated and not suitable for novices. It also has reliability issues, so proceed with caution if you're considering using it.
Windows 10 has a built-in feature called File History that allows you to back up your Dell laptop, providing a safeguard against data loss.
To backup your Dell laptop in Windows 10 with File History, follow these steps: First, ensure that your Dell laptop is connected to a power source and the external drive you want to use for backup is plugged in. Next, go to the Settings app, then select "Update & Security" and click on "Backup.
Step 1. Connect an external drive to your device.
Step 2. To open Control Panel, you can either search for it in your computer's search bar or use the Run prompt, which can be accessed by pressing the Windows key + R on your keyboard.
Step 3. To access the File History feature, navigate to the "Backup & Restore" section, and then click on the "File History" link located in the left panel.
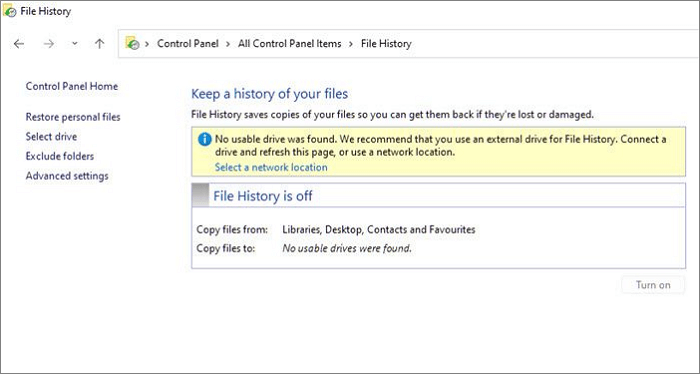
Step 4. To turn on File History and select the drive, first turn on File History, and then select the drive to which you connected.
Step 5. After completing the initial setup, you will be asked to select the drive where you want to create a backup. This is where you choose the external drive or other storage device where your backups will be stored.
To back up your Dell laptop with an OS version older than Windows 10, you can use Windows Backup and Restore, which can be found in the Start Menu.
Windows 10 has a built-in feature called File History that allows you to back up your files to an external hard drive or network location. This feature is designed to automatically save copies of your files at regular intervals, so you can easily recover them if your computer experiences a problem.
Beginner's Guide: How to Use File History Windows 10
File History is a feature in Windows 10 that allows you to automatically back up your files to an external drive, enabling you to recover them in case of data loss. To set it up, connect an external drive to your computer, go to Settings > Update & Security > Backup, and select the drive as the backup location.

The Final Verdict
To back up Dell laptops in Windows 10, you can use Qiling Backup, Dell Backup and Recovery Program, or File History. However, not all Dell laptops have the DBAR program, making it complicated. File History may not be efficient for computer novices. Considering backup time, complexity, reliability, and efficiency, we recommend using Qiling Backup.
Back-Up Dell Laptop in Windows 10 FAQs
Other problems you may be interested in:
1. How do I back up my Dell laptop to an external hard drive?
To back up a Dell laptop to an external hard drive, the most efficient method is to use professional software like Qiling Backup, which offers lossless, quick, and reliable transmission.
2. How do I back up my Dell computer to a flash drive?
If your Dell computer has the DBAR program, you can back up your data to a flash drive using its feature, or use the File History or Windows Backup and Restore programs instead.
3. How do I transfer files from my old Dell computer to my new Dell computer?
If you're switching to a new Dell computer, you can use the Dell Migrate feature to easily transfer files from your old Dell Computer to the new one. This feature allows you to migrate all your data from the old computer to the new one, making the process quick and seamless.
Related Articles
- How to Install Software on Multiple Computers at the Same Time
- Backup User Profile in Windows 10/11 or Transfer to New PC [Complete Guide]
- How to Backup a File with 3 Free Ways in Windows 11/10/8/7
- Backup Data to Tape with Tape Backup Software
- Toshiba External Hard Drive Backup Software for Windows 11/10/8/7
This article provides information on two backup software options for backing up a Toshiba external hard drive. The software allows users to create a backup of their Toshiba external hard disk, providing a safe and secure way to protect their data. By reading this post, users can choose the best software for their needs and ensure their important files are safely backed up. - Can I Transfer My SSD with Installed OS and Programs to Another Computer?
Can I transfer my SSD with installed OS and programs to another computer? Are you curious about the answer? This article will tell whether you can transfer your SSD with Windows and apps to another computer.