M.2 Not Recognized? See How to Make Your M.2 SSD Show Up in Windows
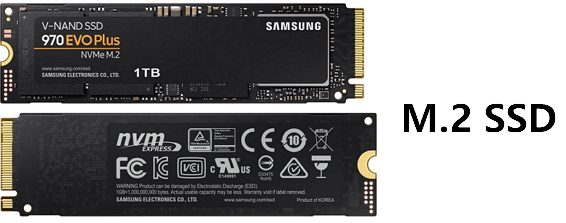
The M.2 drive, also known as an M.2 SSD, is a compact disk that connects directly to a computer's motherboard. It offers high-speed data transfer capabilities, with read and write speeds of around 2500MB/s. M.2 is also referred to as the Next Generation Form Factor (NGFF) for internally mounted computer expansion cards and associated connectors.
Error: M.2 Not Recognized
Cloning Windows to an M.2 SSD has become increasingly popular due to its excellent performance, but some users have encountered issues where the M.2 SSD is not recognized on their Windows PC, leaving them wondering why this is happening.
If your M.2 drive is not recognized, it may be due to a faulty drive, incorrect BIOS settings, or an operating system issue. To troubleshoot, try resetting the BIOS to its default settings, checking the drive's power connection, and running a diagnostic test on the drive. If the issue persists, it may be worth trying a different M.2 slot on your motherboard.
Why is my m.2 not be recognized in Windows?
Here are the symptoms and possible reasons of M.2 not recognized error:
| Symptoms | Reasons |
|---|---|
| M.2 Not Recognized in BIOS |
|
| M.2 Not Recognized as Boot Drive |
|
| M.2 Not Detected in Disk Management |
|
| M.2 Not Showing Up in File Explorer |
|
To get your computer to recognize your M.2 drive, ensure it is properly seated in the M.2 slot, and that the slot is enabled in the BIOS settings. If the drive is not recognized, try booting from a live USB or CD, and then access the BIOS settings from there.
- 1. Check the symptoms of your M.2 drive.
- 2. Follow the respective cases and solutions to make M.2 recognized again.
#Symptom 1. M.2 Not Recognized in BIOS - 3 Fixes
How to Check:
Step 1. Open computer case with a screwdriver.
Step 2. Remove the computer case and find the M.2 SSD.
Step 3. See if you installed M.2 correctly. If not, re-install M.2.
Step 4. Restart PC and press F2/F8/Del to enter BIOS.
Step 5. Go to the startup settings and check if the M.2 is enabled.
If not, go and enable it.
Step 6. If the M.2 is an operating system drive, check the boot menu to see if it's set as the boot drive.
If not, set it as the boot drive.
Fix 1. Re-install M.2
Step 1. Remove the computer or laptop case with a screwdriver.
Step 2. Remove M.2 from computer or laptop.
Step 3. Re-install M.2 on your computer or laptop:
- On laptop: To install an M.2 SSD, open the M.2 slot, slide the drive into the slot, screw it in, and finally cover it.
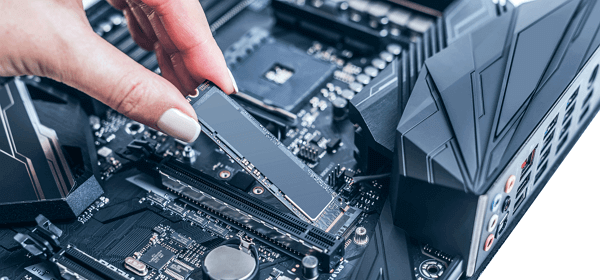
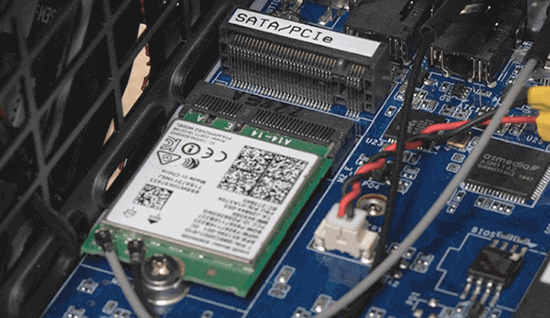
- On desktop: To install an M.2 drive, locate the M.2 connector labeled as "PCIe", insert the M.2 drive into the slot, and secure it with the mounting screw.
Step 4. Cover the computer case and restart the PC.
If the M.2 SSD is not recognized after the computer boots up, try to boot in UEFI mode instead of Legacy mode. To do this, go into the BIOS settings, navigate to the Boot tab, and change the boot mode from Legacy to UEFI. Save the changes and reboot the computer.
Fix 2. Enable M.2 SSD in BIOS
Step 1. Restart PC and press F2/F8/Del to enter BIOS.
Step 2. On the Main menu, expand "SATA Configuration".
Step 3. Select "Configure SATA as IED" and save the changes.
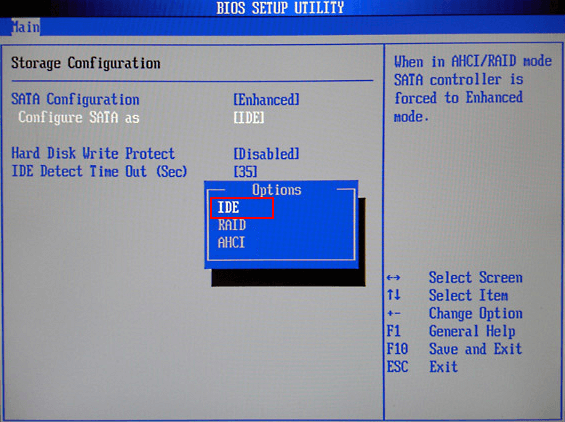
Step 4. To see the M.2 drive in your PC, simply restart the computer, and it should appear in your system.
The M.2 is not an OS drive. It is a storage drive.
#Symptom 2. M.2 Is Not Recognized as Boot Drive
How to Check:
Step 1. Restart PC and press F2/F8/F11 or Del to enter BIOS.
Step 2. If the M.2 OS drive is not set as the boot drive, set it as the first boot drive. Save the changes and exit the Boot Menu. Then, restart your computer and check if the issue is resolved.
If not, go and follow the steps below to set it as the boot drive in BIOS.
Solution: Set M.2 SSD as Boot Drive (for OS Drive Only)
If your M.2 is an OS drive, you'll need to set it as the boot drive so that the computer can recognize it. Here are the steps:
Step 1. Restart PC and press F2/F8/F11 or Del to enter BIOS.
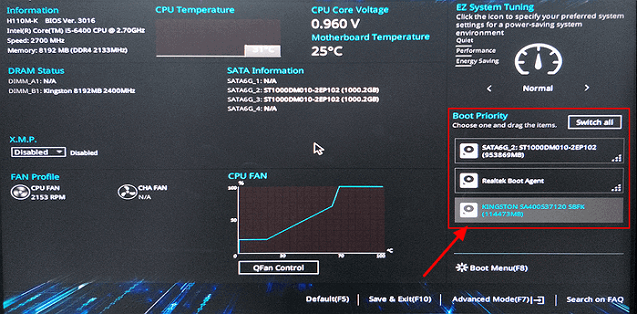
Step 2. To set the M.2 SSD as the boot drive, access the Boot Menu, navigate to the boot priority section, and select the M.2 SSD as the primary boot drive.
Step 3. Save the changes and restart the PC.
Windows will automatically boot up from the M.2 OS drive.
#Symptom 3. M.2 Is Not Detected in Disk Management
How to Check:
Step 1. Right-click the Windows icon and select Disk Management.
Step 2. Check if you see the M.2 disk shows up.
If not, it could be the drive driver is outdated. Here is how to fix it.
Solution: Update M.2 SSD Disk Driver
Step 1. Right-click the Windows icon and click "Device Manager".
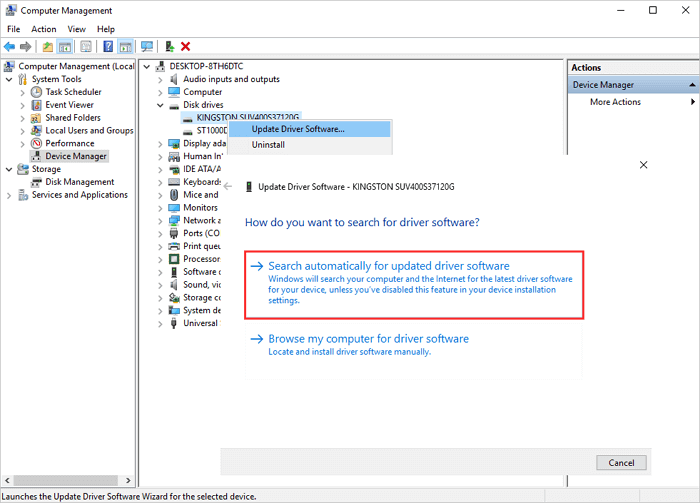
Step 2. Right-click the M.2 SSD, choose "Update Driver Software" from the context menu, and then select "Search automatically for updated driver software" to expand the disk driver.
Step 3. In the pop-up window, choose "Search automatically for updated driver software".
To update the driver software, first, go to the computer's Device Manager, then click on the "Update driver" button, and finally, wait for the computer to search and install the latest driver software.
Step 4. Restart PC after the driver update process.
To see your M.2 SSD in Disk Management, press the Windows key + R to open the Run dialog box, type "diskmgmt.msc" and press Enter.
#Symptom 4. M.2 Not Showing Up in File Explorer - 2 Fixes
How to Check:
Step 1. Press Windows + F keys, open File Explorer.
Step 2. The M.2 volume is not visible in the volumes list. What should I do next?
- If the drive is not recognized by the computer, go and check its state in Disk Management. You can check the state of the drive in Disk Management by following these steps: Open Disk Management, right-click on the drive and select "Properties", then check the status of the drive.
- If your drive shows as raw, refer to the article "how to fix the RAW drive" for troubleshooting steps.
- If M.2 shows as not initialized, you should first initialize the disk, and then create new partitions. This will ensure that the drive is properly recognized and configured by your system.
- If your M.2 drive shows as unallocated, you should immediately recover any data and partitions on it to prevent permanent loss.
Fix 1. Initialize M.2 SSD and Create New Partition On It
#1. Initialize M.2
Step 1. To open Disk Management, press the "Windows + R" keys, type "diskmgmt.msc" and click "OK" in the Run dialog box.
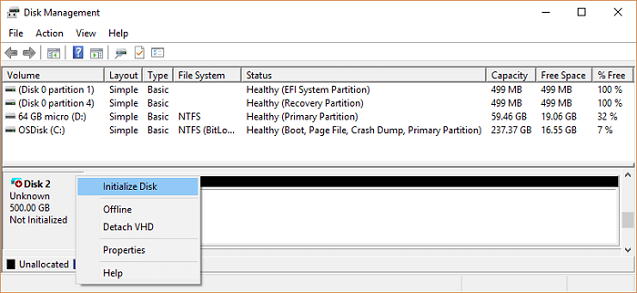
Step 2. Right-click the M.2 SSD, select "Initialize Disk" and if it's offline, first make it online by right-clicking and selecting the "Online" option.
Step 3.Select the M.2 as GPT and click "OK" to accept the changes.
#2. Create Partitions on M.2
Step 1. Right-click the Windows icon, then click "Disk Management".
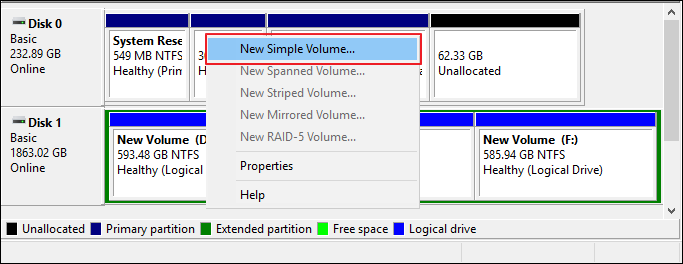
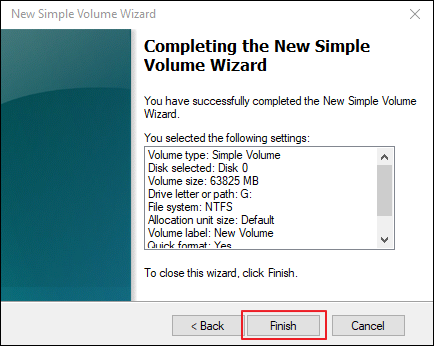
Step 2. Right-click on the unallocated space on the M.2 SSD, select "New Simple Volume", and then click "Next".
Step 3. Set the partition size, partition label, and partition format, then click "Finish" to complete the partitioning process.
If you're running low on disk space, you can free up some space by deleting unnecessary files, emptying the recycle bin, and uninstalling unused programs. You can also consider upgrading your storage drive or adding an external hard drive to expand your storage capacity. Additionally, you can use the built-in Disk Cleanup tool in Windows to remove temporary files, system files, and other items you don't need.
Fix 2. Recover Unallocated M.2, Including Data and Partitions
If you have a used M.2 data disk, you can restore data and partitions at once by following the guide provided.
Recover Lost Partition and Data
Qiling Partition Recovery is a software that helps recover files and partitions from deleted or lost partitions, allowing users to retrieve their files and partitions within minutes.
Bonus Tip: How to Recover Data from A M.2 SSD that Is Not Recognized
The error "M.2 drive not recognized" can occur when the M.2 drive is not properly connected to the motherboard, or when the drive is faulty.
M.2 is not recognized and cannot access valuable data. If you are having the same issue here, follow the tips below for help:
- First. Revert to the above solutions to fix not recognized M.2 SSD.
- Next. Recover Data after Making M.2 Recognized
Editor's Suggestion:
- 1. After making the M.2 recognized on your computer, open the partition to check the files first.
- 2. If everything is all right, congratulations. You can stop here.
- 3. If some files or all data are missing, turn to reliable file recovery software for help.
Here, Deep Data Recovery can thoroughly scan and find all missing files on your M.2 disk using its powerful hard disk recovery feature.
Step 1. Choose file types and click "Next" to start
Launch Deep Data Recovery. Choose file types and click "Next" to start the recovery process.

Step 2. Scan the SSD
To recover lost data from an SSD, select the SSD where the data was lost and click the "Scan" button. This will initiate the scanning process, allowing you to locate and recover the lost data.

Step 3. View the results
When the scanning finishes, use the "Filter" and "Search" options to find lost SSD data by checking the "Deleted Files" and "Other Lost Files" folders.

Step 4. Recover SSD files
Select the desired data and click the "Recover" button to recover lost SSD files.
M.2 Not Recognized Error Is Fixable, Grab the Right Fixes to Make It Workable Now
The M.2 SSD not recognized error in Windows PC can be caused by various factors, including loose connections, outdated drivers, and BIOS issues. Symptoms may include the M.2 SSD not showing up in Disk Management, File Explorer, or the Device Manager. To fix the issue, follow the guidelines above, which vary depending on the case.
However, if you are missing some files after fixing the M.2 not recognized error, you can try Deep Data Recovery for full SSD recovery.
The software will quickly scan and identify any missing M.2 SSD files. To avoid data loss, it's recommended to create a full backup of your M.2 SSD data regularly, which can save you in case errors occur to the SSD.
Related Articles
- How to Recover Deleted Files from Recycle Bin | Recover Recycle Bin
- How to Fix Error Message 'Word was Unable to Read Document. It May be Corrupt' Efficiently
- 2022 USB Data Recovery | How to Recover Files from USB [ 5 Ways]
- Windows 7 ISO File Download [Ultimate and Professional Edition]
- Disk Utility First Aid Process Has Failed [with 5 Proven Ways to Fix It]
If the First Aid process has failed on your macOS, you can try to fix the error by running the repair process again in Disk Utility, checking the disk permissions, and resetting the System Management Controller (SMC). If none of these steps work, you may need to recover data from the unmounted disk using a data recovery software or by booting from a different drive and accessing the storage from there. If the disk is still not accessible, you may need to replace the drive. - How to Fix D3dcompiler_43.dll Not Found [Updated 2024]
Are you facing d3dcompiler_43.dll not found issue on your PC? Then follow this easy guide on how to Fix D3dcompiler_43.dll Not Found