Fixed: Chrome Browser Not Open/Working in Windows 10 Creator
Quick Navigation:
- Chrome Browser Won't Work After Windows 10 Creator Upgrade
- Quick Fix. Upgrade Chrome to the Latest Version
- 3 Solutions to Chrome Won't Open/Not working in Windows 10 Creator
- Part 1. Fix System Internal Error
- Part 2. Reboot PC into Safe Mode with Networking
- Part 3. Turn off Hardware Acceleration
Chrome Browser Won't Work After Windows 10 Creator Upgrade
"Hey guys, do you know how to repair the corrupted Chrome to work again in Windows 10 Creator PC? I upgraded my computer into Windows 10 Creator about two weeks ago, and everything works all good. Yesterday, I tried to use Chrome to search some interesting files online. But the browser wouldn't open. I tried again and again; it just won't work. So do you know how to fix this problem and make my Chrome work again?"
Many Windows 10 Creator users have encountered issues with Chrome, and if you're experiencing similar problems, don't worry! If Chrome won't open or won't work, you can try the methods offered here to repair and fix the issue.
Quick Fix. Upgrade Chrome to the Latest Version
Upgrading your Windows system can sometimes cause compatibility issues with older software, apps, and programs, making them unusable if they're not updated to be compatible with the new system. This is because older apps may not fully support the new Windows system, leading to functionality problems.
To fix the Chrome not working issue, try upgrading the Chrome browser to the latest version with the right edition on your Windows Creator PC. This should resolve the issue quickly.
3 Solutions to Chrome Won't Open/Not working in Windows 10 Creator
If the quick fix doesn't work, don't worry. You can follow these 3 steps to fix the issue:
Part 1. Fix System Internal Error
If your system hard disk has an internal error, you may not be able to use some installed apps, programs and software, including Chrome. To resolve this, you should first identify and fix the internal system errors on the hard disk that are blocking Chrome from working. This will likely involve running a disk check or repair utility to identify and correct any errors or corruption on the hard disk. Once the internal system errors are resolved, you should be able to use Chrome again.
You can fix Chrome not working issue with Qiling Partition Master, a powerful partition manager software that allows you to do the job within 3 simple clicks. Just download and follow the tips to resolve the issue.
Step 1. Right-click the target partition that has a problem.
Step 2. Choose "Advanced" > "Check File System".
Step 3. To resolve the issue in the Check File System window, select the "Fix the error on the disk" option.
Step 4. Click "Proceed" to check errors on your partition.
Part 2. Reboot PC into Safe Mode with Networking
1. Click "Start" > "Settings" > "Update & Security" > "Recovery";
2. Go to "Advanced startup", click "Restart";
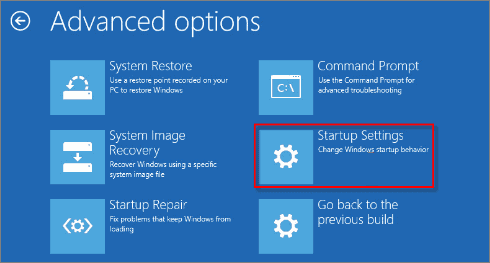
3. To resolve the issue, Windows 10 Creator will restart and boot to a "Choose an option" screen, where you should click on "Troubleshoot", followed by "Advanced options", then "Startup Settings", and finally "Restart".
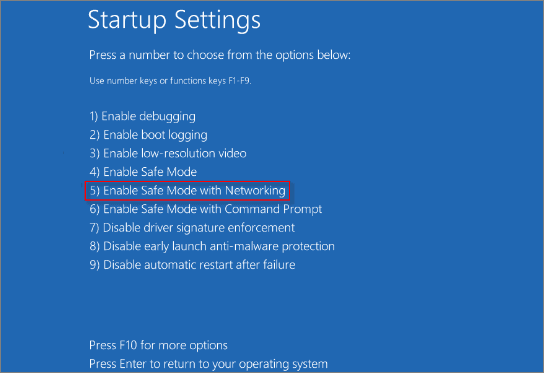
4. Press 5 to enter Safe Mode with Networking.
Part 3. Turn off Hardware Acceleration
1. To access Chrome settings, open Chrome and type "chrome://settings" in the address bar and press Enter. This will take you directly to the Chrome settings page.

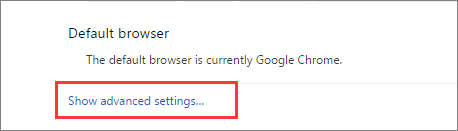
2. Scroll down to the bottom and click on "Show advanced settings...".
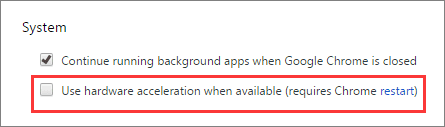
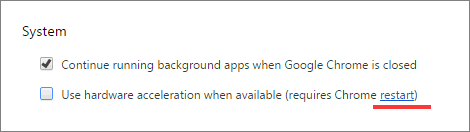
3. In the Further options, scroll down to "System" and uncheck the box that says "Use hardware acceleration when available".
4. Click on "Restart" in Requires Chrome restart dialog;
5. If Chrome is not working properly, try restarting your PC and booting it in normal mode. This often resolves the issue and allows Chrome to function normally again.
Related Articles
- Invalid Value for Registry JPG/JPEG/PNG Files on Windows 10? Fix it Now!
- How to Recover Unsaved/Lost/Corrupted Adobe Acrobat Files on Windows PC
- Solved: Getting Files Ready for Installation Stuck at 0%, 1%, 10%, 100%
- HP Laptop Slow Startup Fixes for HP Laptop Taking Forever to Restart
- How to Solve Windows Can't Convert MBR to GPT [2024 100% Working Solution]
This article focuses on why Windows can't convert MBR to GPT in Disk Management. And you can know the reason and solutions to convert MBR to GPT easily. - How to Fix "Can't Convert to Dynamic Disk" Error [Step-by-Step Guide]
If you're experiencing the “can't convert to dynamic disk” error, don't worry - this article will guide you through the process step-by-step to resolve the issue. With a clear and concise approach, you'll be able to fix the problem and get back to using your computer without any further issues. Just keep reading to learn more!